-
Oven Cleaning Hacks That Actually Work (It’s SO Easy!)
Cleaning the oven is pretty much nobody’s favorite task on their cleaning list. The bad news, however, is that the more it gets put off, the more difficult and time-consuming it will be to clean. No one enjoys heating up their oven only to have it start smoking from the grease build-up. Unfortunately, we’ve all been guilty of this at some point.
Rather than spending an entire day scrubbing, you can actually try several oven-cleaning hacks to make life much so much easier when it comes to cleaning your oven. Some grease and grime may be too difficult or too far gone for hacks, but that doesn’t mean you can’t still take advantage of a few good oven-cleaning tips and tricks.
Ready to give some of these hacks a try? Then keep reading to find out exactly how to put them to the test.
How Did Your Oven Get So Dirty?
Each time you use your oven or stovetop to cook, food drops from your pots, pans, and plates and gathers in the nooks and crannies of the base, in the filters, and pretty much anywhere inside. Eventually, this greasy buildup can start to affect your oven’s overall performance and can even start to impact the quality and flavor of the food you are cooking inside of it.
However, having a dirty oven doesn’t become dangerous for some time, which is probably why it goes so long without cleaning in the first place. There’s no judgment here, we’ve all been guilty of avoiding this particular task.
But there is no time like the present to clean your dirty oven. So how do you do a good job, while keeping things as simple as possible to make the process quick and easy? We have a few solutions, keep reading to find out more.
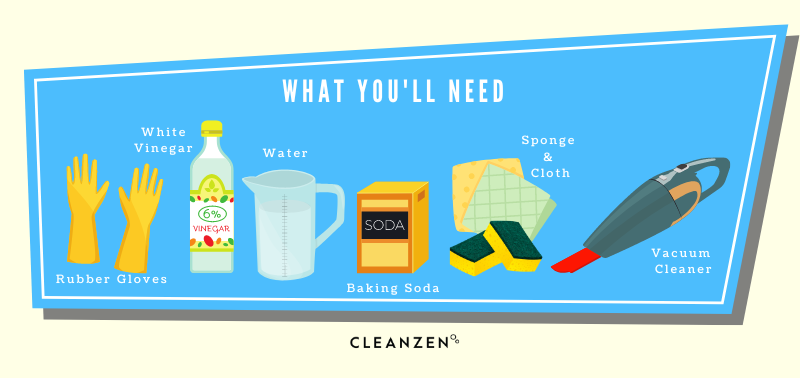
Gather Supplies
Before you get started, you’ll want to make sure you have everything you’ll need to get the job done. Here is a short list of everything we suggest having on hand:
Best Oven Cleaning Hacks
The First Step:
You’ll first need to get up all the crumbs and loose bits that are hiding in and around the oven. It might actually be more tricky to clear them out once you start cleaning, so it makes more sense to get them out with your vacuum first. Be careful not to let your vacuum cleaner get all greasy, there is no need to scrub the oven with it. Just suck up all the loose debris and leave the rest to clean later.
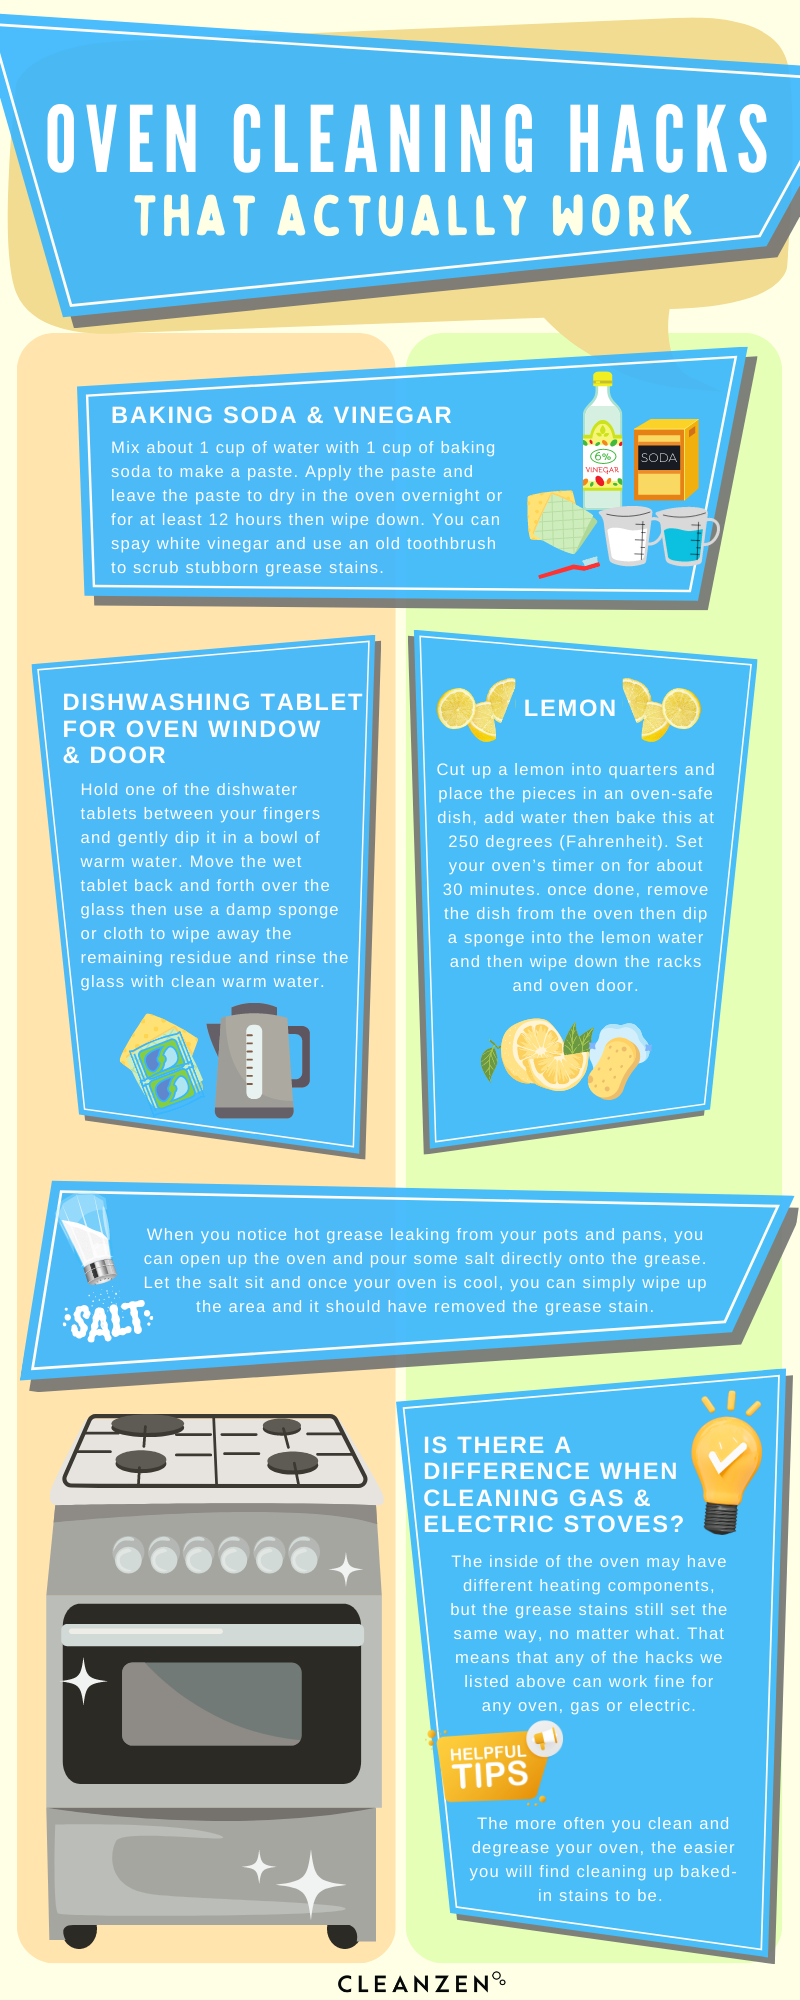
Oven Cleaning Hacks: Baking Soda Vinegar
You’ll first need to get up all the crumbs and loose bits that are hiding in and around the oven. It might actually be more tricky to clear them out once you start cleaning, so it makes more sense to get them out with your vacuum first. Be careful not to let your vacuum cleaner get all greasy, there is no need to scrub the oven with it. Just suck up all the loose debris and leave the rest to clean later.
- Take out the oven racks so you can work deeper in the oven and also clean and degrease them. Be sure to set them on old towels, newspapers, or other surfaces so you don’t spread grime around your home.
- Mix about 1 cup of water with 1 cup of baking soda to make a paste with the consistency of craft glue. Since this is a 1:1 ratio, you’ll need to make enough of the paste to cover the entire inside of your oven.
- Put your rubber gloves on and apply the paste to the inside of the oven with your hands, except for any of the heating components. For particularly grimey areas, you can leave a little extra paste.
- Leave the paste to dry in the oven overnight or for at least 12 hours. During that time, you can clean and degrease the oven racks. Let them soak in a tub of hot water for a few hours, using mild dish soap to scrub away any remaining grime.
- Wipe down the inside of your oven with a damp sponge or cloth. You can use an old toothbrush to scrub any particularly stubborn areas and grease stains.
- For more of an intensive cleaning punch, spray some white vinegar around the oven to help treat and eliminate any remaining stubborn patches of grease.
Understandably, not everyone has 12 hours to clean their oven. If you’re on more of a time crunch, we have a few other hacks you can try your hand at.
Dishwashing Tablet
Having y messes smeared around inside the window or door of your oven isn’t a great look. But we have an easy fix for this with this hack:
- Grab your trusty pair of rubber gloves and a few dishwasher tablets.
- Hold one of the dishwater tablets between your fingers and gently dip it in a bowl of warm water. Move the wet tablet back and forth over the glass and pay extra care to the more stubborn grease stains.
- The tablet will dissolve, so you may need a second one depending on how quickly this happens.
- Use a damp sponge or cloth to wipe away the remaining residue and rinse the glass with clean warm water.
You may have heard that dishwasher tables are a good oven door cleaning hack. Now you know that it’s true!
Lemon Oven Cleaning Hacks
This trick has actually been around for some time but it has recently been blowing up on TikTok. For good reason too, as this is one of the easiest hacks to clean your oven. Here is how it works:
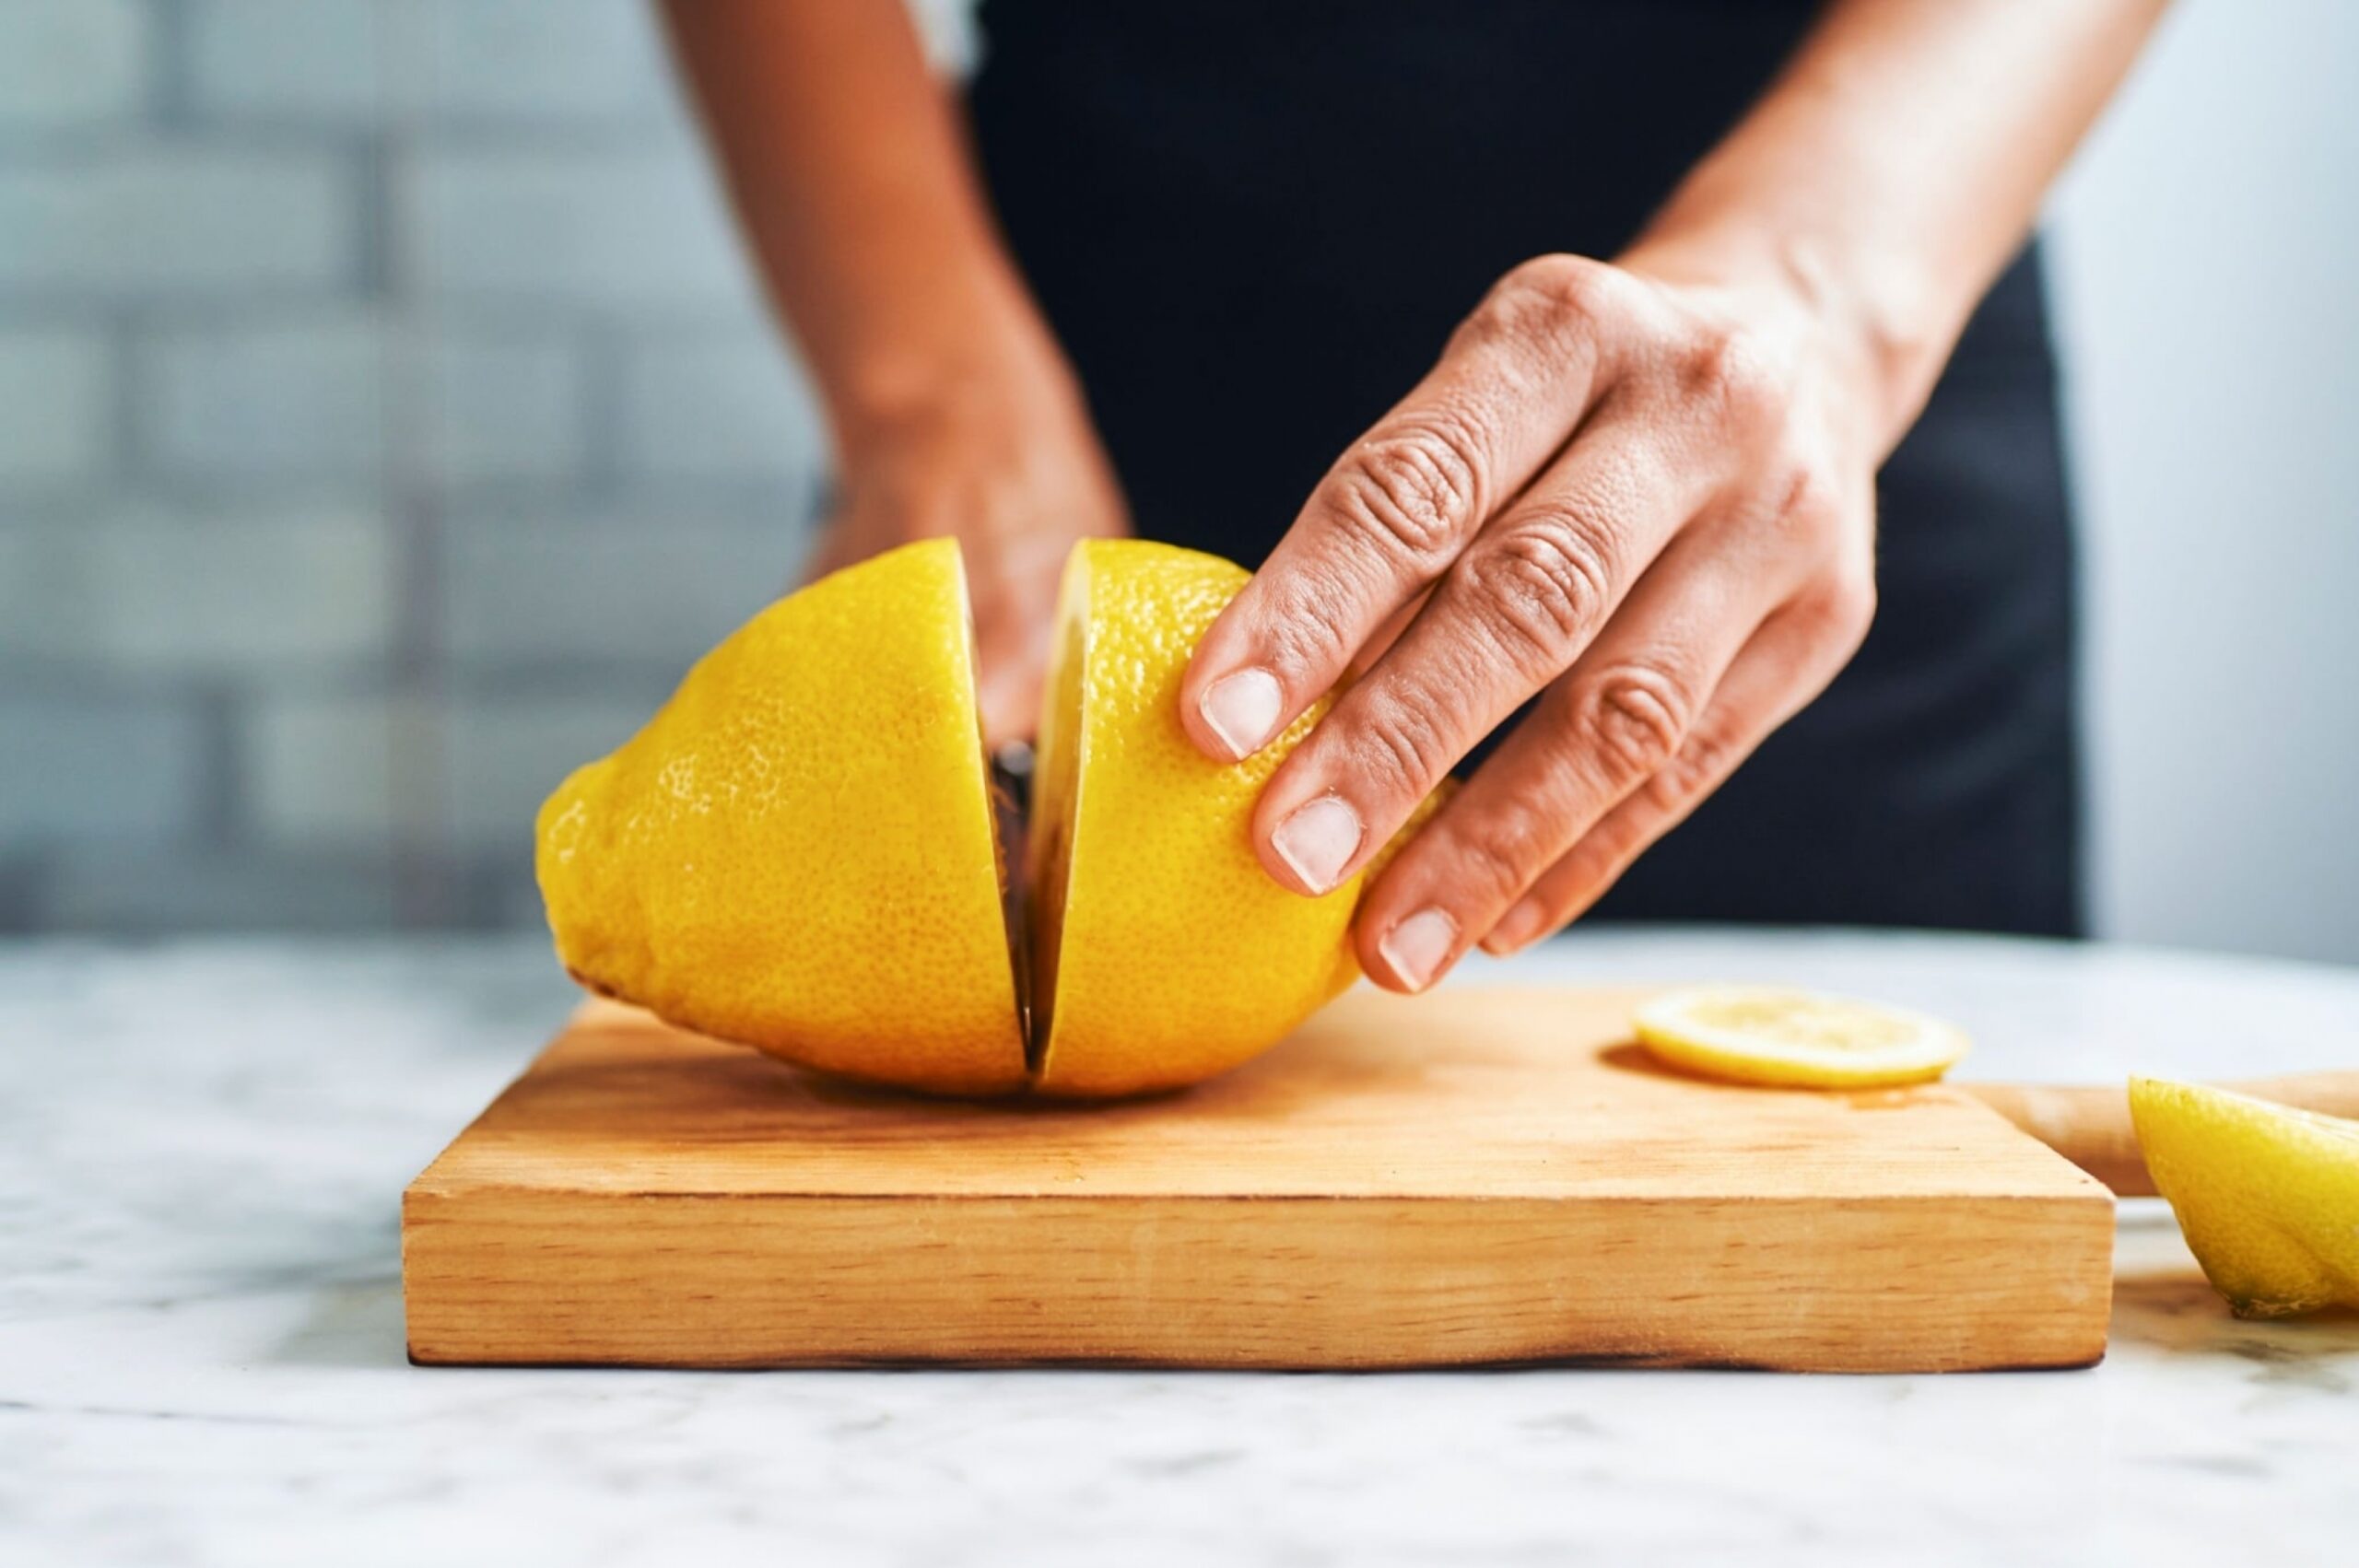
- Cut up a lemon into quarters and place the pieces in an oven-safe dish.
- Pour some water over the lemons into the dish and then place the dish with water and lemons in the oven.
- Bake this at 250 degrees (Fahrenheit) and set your oven’s timer on for about 30 minutes.
- After the timer goes off, remove the dish from the oven. Dip a sponge into the lemon water (very carefully, it’ll still be hot!) and then wipe down the racks and oven door.
Remember that the oven will be hot during this process, so make sure you are careful and protected while you clean in and around the oven.
Salt
If you catch grease spills early, they can be treated and cleaned up almost immediately to minimize the amount of damage to your oven. When you notice hot grease leaking from your pots and pans, you can open up the oven and pour some salt directly onto the grease. Let the salt sit for about 2-3 hours while your oven cools off after you’re done cooking. Once your oven is cool, you can simply wipe up the area and it should have removed all, if not almost all, of the grease stain.
Is There a Difference When Cleaning Gas and Electric Stoves?
Finally, let’s talk about the type of stove you have in your home. Some people wonder whether they can or should treat grease spills differently in a gas oven than in an electric oven. And that is a fair question, so here is the answer: The inside of the oven may have different heating components, but the grease stains still set the same way, no matter what. That means that any of the hacks we listed above can work fine for any oven, gas or electric.
Don’t Wait To Clean!
The more often you clean and degrease your oven, the easier you will find cleaning up baked-in stains to be. At the end of the day, the process is pretty much the same no matter when you last cleaned it. The process we suggest for intensive cleaning is the overnight method using baking soda. This allows time to soak and loosen up bigger greasy messes.
In a pinch, using salt can be a big time-saver when fighting against larger messes down the road. Of course, when you need to clean up and remove that lingering smell of burnt food, try the lemon hack to leave your home smelling fresh and clean for days.
For more cleaning tips, tricks, and hacks check out our blog and read up on a variety of topics from cleaning to staying organized. You can also book any variety of our available cleaning services for your home with our friendly and affordable cleaning team.
The post Oven Cleaning Hacks That Actually Work (It’s SO Easy!) appeared first on Cleanzen.
from Cleanzen https://cleanzen.com/blog/oven-cleaning-hacks/
via IFTTTfrom Cleanzen Cleaning Services https://cleanzencleaningservices0.blogspot.com/2023/05/oven-cleaning-hacks-that-actually-work.html
via IFTTTfrom Gabriela Bragg https://gabrielabragg.blogspot.com/2023/05/oven-cleaning-hacks-that-actually-work.html
via IFTTT -
How to Get Oil Out of Clothes (Without Ruining Them!)
A nice big bite of a juicy hamburger or hovering over a cooking pan without an apron can catch anyone by oily surprise, it happens to us all even at the worst times. Accidents happen no matter how hard you try to avoid them, but that doesn’t mean you have to say goodbye to your favorite shirt.
Follow our quick and easy method below to learn the best tips for removing stubborn oil and grease stains from your clothing.
Why Are Oil Stains So Difficult to Remove?
Grease and oil leave behind some of the most annoyingly stubborn stains on clothing. These stains can be hard to clean, but luckily it is not impossible. How successful the removal is really depends on the state of the stain, the material, the color of the fabric, and the method you use to clean it.
Even if a stain is small and light when you first catch it, it can darken on the fabric over time as it sets in, which is why it’s essential to remove them as soon as possible. The longer you wait to treat and remove the stain, the more absorbed the oil and grease will become into your clothing.
Once it dries, the stain will be pretty difficult to remove and might even ruin your clothes. So how do you save your clothing before those annoying stains have time to set in? Keep reading to find out what tips and tricks we have for you.
What You’ll Need to Get Oil Out of Clothes
When you are checking around your home to find the right things to use against an oil or grease stain, you’ll want to make sure you use the right products and tools. Here is a general list of products you can use to treat oil stains, according to the method we provided below:

How to Get Oil Stains Out of Clothes
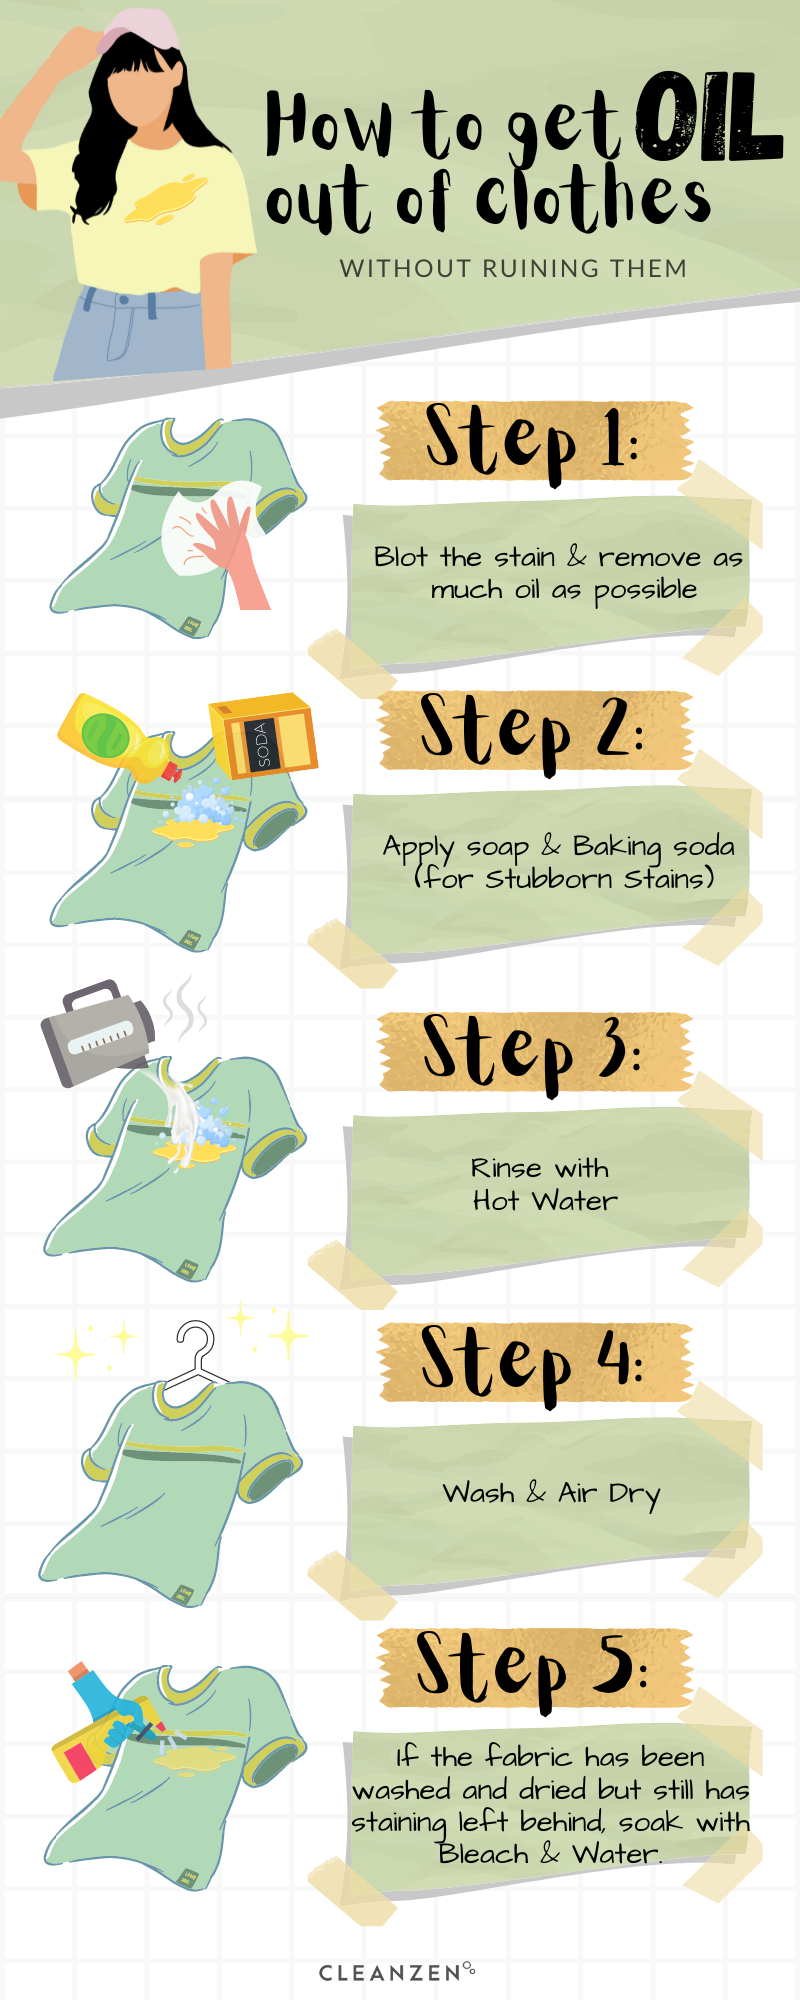
Got your supplies and feeling ready to tackle those pesky oils stains? Here is our go-to method for removing oil stains from your clothes, along with a few extra steps for more stubborn and set-in stains:Blot the Stain
Use a paper towel, napkin, or microfiber cloth to blot away as much of the oil as possible as soon as you notice the stain. This will make it easier to clean and treat the stain once you start washing it. Avoid rubbing at the stain, as this will only push the grease and oil deeper into the fabric’s fibers and make it even harder to fully remove it.
Apply Soap
Lay the piece of clothing on a flat surface and put a few drops of dish soap directly onto the stain. Work the soap into the fabric with your hands or with a toothbrush to bring the soap to a lather to loosen the oil and grease.
Apply Baking Soda (for stubborn stains)
If you’re dealing with more stubborn and set-in stains, sprinkle a bit of baking soda directly onto the stain with the dish soap. Scrub the powder and soap with a toothbrush and then let it sit for a few minutes until the baking soda dries slightly and covers the stain in a hard paste.
Rinse with Hot Water
After you’ve allowed the dish soap, and baking soda if needed, to work on fighting the stain for about an hour, rinse the clothing with hot water. Once you are done, dip the affected area on the fabric in hot water and leave it for another hour.
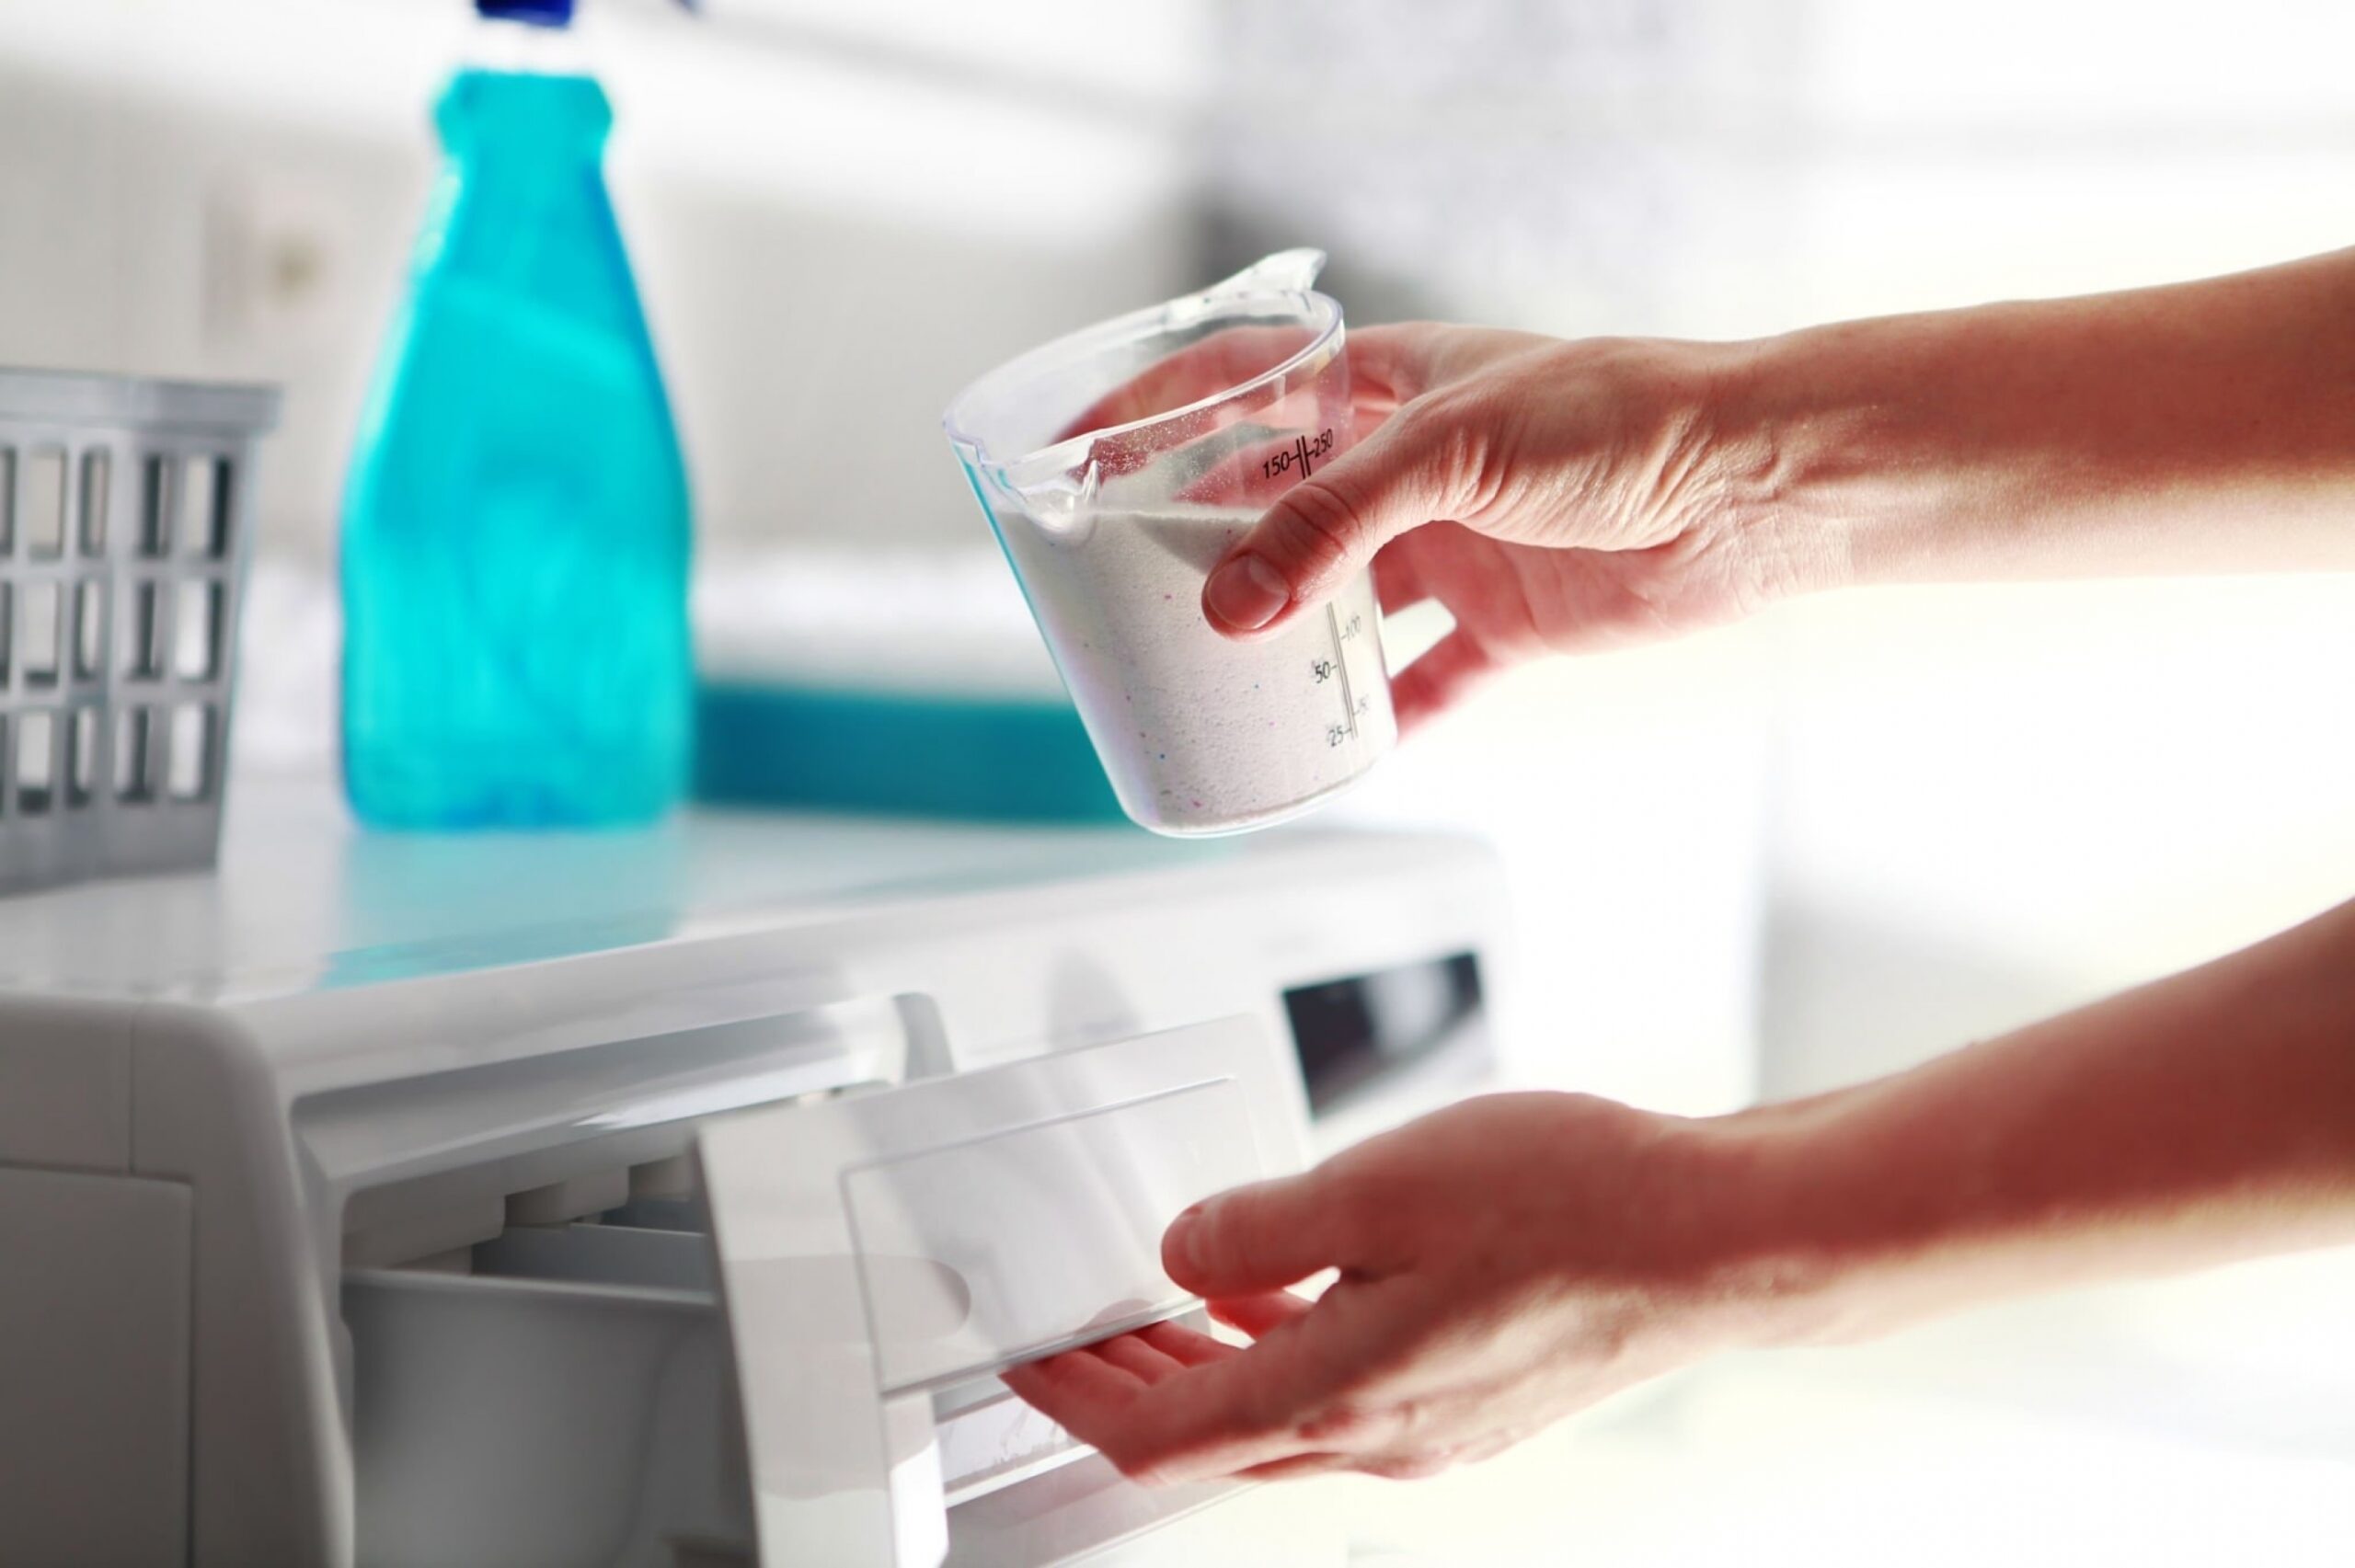
Wash & Air Dry
Once the stain is all but gone from the clothing, wash the garment in your washing machine on a warm water cycle and then let it air dry rather than in your dryer. If the stain has not been completely lifted and removed, you may want to repeat the previous steps once again.
Soak with Bleach & Water (for stubborn stains)
Sometimes, stubborn stains can require more drastic measures. If the fabric has been washed and dried but still has staining left behind, dip it in some warm water mixed with a color-safe bleach and let allow this to sit for about an hour. Once it has been left to soak, wash and dry the garment as normal.
Tips, Tricks, & FAQs
How to Get Motor Oil Out of Clothes?
 Treating and removing motor oil stains has pretty much the same process as regular oil. Blot away as much of the stain as possible, apply dish soap and baking soda and scrub the mixture with a toothbrush, rinse and soak in hot water, and then run through the washing machine.
Are Oil Stains Permanent?
The short answer is, they can be. However, if you catch and treat oil stains quickly, you have a better chance to remove them. The best course of action is to blot fresh stains quickly and treat them even quicker. The longer you wait to treat oil or grease stains, the more likely they are to be permanent.
Unfortunately, success isn’t always guaranteed and you can sometimes be left with a permanent stain. The fibers and fabric of your clothing may contribute to how stubborn oil and grease stains can be. Synthetic fibers like polyester are incredibly difficult to clean because oil and excess grease particles stick to them like magnets, meaning that without proper care and attention, stains could become permanent and ruin your clothes for good.
How Do You Get Oil Stains Out of Jeans?
You can approach oil stains on your jeans and other denim as you would on any other piece of clothing, and since denim is generally made from natural fibers, it is usually more accepting of stain removal than synthetic fibers. Start by blotting the stain so it doesn’t settle into the fibers
 If you’re out and can’t remove your jeans, use a bit of salt or artificial sweeteners on the stain to soak up as much of the offending oil until you can give your jeans a deep clean at home using the method we provided above.
How to Get Old Oil Stains Out of Clothes
Dried oil stains are much more difficult to get out of clothing, but luckily it is not a completely impossible task. The first thing you’ll have to do to remove the stain is attempt to return the oil stain to a liquid state by using hot water. If that doesn’t work, add a little more oil to help revive and loosen it up.
Many people actually swear by treating oil and grease stains with WD-40. You can do this by spraying a small amount into a bowl and applying it with cotton swabs. Place a towel or microfiber cloth on the other side of the fabric so that the oil stain doesn’t soak through to the back of the clothing item. Once the stain has been treated with the WD-40, soak up the remaining stain using the same method we provided above, and then wash and dry the garment as usual.
Is Hot or Cold Water Better for Removing Stains?

Oil and grease are usually semi-solid at room temperature, meaning that it needs to be fully liquid to be properly removed. The best way to liquify grease spots and stains on fabric is to use warm or hot water when treating and washing the garment.
Is White Vinegar a Degreaser?
Distilled white vinegar is our favorite degreaser! To use it o help treat oil and grease stains, mix it with some water. We recommend about 1 part vinegar to about 4 parts water. Apply this solution directly to the grease and let it sit for a few minutes to an hour.
That pungent vinegar smell will dissipate once the item is completely dry, and especially after you run it through the wash. Remember to test in an inconspicuous area before applying the solution to stains because even diluted vinegar can discolor certain fabrics.
What Mistakes Should You Avoid When Removing Oil Stains?
- Always blot, never rub, a stain, including oil stains.
- Always try and address an oil stain immediately so it doesn’t have time to settle into the fabric and dry.
- Since oil stains are, avoid using any water on an oil stain. If the stain has dried, then you should only use hot water.
Remember, speed is key when treating and removing oil from clothes. Work as fast as you can and you should be able to remove any oliy stains from your clothes easily. For more cleaning tips and tricks, and to book services for your home or business, check out Cleanzen Cleaning Services today!
The post How to Get Oil Out of Clothes (Without Ruining Them!) appeared first on Cleanzen.
from Cleanzen https://cleanzen.com/blog/how-to-get-oil-out-of-clothes/
via IFTTTfrom Cleanzen Cleaning Services https://cleanzencleaningservices0.blogspot.com/2023/05/how-to-get-oil-out-of-clothes-without.html
via IFTTTfrom Gabriela Bragg https://gabrielabragg.blogspot.com/2023/05/how-to-get-oil-out-of-clothes-without.html
via IFTTT -
How to Get Dog Poop Out of Carpet (Guide & Tips)
Even our most beloved and well-behaved furry friends can have accidents inside our houses, it happens to the best of us. Fortunately, we have the fix for even the most smelly of “gifts” like a helpful DIY recipe and a super simple guide to effectively clean up dog poop. Keep reading to find out how to rid your home of your pup’s “present” without a trace.
You’re Not the Only One
If you think you’re the only one to deal with little “gifts” from your furry friends, we can promise that you’re not. In fact, most homes that have dogs have dealt with the same problem. Wondering just how many households have dogs? Well, American Veterinary Medical Association estimates that about 48.2 million households own a dog.
Imagine how many of those homes have also dealt with having to clean up their dog’s poop. No matter how long you’ve had your furry friend and how well-trained they are, accidents can and will happen, and that’s okay! You just have to know how to take care of them properly.
Cleaning Dog Poop Smell From Carpet
Everyone’s favorite and most trusted cleaning product is back again to make cleaning your pet’s little “present” from your carpet. That’s right, baking soda is once again here to save the day. Baking soda is our favorite and most recommended odor-fighting product that works to absorb and remove unpleasant smells from around your home instead of just disguising them.
It is also a natural, non-toxic, and eco-friendly alternative to other products on the market, making this a safe and effective product to use around kids and furry friends.
What You Need
Before you get started with the cleaning process, it is important to make sure you have all the tools and products you’ll need on hand. Curious about what that includes? Here is a list of the basics to help you get started:
- Rubber gloves
- Cleaning cloths or paper towels
- Baby Wipes
- Non-Bleach Dish Soap Water
- Distilled White Vinegar
- Baking Soda
- Vacuum
How to Get Dog Poop Out of Carpet
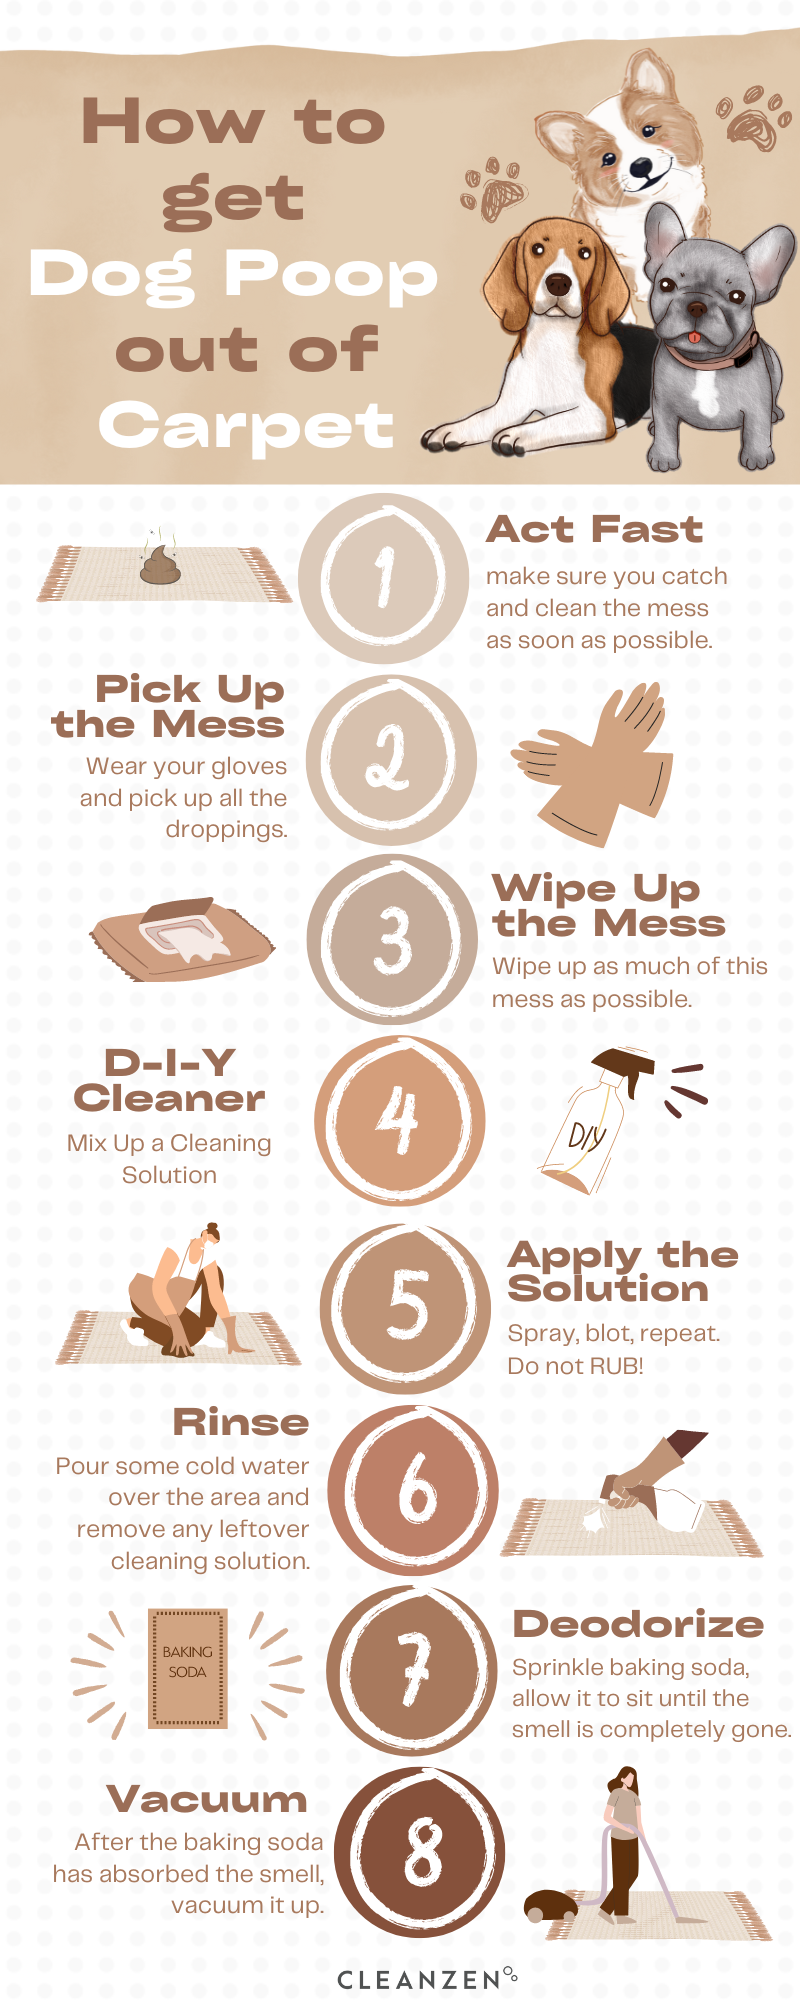
Luckily, cleaning can be pretty straightforward when you know what to do. Here is the easiest and most effective way to clean up dog poop from your carpets:1. Act Fast
The faster you catch and clean up your furry friend’s little “gift” the better. When the poop has time to settle into the carpet it will unfortunately also have time to leave a more stubborn stain, so make sure you catch and clean the mess as soon as possible.
2. Pick Up the Mess
Break out your rubber gloves (and maybe a mask if you’re sensitive to smells!) and paper towels because the first step in cleaning up puppy poop is picking up all the potential droppings. There really is no better way of telling you you have to pick up poop is there?
3. Wipe Up the Mess
Unfortunately, sometimes our beloved pups can have some less-than-solid accidents in the house, and that’s okay. It is, however, important to wipe up as much of this mess as possible. Baby wipes are a good product to use in this situation, just remember to also have those rubber gloves handy.
4. Mix Up a Dog Poop Cleaning Solution
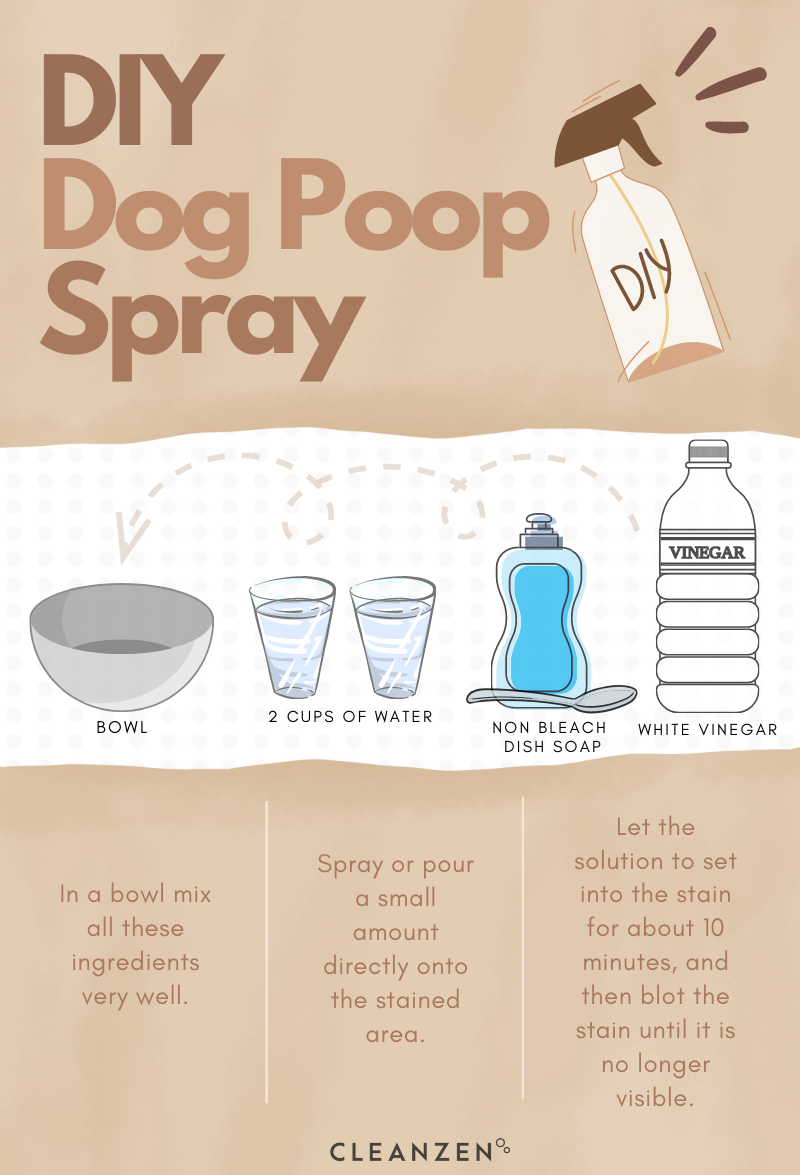
Once the primary source of any staining has been removed and wiped away, you can get to work treating any stains. In order to do this, here is a great DIY recipe you can create to help the process:
- In a bowl or spray bottle mix together: 2 cups of cold water, 1 tablespoon of non-bleach dish soap & 1 tablespoon of white vinegar
- Mix all these ingredients very well each time you use the solution, especially when in a spray bottle.
- Be sure to check that your dish soap isn’t bleach based or contain any bleach whatsoever. Bleach should never be mixed with cleaning acids like vinegar as this will result in highly toxic fumes.
5. Apply the DIY Poop Spray
Use the solution you just created by spraying or pouring a small amount directly onto the stained area. Allow the solution to set into the stain for about 10 minutes, and then blot the stain until it is no longer visible. This requires patience and may need several rounds, but the stain should lift with some work.
6. Rinse
Once the stain has been fully lifted and blotted away, pour some clear cold water over the area you’ve been treating. Blot this up with a microfiber cloth or paper towels to remove any remaining cleaning solution and water.
7. Treat the Smells
To remedy any lingering smells, sprinkle a generous amount of baking soda over the affected area. Allow the powder to sit for 10 minutes or even overnight (for larger messes) to fully treat and remove any lingering odors.
8. Vacuum
Once the baking soda has been left to sit and absorb any odors, you can remove it by thoroughly vacuuming the entire area. And voila! No more stains and no more smells.
What Cleaning Products Clean Dog Poop Stains From Carpet?
When you’re in need of an efficient product that can tackle stains and odors all in one, you’ll want to look for a good enzyme cleaner. Enzyme based cleaners work by releasing probiotics that are activated when you spray the product and begin working as soon as they hit the affected area.
As long as you reapply and keep the area damp with the product, those probiotics will continue to multiply and remove the offending stain and odor until they’re gone. These products are basically the Holy Grail if you are dealing with pet urine, vomit or poop so you’ll want to make sure you find the right product for your home.
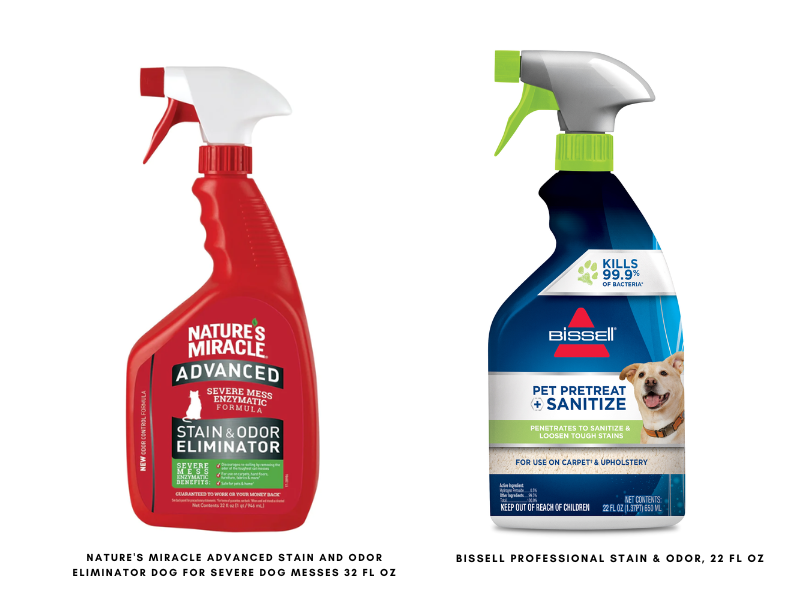
When looking for an enzymatic cleaner, it is important to find one that contains protease enzymes, such as Nature’s Miracle Advanced Dog Enzymatic Stain and Odor Eliminator, since those types of enzymes break down proteins or you can also try Bissell Professional Pet Stain and Odor Removing Formula. Let us know what you think of these products in the comments below and feel free to suggest your favorite enzyme cleaner to others!
More Tips & Tricks in Cleaning Up Dog Poop From Carpet
- If you’re using any pre-formulated cleaning products, always read the manufacturer’s instructions before using them on your carpet. A few products can be harmful to your carpet if they aren’t used correctly.
- Always remember to blot, not rub! Rubbing at stains will drive the stain deeper into the carpet fibers, resulting in a more stubborn spot and smells that might never leave.
- Remember to test any cleaning formulas in a small, hidden area on your carpet before cleaning to avoid any permanent damage. This applies to pre-formulated and DIY cleaning products.
- Unfortunately, getting creative when it comes to mixing cleaning products actually isn’t the best idea, especially around pets and kids. In fact, mixing products that contain bleach with acidic products like vinegar can create highly toxic gases. Find out more about why you should never mix bleach and vinegar for cleaning here!
Related Video: Check out this video on how you can get poop off your carpet in under 2 minutes:
The post How to Get Dog Poop Out of Carpet (Guide & Tips) appeared first on Cleanzen.
from Cleanzen https://cleanzen.com/blog/how-to-clean-dog-poop-out-of-carpet/
via IFTTTfrom Cleanzen Cleaning Services https://cleanzencleaningservices0.blogspot.com/2023/05/how-to-get-dog-poop-out-of-carpet-guide.html
via IFTTTfrom Gabriela Bragg https://gabrielabragg.blogspot.com/2023/05/how-to-get-dog-poop-out-of-carpet-guide.html
via IFTTT -
Never Mix Bleach and Vinegar: Yes, It Can Kill You

Cleaning like a pro can often mean getting creative with cleaning supplies. You’ve probably become very familiar with products like bleach and vinegar when it comes to keeping things clean and disinfected. But do you know what happens when you mix bleach and vinegar together?
Turns out, mixing these two effective products isn’t as good of a cleaning cocktail as you may think. Keep reading to find out why you should never, ever mix bleach and vinegar when you clean around your home.
Can You Mix Bleach and Vinegar?
Is mixing bleach and vinegar ever a good idea? The short answer is absolutely not. Along with a bit of a science lesson: When you mix chlorine bleach, which contains sodium hypochlorite, with vinegar this will create chlorine gas.
This is a highly dangerous chemical that’s actually deadly in high volumes. So even though it might seem like you’re intensifying your cleaning power by using bleach and vinegar at the same time, it is never safe to mix the two, even in very small amounts.
What Happens if You Mix Bleach and Vinegar?
Mixing any amount of bleach with even the smallest bit of vinegar creates a harmful chemical reaction best known as chlorine gas. What’s worse is that this toxic, and sometimes lethal, gas is completely invisible, so the only way to detect it is by smell.The horrible and fast-acting side effects you will likely experience after being exposed to it are a clear sign of exposure as well. No matter how you may have been exposed to chlorine gas, you will know almost immediately due to the smell and symptoms. To find out what potential symptoms you may experience from chlorine gas, check out the list below.
Symptoms of Exposure
If you accidentally created and exposed yourself to chlorine gas without realizing it, you will most likely be exhibiting some very obvious symptoms. According to the CDC, the following are the most common symptoms of exposure to chlorine gas:
What to do After Mixing Bleach & Vinegar
If you have in any way mixed bleach and vinegar and been exposed to chlorine gas, the best course of action at the moment is to remain calm and move to fresh air. Here are the best methods for protection against chlorine gas exposure:- If you accidentally created chlorine gas anywhere within your home, open as many windows around the space as possible and immediately call the American Association of Poison Control Centers, at 1-800-222-1222 for proper cleaning and disposal methods.
- If any combination of bleach and vinegar has contaminated your clothing, remove it immediately. Avoid pulling contaminated clothing over your head or face and place the clothing in a sealable plastic bag to be discarded by local authorities.
- If your eyes have started to burn, flush them with lukewarm water for 10 to 15 minutes, and do not use eye drops as they can worsen the situation.
- Remove any contacts or glasses and immediately shower in lukewarm water from head to toe without scrubbing. Use mild soap to clean your skin and DO NOT allow the water to run into your eyes, mouth, or nose.
Alternatives to Use Instead of Bleach & Vinegar
Instead of mistakenly reaching for bleach to boost the cleaning power of vinegar, try any of the following methods to avoid risking your home and family to harmful chlorine gas.
For Cleaning & Disinfecting:
Use Vinegar on its Own
As we said, plain old distilled white vinegar packs far more of a punch than many people may think. It can disinfect and brighten your laundry and even help remove soap and hard water residue. Because it is 80% effective against viruses and mold bacteria, it is an amazing solution for a more natural and safe disinfectant.
Even though it is a highly effective disinfectant, vinegar is non-toxic if ingested or inhaled, making it a strong alternative to bleach.
Baking Soda
If you are on the hunt for a great cleaning and whitening agent, baking soda is our favorite solution. Baking soda is great at fighting those hard-to-get-out stains on clothing, furniture, and floors. A small amount of baking soda can greatly improve the cleaning power of vinegar, lemon juice, and water.
While baking soda isn’t the top solution for disinfecting, it still has a wide variety of uses for cleaning and stain fighting around the house.
You probably already have a bottle of hydrogen peroxide in your first aid kit to clean up a cut, but it can do much more than that around your home. Hydrogen peroxide is a great natural alternative for treating bacteria, mold and fungal growth, as well as bad odors around the house in place of bleach.
If you usually use bleach to disinfect and clean surfaces, just grab a cloth and use a 3% solution of hydrogen peroxide to kill many types of bacteria including salmonella around the kitchen.
Lemon Juice
You can use hot water and lemon juice against mold and mildew stains, as well as on kitchen counters to kill bacteria and keep your home lemony-fresh. It works well to remove grime because the citric acid within lemon juice is a bonding agent.
This means it can stick to minerals and other particles in grime and dirt and help to dissolve them as you scrub the surface. Nothing works quite as well as lemon juice to make sure your home looks and smells incredible.
Castile Soap
Castile soap is an amazing natural soap that you can use as a bleach alternative for a variety of cleaning purposes including laundry, mopping, and cleaning countertops. While it is not a disinfectant like bleach, castile soap is still great at removing dirt, grime, and many surface stains.
You can create a cleaning solution by mixing ¼ cup of castile soap with about 1 quart of warm water. Depending on how much you use and how often you use it, you can either safely pour the dirty mixture down the sink or even save it in a spray bottle for next time.
For Laundry:
Oxygen Bleach for Laundry
Oxygen bleach is a gentle, non-toxic alternative to chlorine bleach for cleaning laundry, bathrooms, kitchens, etc. Although they might sound similar, the main difference between oxygen bleach and chlorine bleach is the active ingredients they contain and how they work to remove stains and whiten fabrics.
Oxygen bleach’s active ingredient is sodium percarbonate which works by releasing oxygen ions that break down stains and dirt, causing damage to fabrics or causing color loss like chlorine bleach might.
A Pinch of Salt
Regular old table salt can be another natural bleach alternative for removing stains and brightening fabrics like sheets, tablecloths, hand towels, and other white clothing. It is a natural mineral that can be used as an abrasive cleaning additive and can help break down stains and grime when mixed with small amounts of water.
You can create a thick paste of salt and water to use as a laundry pre-treatment for stains or to remove mildew in and around the bathroom. For safety, always follow all instructions when cleaning with salt around the house.
When in Doubt, Trust the Professionals
The best solution for avoiding the risk of mixing bleach and vinegar is by calling in a professional cleaning company. To make things super easy for you and your family, feel free to check out our green cleaning services! Using environmentally friendly products and equipment is important, especially around kids and pets.
Be sure to check out our blog for more cleaning tips and tricks and find out how to further avoid contaminating your home by mixing bleach and vinegar. We’re proud to offer a variety of friendly and affordable services and cleaning guides to our clients and we look forward to hearing from you!
The post Never Mix Bleach and Vinegar: Yes, It Can Kill You appeared first on Cleanzen.
from Cleanzen https://cleanzen.com/blog/mixing-bleach-and-vinegar/
via IFTTTfrom Cleanzen Cleaning Services https://cleanzencleaningservices0.blogspot.com/2023/05/never-mix-bleach-and-vinegar-yes-it-can.html
via IFTTTfrom Gabriela Bragg https://gabrielabragg.blogspot.com/2023/05/never-mix-bleach-and-vinegar-yes-it-can.html
via IFTTT -
How to Clean Toilet Bowl Stains (Like A Pro!)
Cleaning the bathroom is almost no one’s favorite task, and that is usually because no one enjoys cleaning toilets. We get it, toilets are gross and often hotbeds for bacteria, but that really means that they need to be cleaned more often than basically anything else in the home.
Sometimes, no matter how often or how vigorously you scrub, there can still be some residual stains in the toilet bowl. But don’t worry because, most of the time, those stains aren’t actually your fault.
So where do those stains come from, and how are you supposed to get rid of them without completely ruining both your toilet and pipes? Lucky for you, we have an explanation and several solutions.
Below, we’ll tell you about the different stains you may find in your toilets and also guide you through the safest and most natural ways to clean a variety of stubborn stains from your toilet bowl. With a little patience and some elbow grease, your toilets will be clean and stain free in no time.
What Creates Toilet Bowl Stains?
There are actually a number of sources for different types of toilet bowl stains. The best way to treat the stains in your toilet is to learn what causes toilet stains of all kinds. Not all stains are created equally, which means they can’t all be removed in the same ways.
Before diving into how to clean toilet bowl stains, let’s learn about at what causes them. Once you know what you’re dealing with, it’ll be easier to find the right stain remover and even prevent stains in the future.
Mineral & Hard Water
Mineral and hard water stains are easily the most common stain you will find inside your toilet bowl. These are so common because of the high amounts of particular minerals like calcium, limescale, and magnesium found in your home’s water.Over time, these minerals can leave yellowish and brownish deposits and rings in your toilet. You can actually prevent future stains and potentially reduce damage to your water pipes by installing a filter to eliminate pollutants.
Rust
If you notice darker brown or red toilet bowl stains, the source could be corroded pipes which can contaminate the water and add high levels of iron to your home’s water. Unlike lighter mineral stains, you might notice rust stains earlier on because the deeper red color stands out against white porcelain toilets.Rust is also corrosive and hard to remove red buildup and a chemical reaction, iron oxide, can wreak havoc on your toilet bowl. But even if you’ve been putting it off for a while, removing rust stains isn’t impossible.
Copper
These stains can appear similar to rust stains in color, if not slightly lighter. Copper can make water highly acidic and your toilet is unfortunately where it accumulates. Getting rid of copper stains can be fairly easy, but without fixing the source of the problem, they’re just going to return.If you have copper water pipes and notice copper stains, the problem might be pipe corrosion and you may need to fully replace the pipes at some point. However, if the problem is acidic and coppery water, you can install a filter that cleans the water coming into your home
Mold
Stains on tubs, sinks, and toilets from mold look gross and can have truly nasty effects on your overall health. Mold stains are super easy to spot because of the dark green and black spots. Even if you don’t see mold, you’ll likely notice the musky, unpleasant odor coming from your toilet.If you find any of those nasty mold stains in your toilet bowl, it’s super important to treat and remove the mold as soon as possible. As soon as you’ve cleaned up the stains, you can keep mold and mildew at bay by making sure your bathroom is well-ventilated, especially after bathing or showering.
How to Clean Toilet Bowl Stains the Right Way
Even though the stains in your toilet might seem like they’ll require some of those industrial-strength cleaners, you can and should clean them as safely as possible. Cleaning toilets safely and naturally is always the best course of action for the sake of your home’s pipes as well as for the sake of your family.
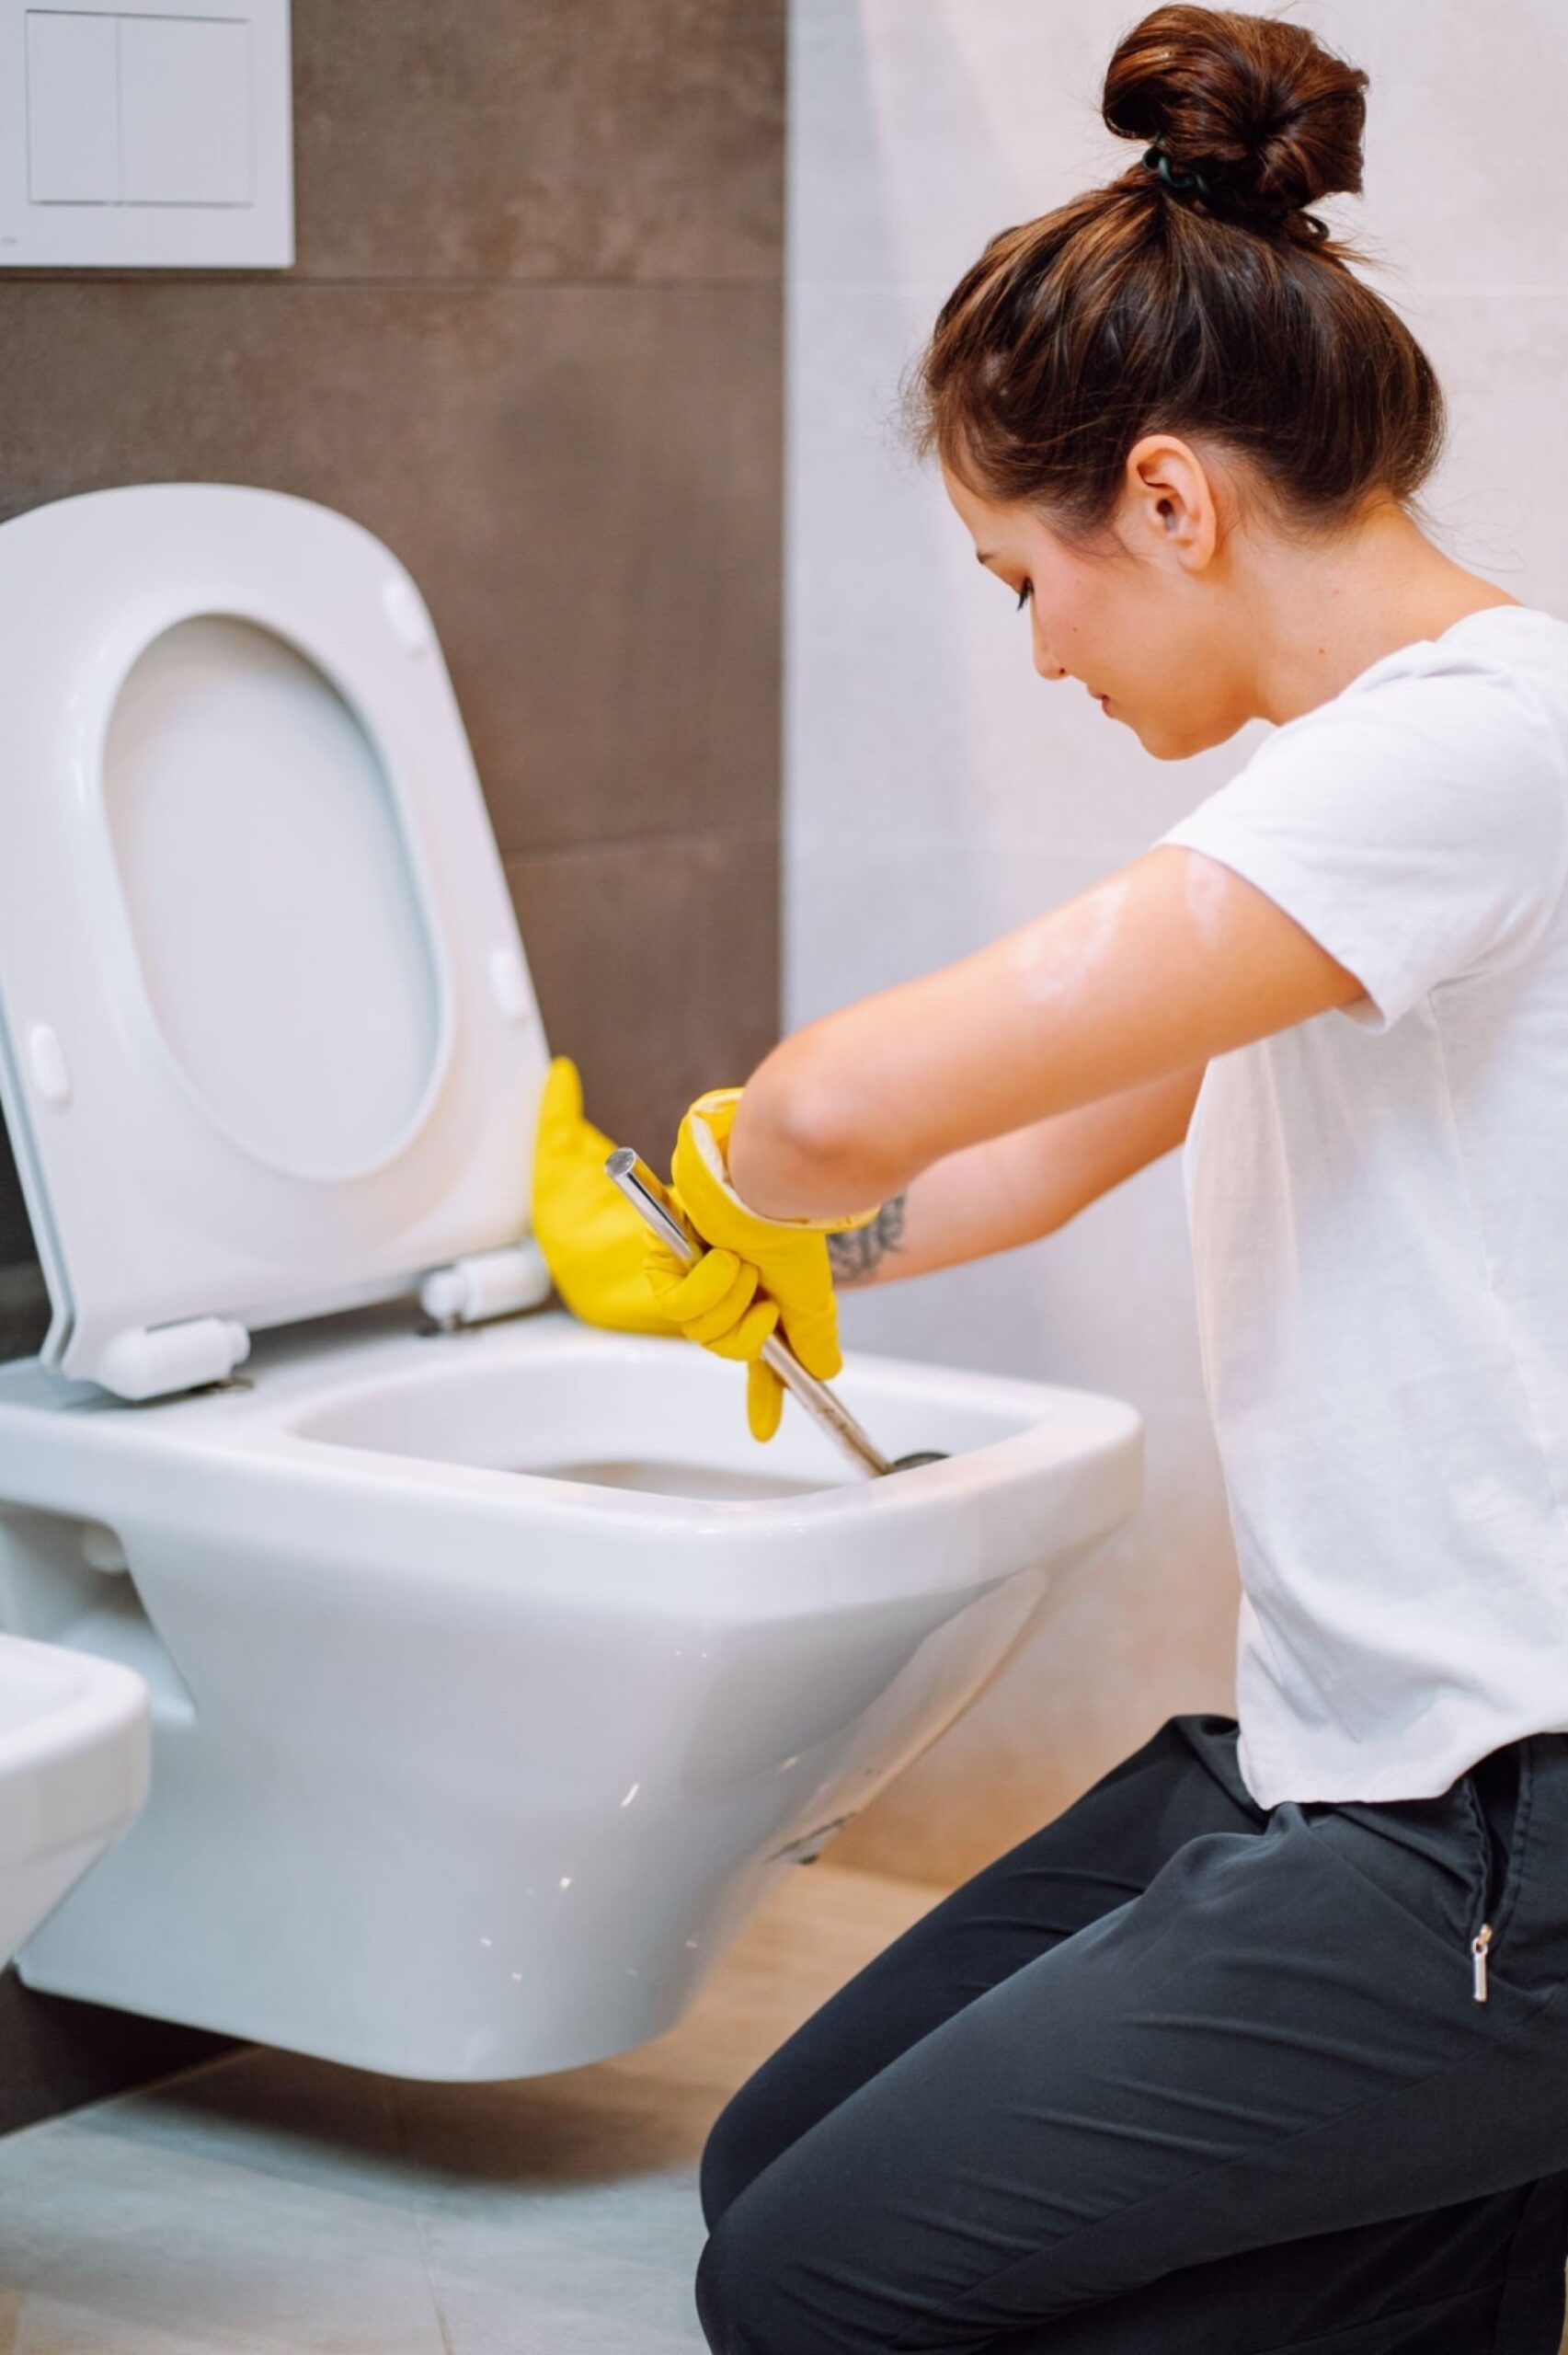
But before you set out on your cleaning mission, you should always make sure you and your bathroom are prepared for action. Here are a few things to remember before getting started:
- Turn off the water flow to your toilet and flush it before applying any cleaning products, this will ensure that your toilet bowl is fully exposed to be cleaned.
- Make sure you have and wear protection like eyewear, gloves, and a mask before you clean your toilet, especially before dealing with any mold.
- Open a window and or turn on your bathroom’s fan or vent to ensure that the space is well-ventilated and you have direct access to fresh air.
- Give your toilet a good scrub with your toilet brush to help loosen up some of the more stubborn stains and grime before settling in to clean them directly.
To find out what kind of natural and safe stain removal methods work best for the stains in your toilet, keep reading and review the cleaning guide below.
Lemon Juice
Best for: Hard water, mineral, and mold stainsNot only does lemon juice smell great, but it can also whiten and brighten while breaking down stains. The acidity found in lemon juice works well to dissolve mineral deposits and the antifungal properties can kill mold, making lemon juice ideal for treating stains in your toilet. Here is how to use lemon juice properly:
- Pour about 1 cup of lemon juice and ½ a cup of water into a spray bottle and mix them together.
- Spray the lemon juice and water around the entire surface of the toilet bowl including the lip of the seat.
- Allow the spray to sit in the toilet bowl for about half an hour and spray a little more if needed before continuing.
- Use your toilet brush to scrub the whole toilet bowl vigorously to remove any stubborn stains.
- Once the surface of the bowl is clean and clear of stains, turn the water back on and flush the toilet to clear the lemon juice.
With a bit of elbow grease and patience, your toilet should be clean and free of stains while also smelling delightfully lemony fresh. However, if your toilet still has stains after using lemon juice, don’t be discouraged. There are still several methods to use to treat and remove any stains
Coca-Cola
Best for: Hard water and mineral stainsTurns out Coke isn’t just our favorite soda (sorry Pepsi fans!) but is also a pretty effective cleaner. In theory, it actually works similarly to vinegar when cleaning. This is likely because of its pH level, which is reported to be 2.6 to 2.7, due to H3PO4 or phosphoric acid within it. Here is how to use Coca-Cola to clean your toilet:
- Carefully pour a full 16oz bottle of Coke around the surface of your toilet bowl.
- Leave the soda to sit on the surface for several hours, for best results we suggest leaving it overnight.
- Once the soda has been allowed to sit for some time, use your toilet brush to thoroughly scrub the toilet bowl clear of stains.
- Once scrubbed clean, turn the water back on and flush your toilet to clear the Coke from the bowl.
Remember, if this doesn’t do the trick, there are still more methods to put to use so keep reading to find your next move.
White Vinegar & Baking Soda
Best for: Hard water, mineral, rust, copper, and mold stainsIf you’ve read any assortment of cleaning blogs, you know this partnership of products is recommended for everything from stain removal to disinfecting. Distilled white vinegar is a natural cleaner, disinfectant, and fungicide, and baking soda is a natural deodorizer, whitener, and mild abrasive. Here is the best way to use these two products to clean stains in your toilet:
- Sprinkle a generous amount of baking soda around the surface of the toilet bowl and use your toilet brush to scrub the surface and make a paste from the baking soda and the very small amount of water still in the bowl.
- Let this paste sit in the bowl for about 10 to 20 minutes before continuing to the next step.
- Once the paste has been allowed to sit for some time, carefully pour about 2 cups of vinegar around the bowl and then close the toilet lid.
- Allow the vinegar and baking soda paste to react and sit in the toilet for about half an hour before reopening and scrubbing the bowl vigorously.
- As before, once the toilet has been scrubbed well you can turn the water back on and flush the toilet to clear the remaining vinegar and baking soda.
This method is almost always effective on the first round, but don’t be afraid to repeat the process in order to treat more stubborn stains and residue. Vinegar on its own is a strong and effective cleaner, so you can also use it alone to clean and disinfect.
Hydrogen Peroxide
Best for: Hard water, mineral, and mold stains
You might not think to check your medicine cabinet for a handy household staple, but hydrogen peroxide is about as safe and natural as possible when it comes to house cleaning. It’s perfect for treating mold, hard water, and other stains within your toilet. The punch of hydrogen peroxide packs can clean stains and kill germs, leaving your toilet clean and healthy. Here’s how to safely use hydrogen peroxide to clean stains from your toilet:
- Pour about ½ to 1 cup of hydrogen peroxide around your toilet bowl and allow it to sit for half an hour.
- Once it has had time to work, use your toilet brush to scrub the toilet bowl vigorously.
- If there are stubborn stains that haven’t been removed by the hydrogen peroxide alone, sprinkle a small amount of baking soda directly onto the stain and scrub the bowl until it is clear.
- After scrubbing, turn the water flow back on and flush the toilet to clear away the hydrogen peroxide.
Pumice Stone
Best for: Rust and copper stainsPumice stones, often sold as scouring sticks, are usually either a tried and true solution or a last-ditch effort for stain removal. These work best against the toughest and most stubborn stains, but can permanently scratch your toilet’s porcelain finish. Be sure to keep both the scouring stick and the toilet bowl wet to help avoid scratches.
Did any of these methods help you to flush away the stubborn stains in your toilet? Have you tried any other methods that you’ve found to be effective and handy in your home? Tell us about your experiences, tips, and tricks in the comments below! We love hearing from you (Just be sure to keep the toilet humor to a minimum)!
If you’re looking for more cleaning hacks and how-to guides, check out our blog to read up on how to clean basically everything in and around your home. Looking for less DIY and more SOS? Take a step back and let Cleanzen clean up around your home! Our friendly and affordable cleaners are here to help, so contact us today to find out how we can help you keep your home happy and healthy all year long.
The post How to Clean Toilet Bowl Stains (Like A Pro!) appeared first on Cleanzen.
from Cleanzen https://cleanzen.com/blog/how-to-clean-toilet-bowl-stains/
via IFTTTfrom Cleanzen Cleaning Services https://cleanzencleaningservices0.blogspot.com/2023/04/how-to-clean-toilet-bowl-stains-like-pro.html
via IFTTTfrom Gabriela Bragg https://gabrielabragg.blogspot.com/2023/04/how-to-clean-toilet-bowl-stains-like-pro.html
via IFTTT -
12 Ways to Combat Allergens Around Your Home
Warm weather is finally upon us, unfortunately that almost always means allergies. If you’ve found that there’s no escape from your symptoms, the air in and around your home might be to blame. Keep reading to find out what has been making your sniffling worse and how to keep your family happy and healthy this allergy season.
What Causes Allergies?
The warm, sunny weather of spring brings on the never ending sniffles and watery eyes that seem to plague everyone each year. But what exactly causes those pesky flareups every time the pollen count increases? Allergies are your body’s reaction to a foreign particles in the air called allergens. If you have an allergy to a particular allergen, like seasonal pollen, dust and dander, your immune system overreacts to its presence and brings on symptoms like hay fever and even anaphylaxis in some cases.
Reducing Allergens at Home
So when it comes to those annoying airborne allergens, how can you manage and minimize their effects when you’re indoors? Keep reading to see what tips you can use around your home.
1. Vacuum Every Week
Making sure you vacuum as a part of your regular cleaning schedule can make a huge difference, especially during peak allergy seasons. Even if you already make sure to vacuum semi-regularly, you may want to increase the frequency to keep allergens under control. We recommend thoroughly vacuuming once or twice each week to reduce the allergens that may collect around the house. Be sure to focus on carpeted floors and upholstered furniture all over the home as fabric can trap and hold onto allergen particles extremely easily. Be thorough and remember to clean and change out your vacuum’s filter to make sure that it is just as effective each time you use it.
2. Dust the Home Efficiently
Much like vacuuming, regular dusting can make a noticeable difference in the effects of allergens within your home. You should also make sure to dust your home several times each week in order to catch and remove any allergen accumulations. When you dust, move from top to bottom so you can avoid spreading dust around clean surfaces. Avoid using a feather duster or cloth and instead opt for a damp microfiber cloth. Microfiber can more effectively trap dust within the fibers instead of simply moving it around. Pay extra care to remember to clean and dust ceiling fans, blinds, curtains, and light fixtures.
3. Clean & Replace Air Filters Regularly
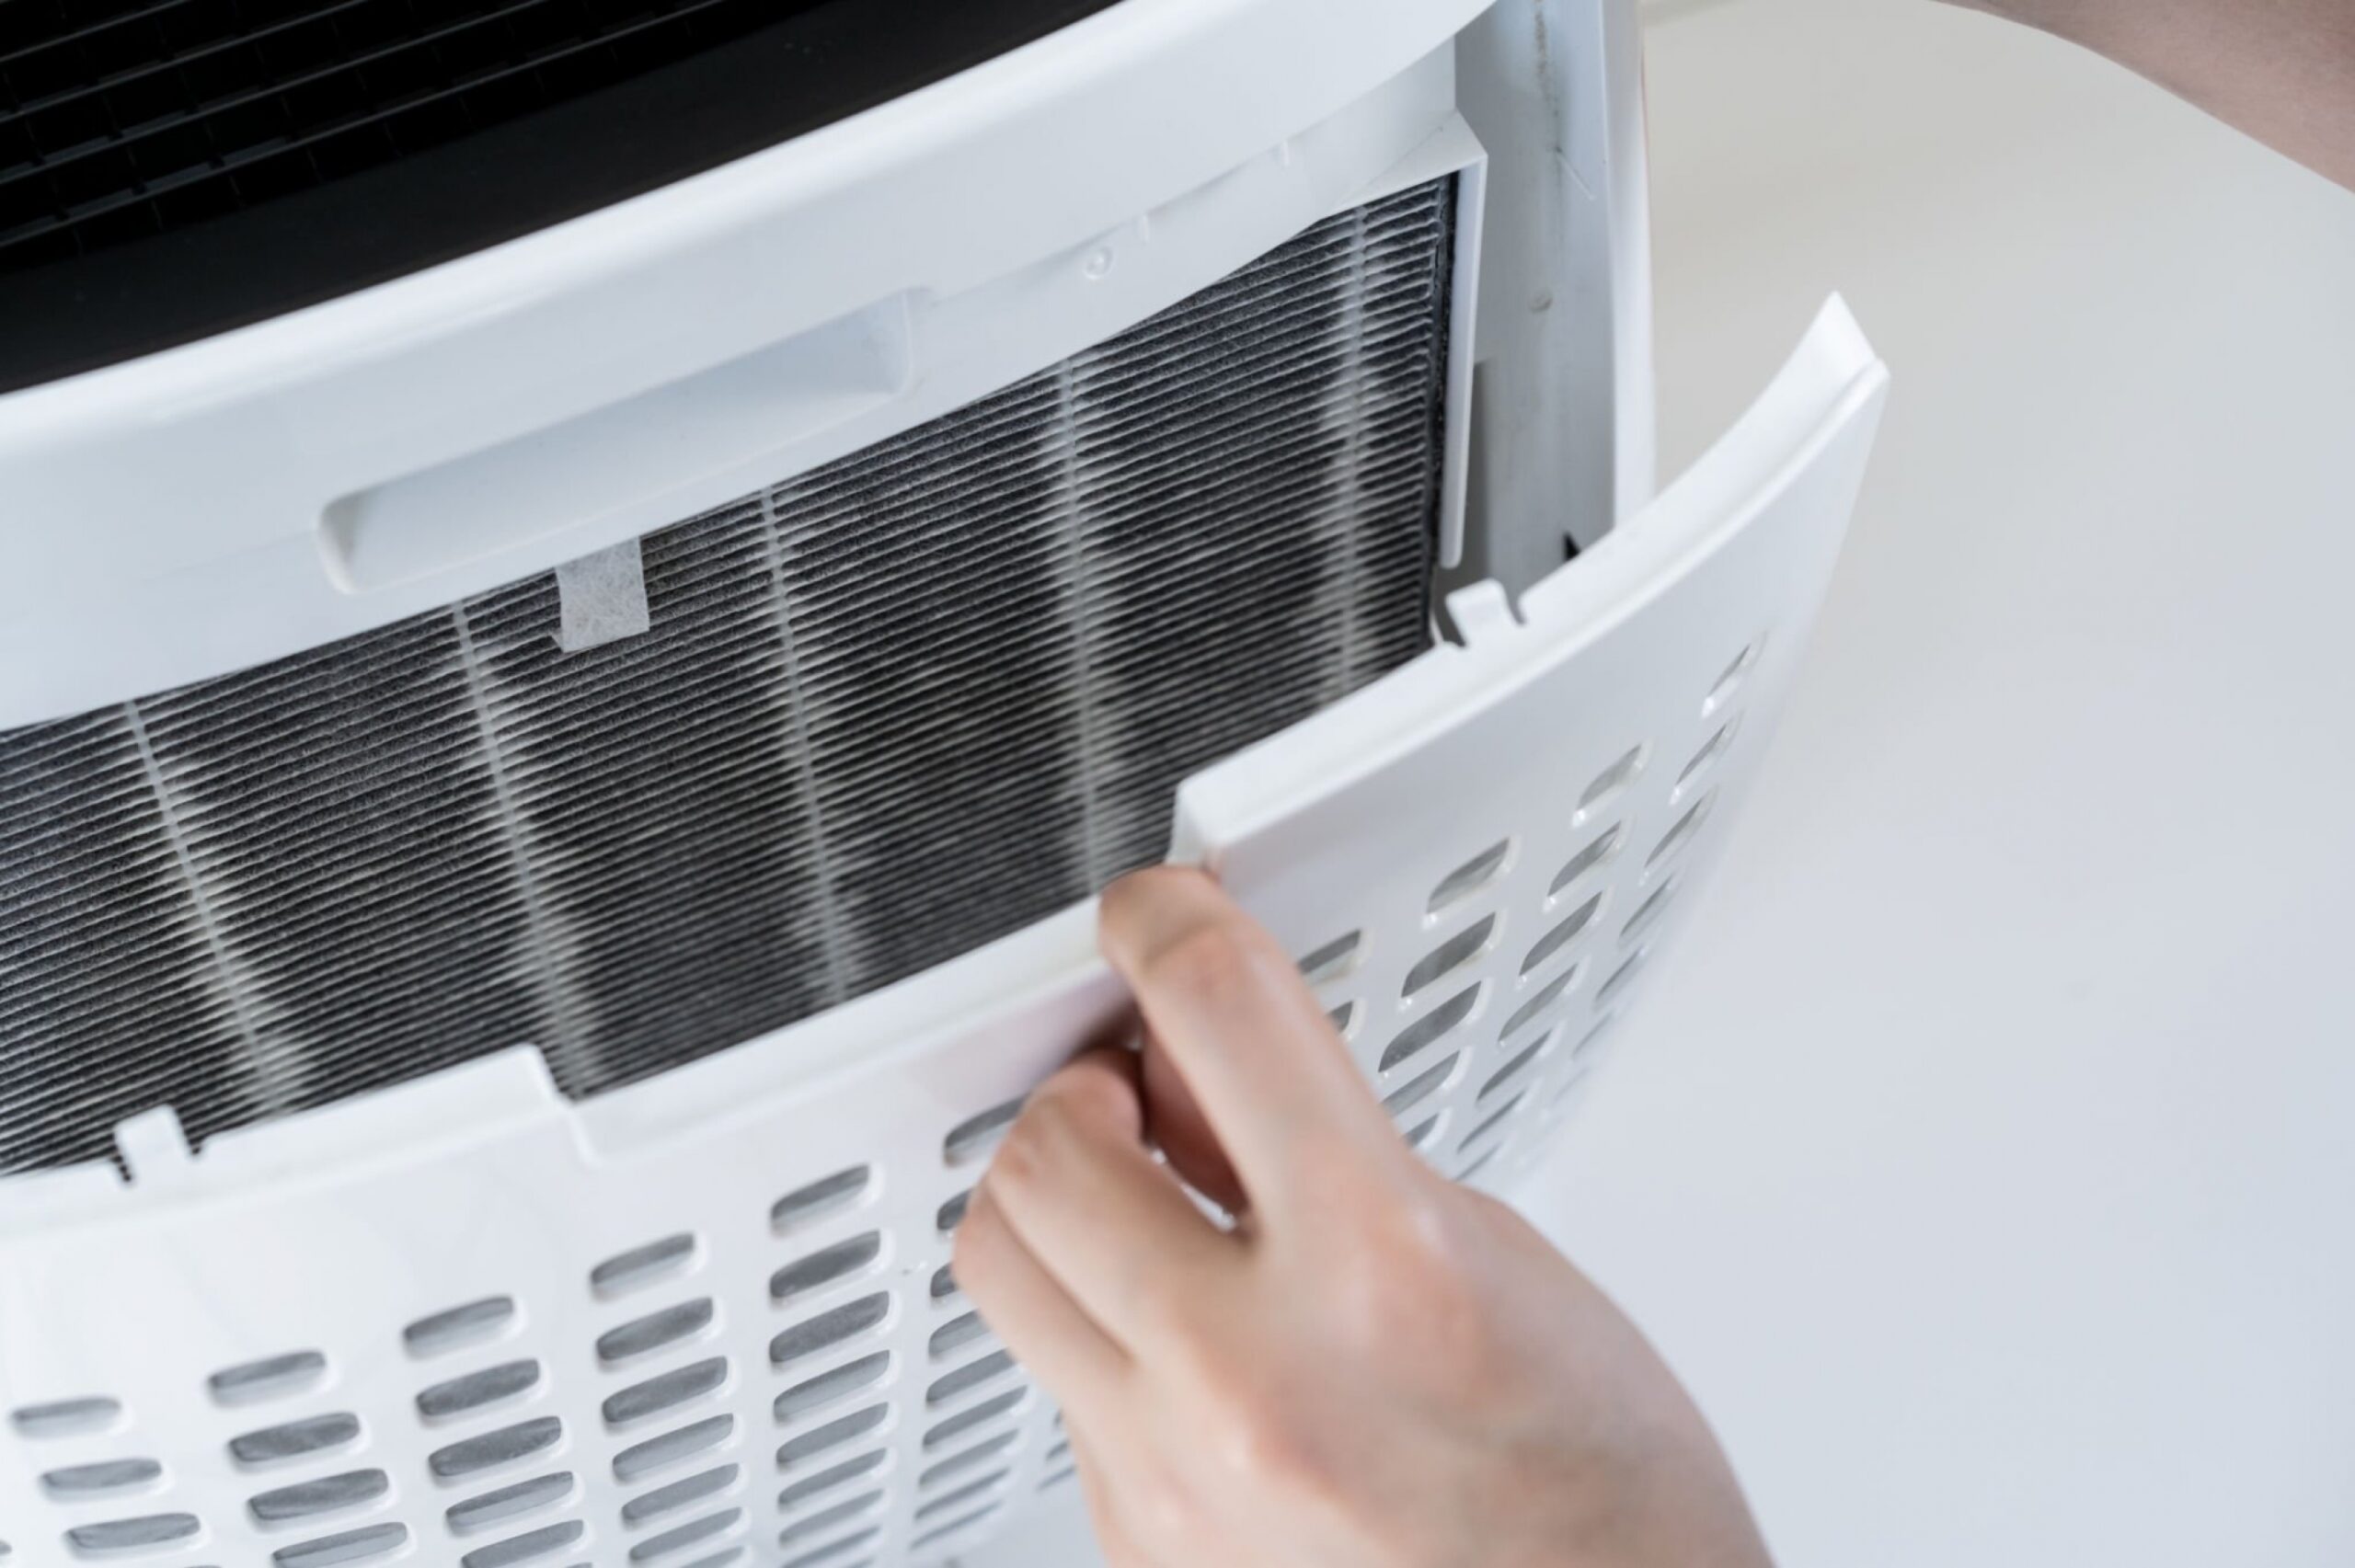
Warmer weather means finally switching on your home’s AC unit of central cooling system and starting to circulate that wonderful cool air. The only issue is that you could be circulating allergen filled air around your home. Be sure to also check to see if your unit or system uses permanent or disposable filters so that you know exactly how to clean them or which type of filter you’ll need to purchase when you replace them. We highly suggest replacing any filters within your home as soon as the weather changes and also making sure to clean the filter a few times each month. Check the manufacturer’s instructions when cleaning and replacing any and all filters around your home.
4. Leave Shoes & Outerwear at the Door
In order to avoid bringing all those pesky outdoor allergens into your home, you’ll need to take some preventative measures. Here are a few ways to stop allergens at the door:
- Make sure you have a mat both inside and outside the entryways around your home and remember to wipe your shoes before and after entering.
- Take your shoes off after entering the home and consider implementing a no-shoes policy to avoid guests and residents from tracking allergens around the house.
- If you are wearing any outerwear when you enter the home, make sure to remove it at the door and wash it regularly so that you can prevent the spread of allergens.
- Keep your front and back patios clean and swept to keep the amount of pollen that accumulates on the surfaces just outside your home under control and reduces the amount of allergens that enter your home.
5. Reduce Clutter Around the Home

One of the best ways to keep dust accumulation under control around you home is by minimizing the clutter. The more surfaces that are created around the home, the more spaces dust, dander, and pollen particulates have to settle and accumulate. Not only is this a good way to minimize the dust around you home, it also leaves your home looking and feeling fresh and clean. Make sure items that collect dust easily like knickknacks, tabletop ornaments, books and magazines are put away in their proper places. Get the kids involved by having them clean up and put away toys, games and stuffed animals.
6. Wash All Linens Regularly
As you clean and straighten up around the house, don’t forget to freshen up the linens in each room. Regularly wash and change out towels, bedding, pillows, and throw blankets around the house. Bedding specifically can accumulate dust mites and other nasty particulates very easily, so when you wash and change your sheets and blankets, take some time to also clean and deodorize your mattress and pillows before replacing any and all covers. If you’re interested, there are also many varieties of dust-proof and hypo-allergenic sheets and bedding on the market for you to consider switching to to better manage your allergies as you sleep.
7. Keep Windows & Doors Sealed
The urge to open up the windows around your home to let in fresh air as the weather warms up can actually cause more harm than good for those with allergies. Unfortunately, by flushing the stale winter air from your home through open windows, you are opening your home to pollen and dander from the outside. Those lovely cool breezes through the windows can also stir and kick up the dust around your home and carry it all throughout your home. Rather than opening up the windows and doors to bring in pollenated air, switch on your AC and make sure the filters around your home are clean. This way you’ll be able to circulate fresh air and also remove airborne particulates at the same time.
8. Wash Your Hands & Face
You may already notice that your allergies have started to become more and more of a problem and you find yourself struggling with the classic symptoms of runny nose and eyes. With every wipe of the nose and eyes, you may actually be making your situation worse. To best keep your symptoms under control and skin clear of allergens, remember to regularly wash your face and hands. Our hands can transfer those problematic particles easily to our faces and the rest of our body so the best solution to this is the most obvious. Wash your hands frequently and remember to keep your hands away from your face so that you don’t add to your already sensitive sinuses.
9. Invest in an Air Purifier
If you’re waking up congested and find that your symptoms never improve, but you might want to take things to the next level with an air purifier. The right purifier can make a substantial difference in the air quality around your home. When you’re looking for a good air purifier, check for a high “Clean Air Delivery Rate” or CADR. A HEPA filter is a must for air purifiers as they been around since the 50s and have been shown to trap those annoying microscopic allergens. You should also make sure you purchase a device that can handle the size of the room you’ll be using it in. All you have to do is turn the device on and leave it to do its thing.
10. Keep Furry Friends Groomed
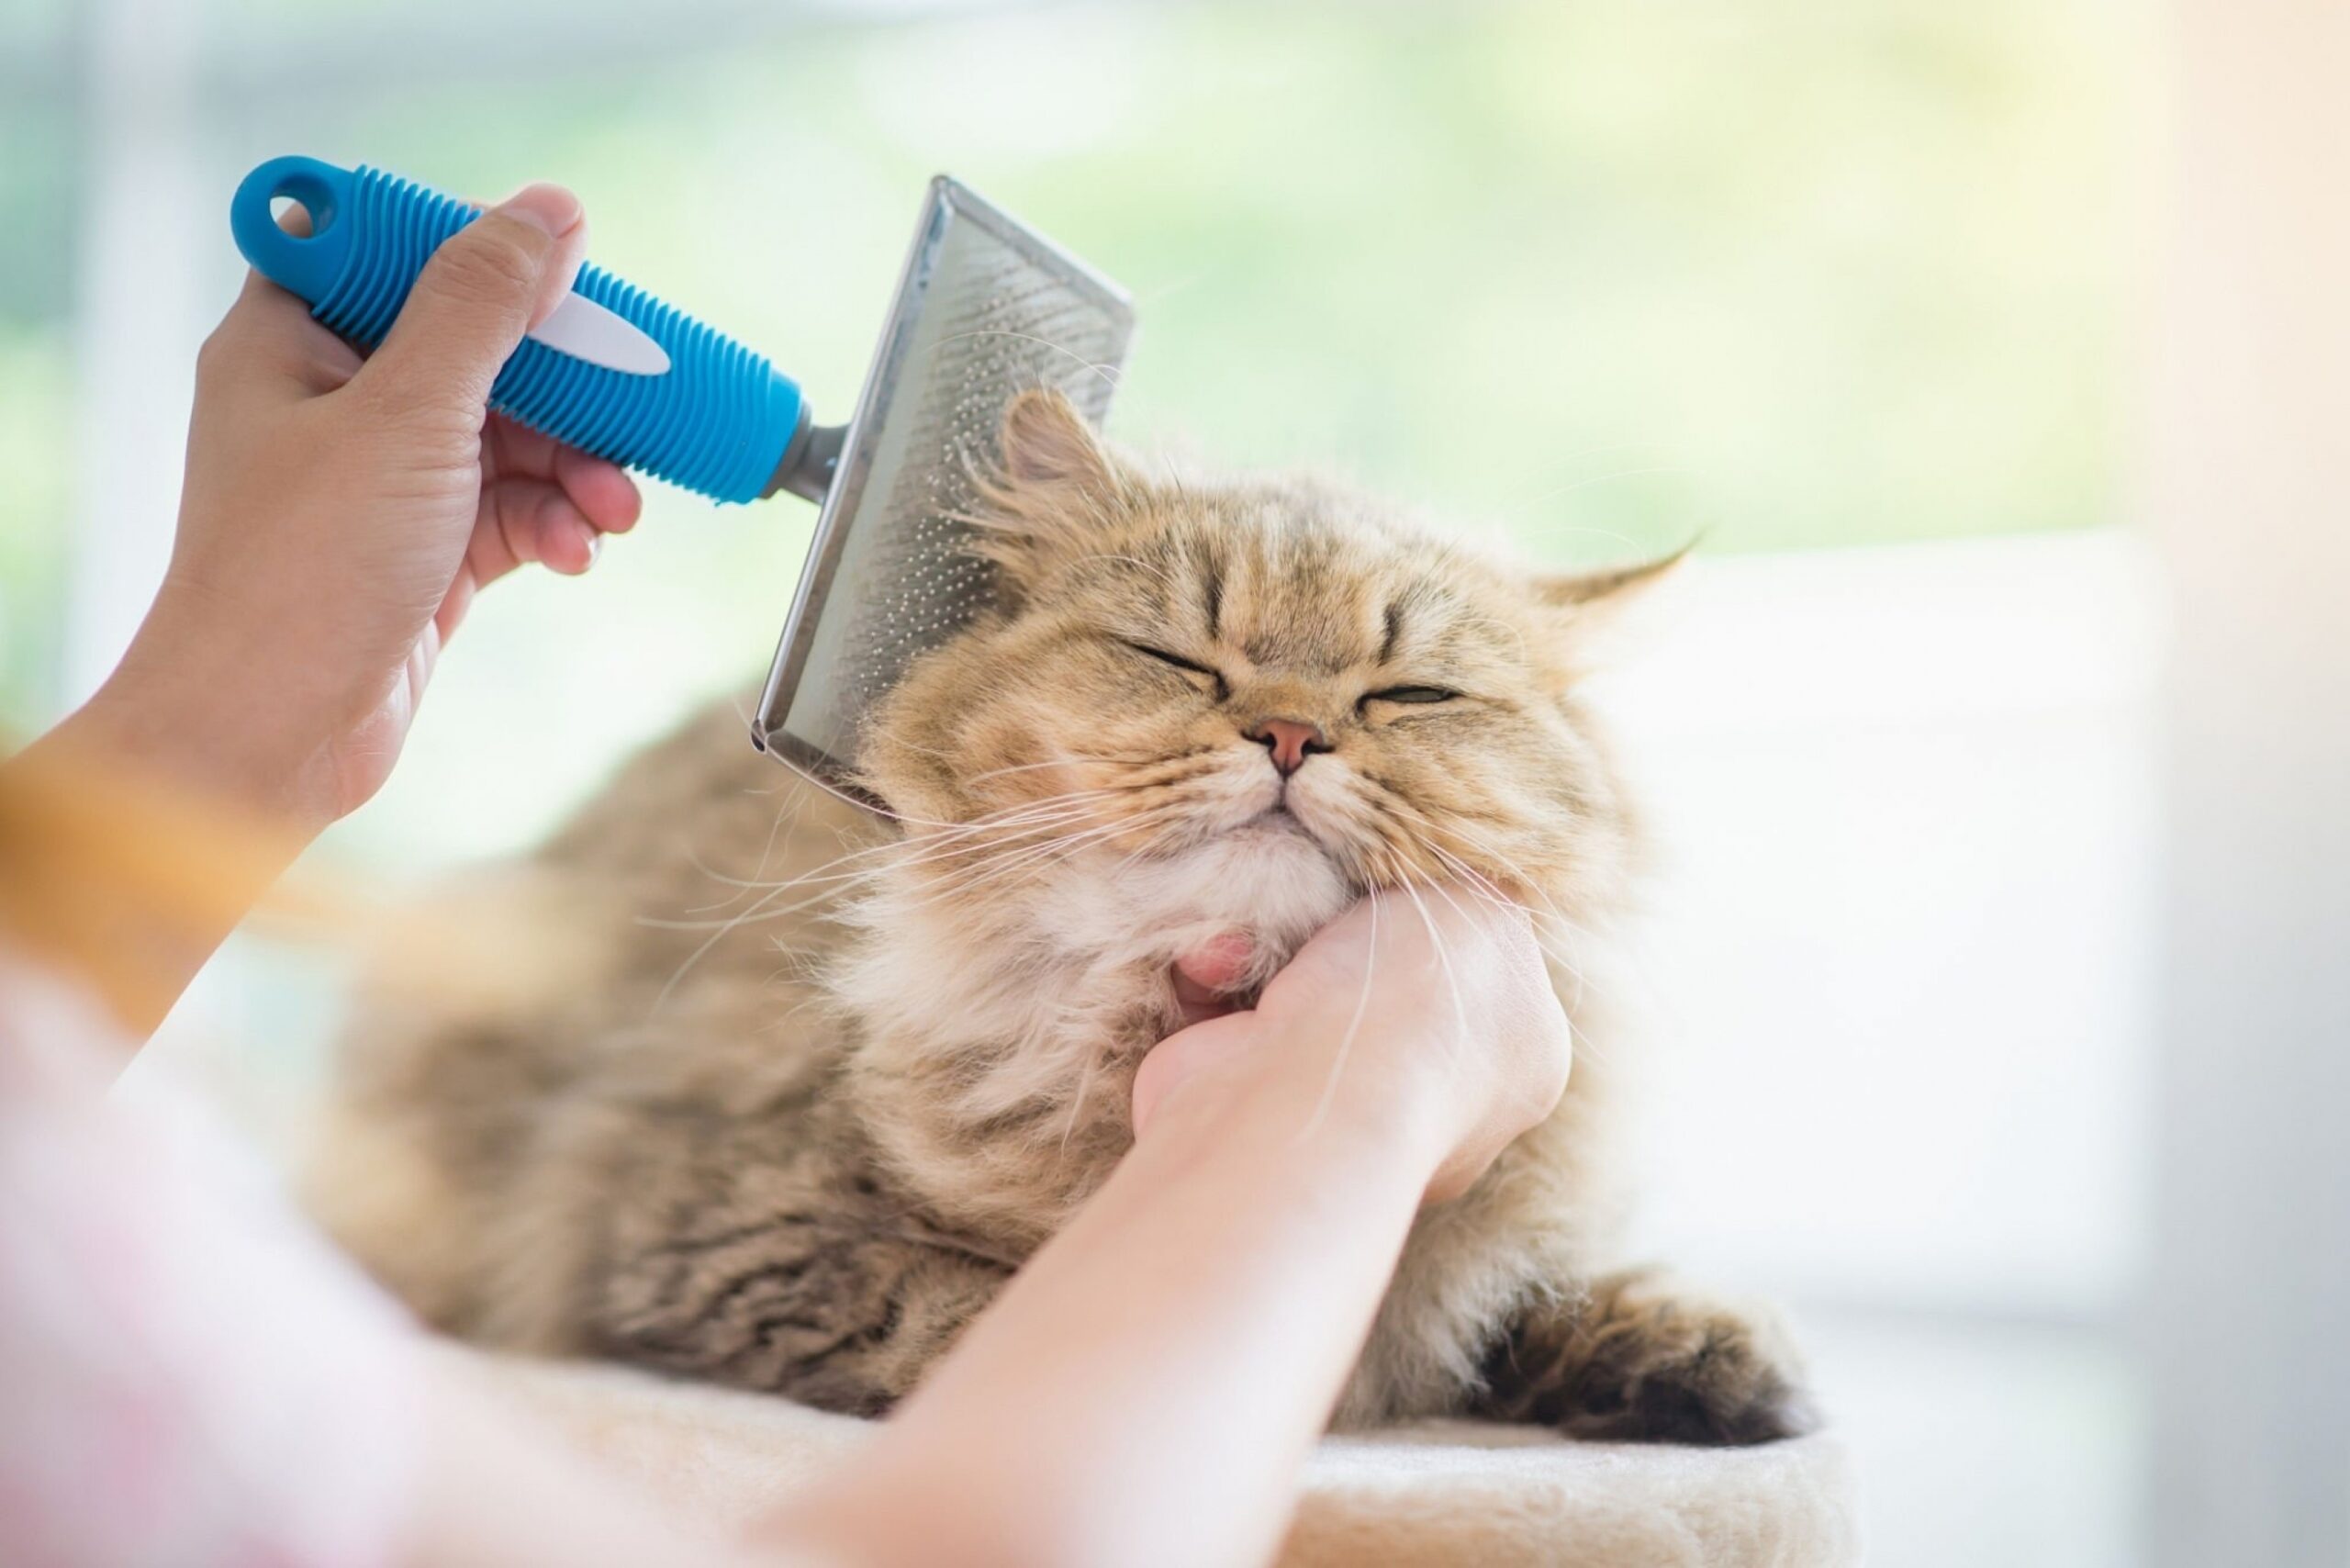
Our pets are beloved members of our family, and they love getting some fresh outdoor air just as much as we do. The only issue is that they always seem to be magnets for dander and pollen to catch onto and accumulate. The best and only way to keep our furry friends from bringing in their collection of allergy inducing particles is by keeping them clean. Regularly grooming and brushing our pets is one of the most effective ways to keep the dander and pollen they collect and produce under control. There are even a variety of dander reducing shampoos and sprays that you can use to keep your pets from making your allergies worse.
11. Manage the Humidity Within the Home
Turns out hot and humid homes can be breeding grounds for dust mites and mold. Both of these can add to and worsen your allergies and symptoms. To keep you home as free from these harmful particulates as possible, try to maintain your home’s temperature between 68° F and 72° F. You should also keep the relative humidity within your home no higher than 50% in order to keep mold from forming around the house.
12. Clean & Dust Curtains & Blinds
Many of us can forget that curtains and horizontal blinds need just as much attention when cleaning as the rest of our home. In fact, because they are so close to the windows, they can accumulate dust and pollen particles more easily than other surface around your home. If you struggle to keep up with dusting your horizontal blinds, consider replacing them with washable roller-type shades. You may also want to look into switching to washable curtains made of plain cotton or synthetic fabric rather than your regular upholstery curtains and trim.
Leave your tips and suggestions for reducing allergens in the comments below, we love hearing from you! For more tips and trick for keeping your home clean, and to find out how our friendly cleaner can help, check out cleanzen.com/denver.
The post 12 Ways to Combat Allergens Around Your Home appeared first on Cleanzen.
from Cleanzen https://cleanzen.com/blog/reduce-allergens-in-home/
via IFTTTfrom Cleanzen Cleaning Services https://cleanzencleaningservices0.blogspot.com/2023/04/12-ways-to-combat-allergens-around-your.html
via IFTTTfrom Gabriela Bragg https://gabrielabragg.blogspot.com/2023/04/12-ways-to-combat-allergens-around-your.html
via IFTTT -
How to Properly Clean Your Kitchen Sponge
Sponges are a key utensil that nearly everyone has in their kitchen. They do the job of cleaning our dishes and wiping up any assortment of messes around the kitchen. But did you know that the thing that does the cleaning also needs to be cleaned?
Doing the dishes with the same dirty old sponge you toss in your sink between uses can actually do more harm than good. Below, we’ve compiled a few of our go-to methods for both keeping your kitchen sponge clean and killing the bacteria within it. Keep reading to find out just how easy the process can be.
Why Should You Clean Your Kitchen Sponge?
Kitchen sponges, while meant to clean, require fairly frequent cleaning themselves. But why is that? The pores within sponges can very easily trap and hold onto moisture and food debris, and this can breed bacteria and germs. Sponges require regular cleaning and disinfecting in order to kill the bacteria that can grow within them. Without cleaning them, when you use your kitchen sponge to clean your dishes and countertops and stove, you are spreading the bacteria and germs within the sponge. So how do you keep those cleaning utensils clean?
The Best Ways to Clean a Sponge
Below you’ll find a handful of methods you can pick and choose from to keep your kitchen sponge clean and sanitized between uses. Keep reading and try them for yourself to see what works in your home.
1. Vinegar
One of the best and most effective ways to clean and disinfect your kitchen sponge is by using household white vinegar. This method is super simple but effective! Here’s what to do:
- Fill a bowl with undiluted distilled white vinegar and then submerge your kitchen sponge in the bowl.
- Allow your kitchen sponge to soak in the vinegar for 5 to 10 minutes to clean, disinfect, and deodorize.
- Once your sponge has been left to soak, remove it from the vinegar then rinse it under hot water and wring it out. Leave it to dry for a few hours before using it again around your kitchen.
2. Bleach
If you’re looking for a more heavy-duty method for cleaning and disinfecting, bleach is the key. This is the best way to kill mold, bacteria, and mildew hiding in your sponge. Here’s how to create and use a bleach solution to clean your sponge:
- In a bowl, mix together 1 quart of hot water and ½ a teaspoon of bleach.
- Submerge your kitchen sponge in the solution, and allow it to soak for 5 to 10 minutes. This will allow the bleach time to disinfect and kill bacteria within the sponge.
- After the sponge has had time to soak, remove it and rinse it under hot water. Wring it out and allow it to fully dry before using it again.
Note: Vinegar and bleach both have very strong and pungent odors. Please make sure that when you use either of these methods that you do so in a well-ventilated area and protect your airways during the cleaning process.
3. Microwave
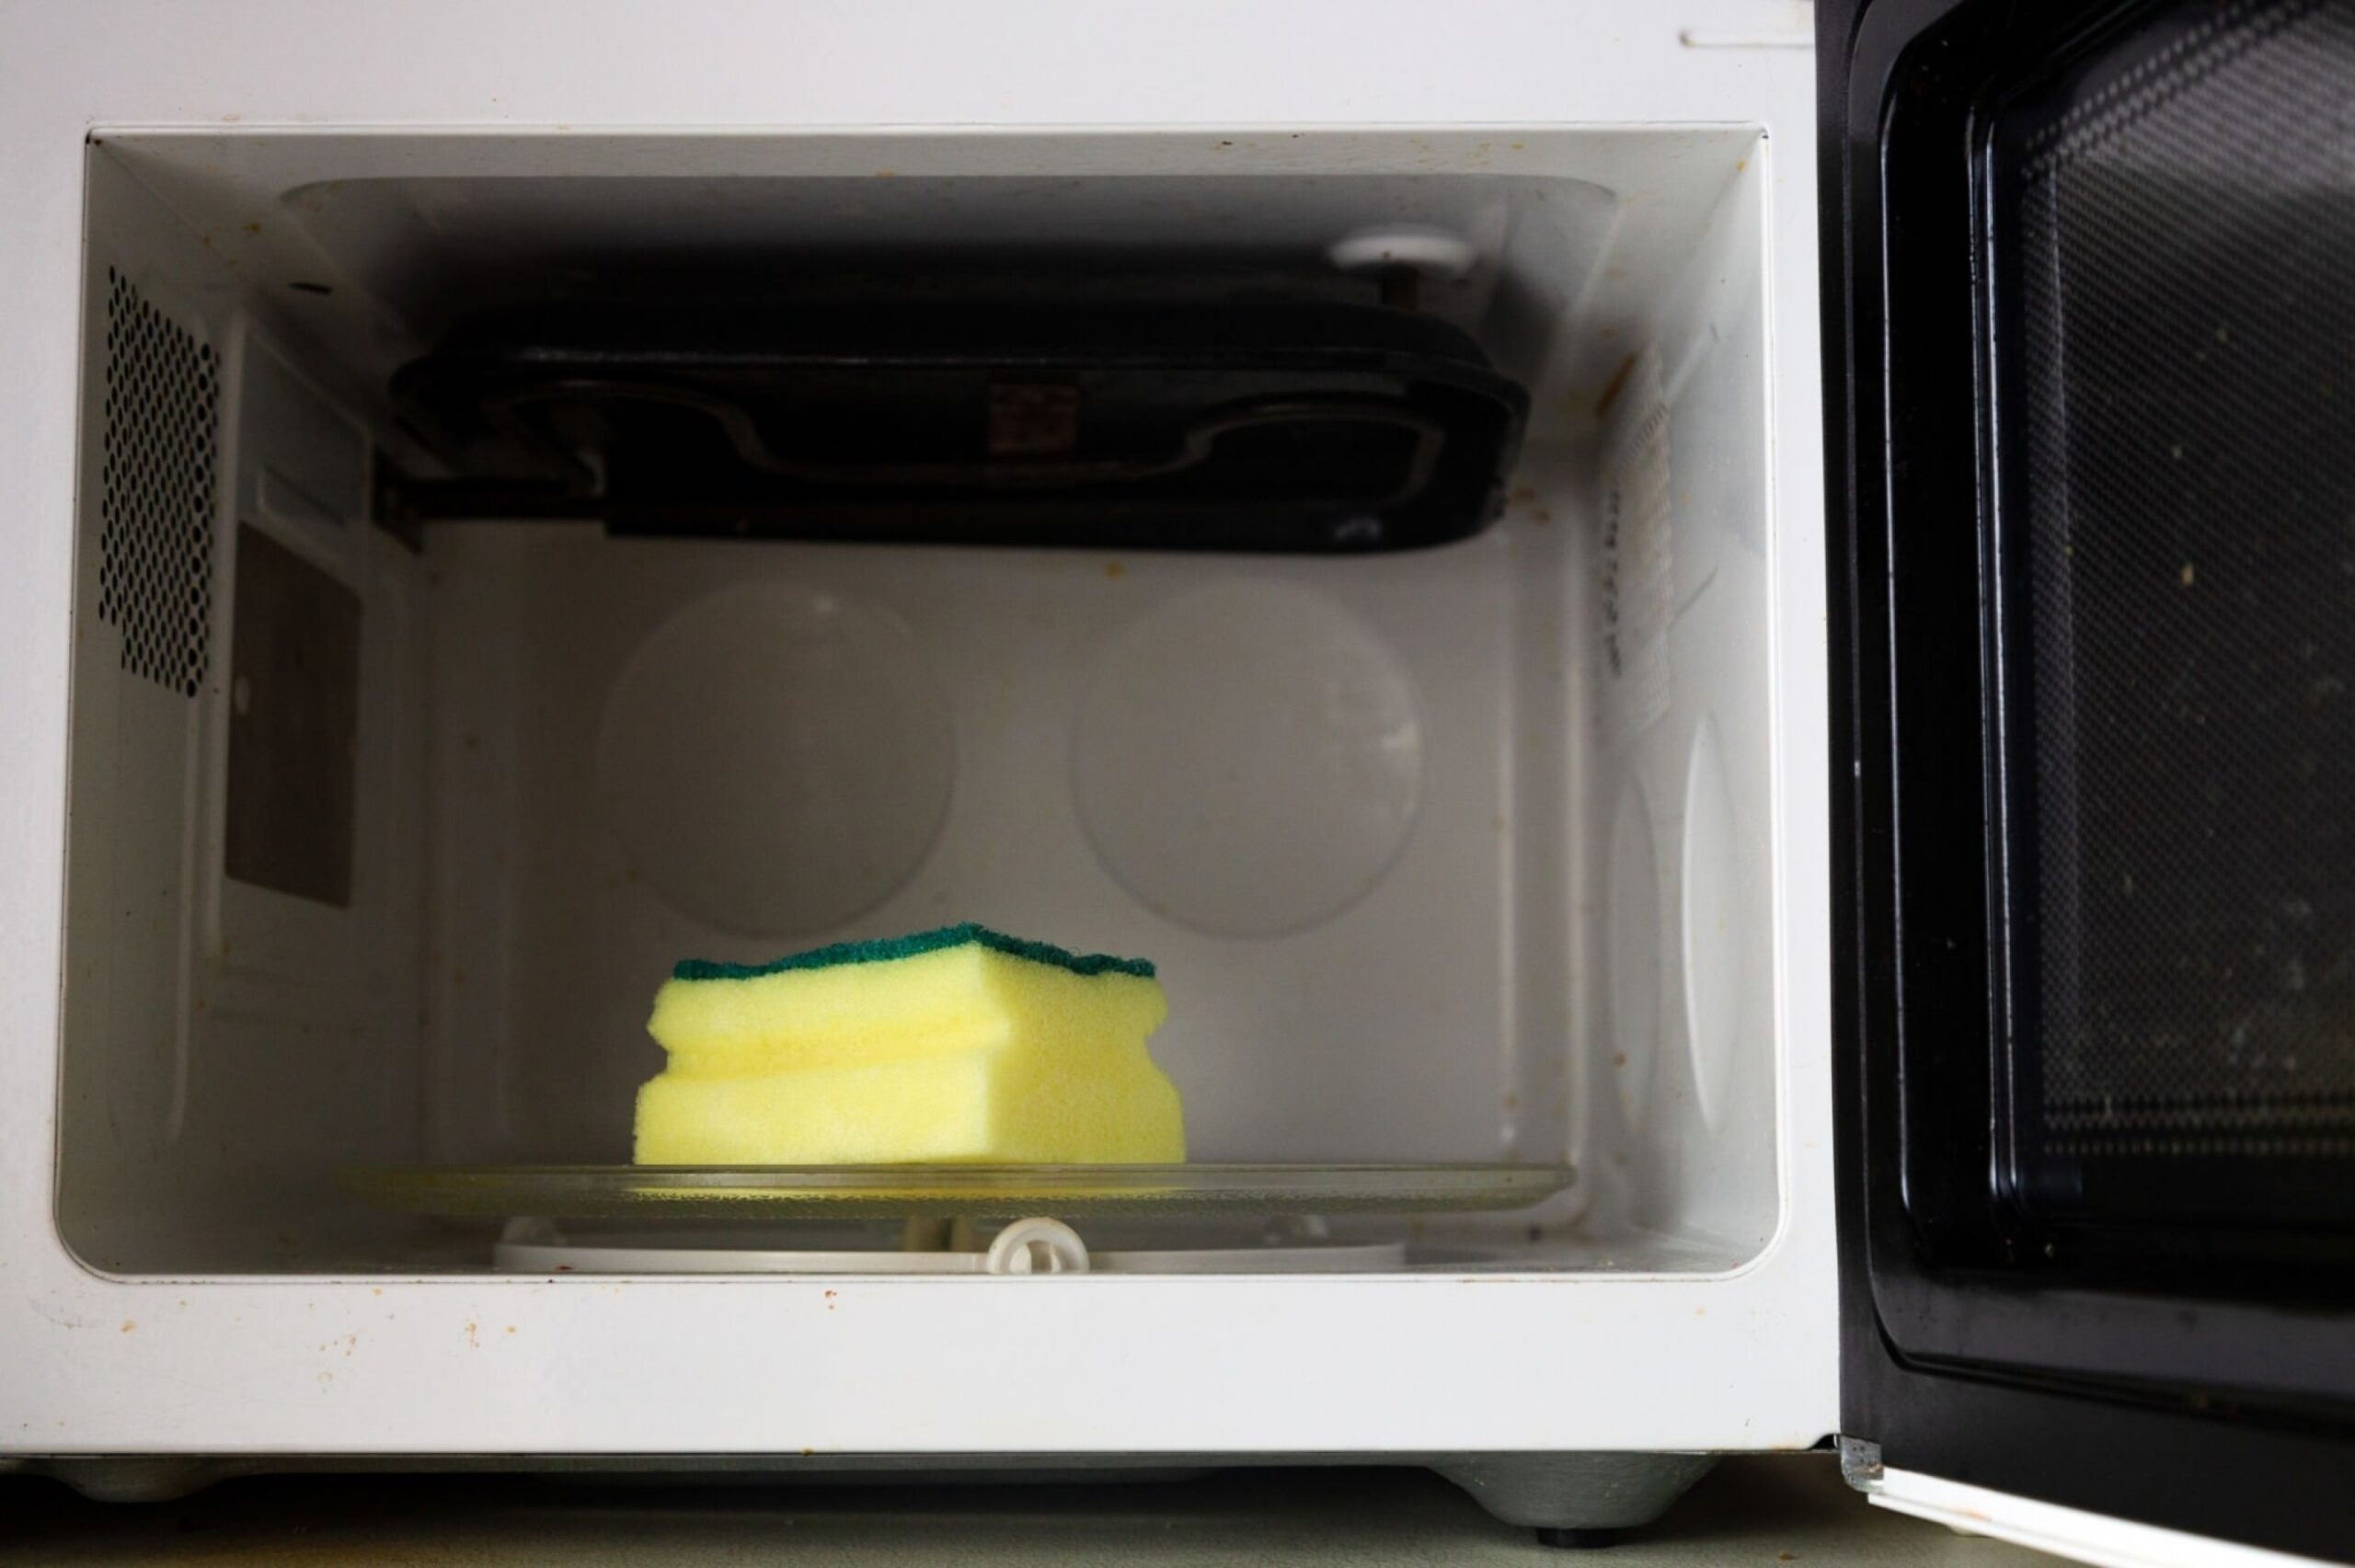
When you want to clean and disinfect your kitchen sponge, but maybe want to skip the chemicals in the process, turn to your microwave. Heat alone can kill more bacteria than you might think, so here’s how to do it:
- Thoroughly and completely soak your kitchen sponge in warm water. Never put a dry sponge in the microwave, this is an easy way to start a fire!
- Place the wet sponge either on a plate, or in another shallow container with a small amount of water.
- Set your microwave timer for 5 minutes and start microwaving the sponge.
- Once the microwave has finished, take the sponge out and allow it to cool for 10 to 15 minutes.
- Once cool, wring out your sponge and allow it to dry before putting it to use again.
4. Dishwasher
Another kitchen appliance you can use to make sure you sponge is deep cleaned and sanitized is your dish washer. This is probably the most hands-off method of cleaning, so here’s how to put it to use:
- Before you start your next dishwashing load, place your kitchen sponge on the top rack of the dishwasher.
- Set your dishwasher to a long hot water cleaning cycle followed by a high-heat drying cycle.
- After the drying cycle has finished, open up the dishwasher and allow everything to cool, including the sponge. Once cool, make sure the sponge is completely dry before starting to use it around your kitchen again.
5. Boiling Water
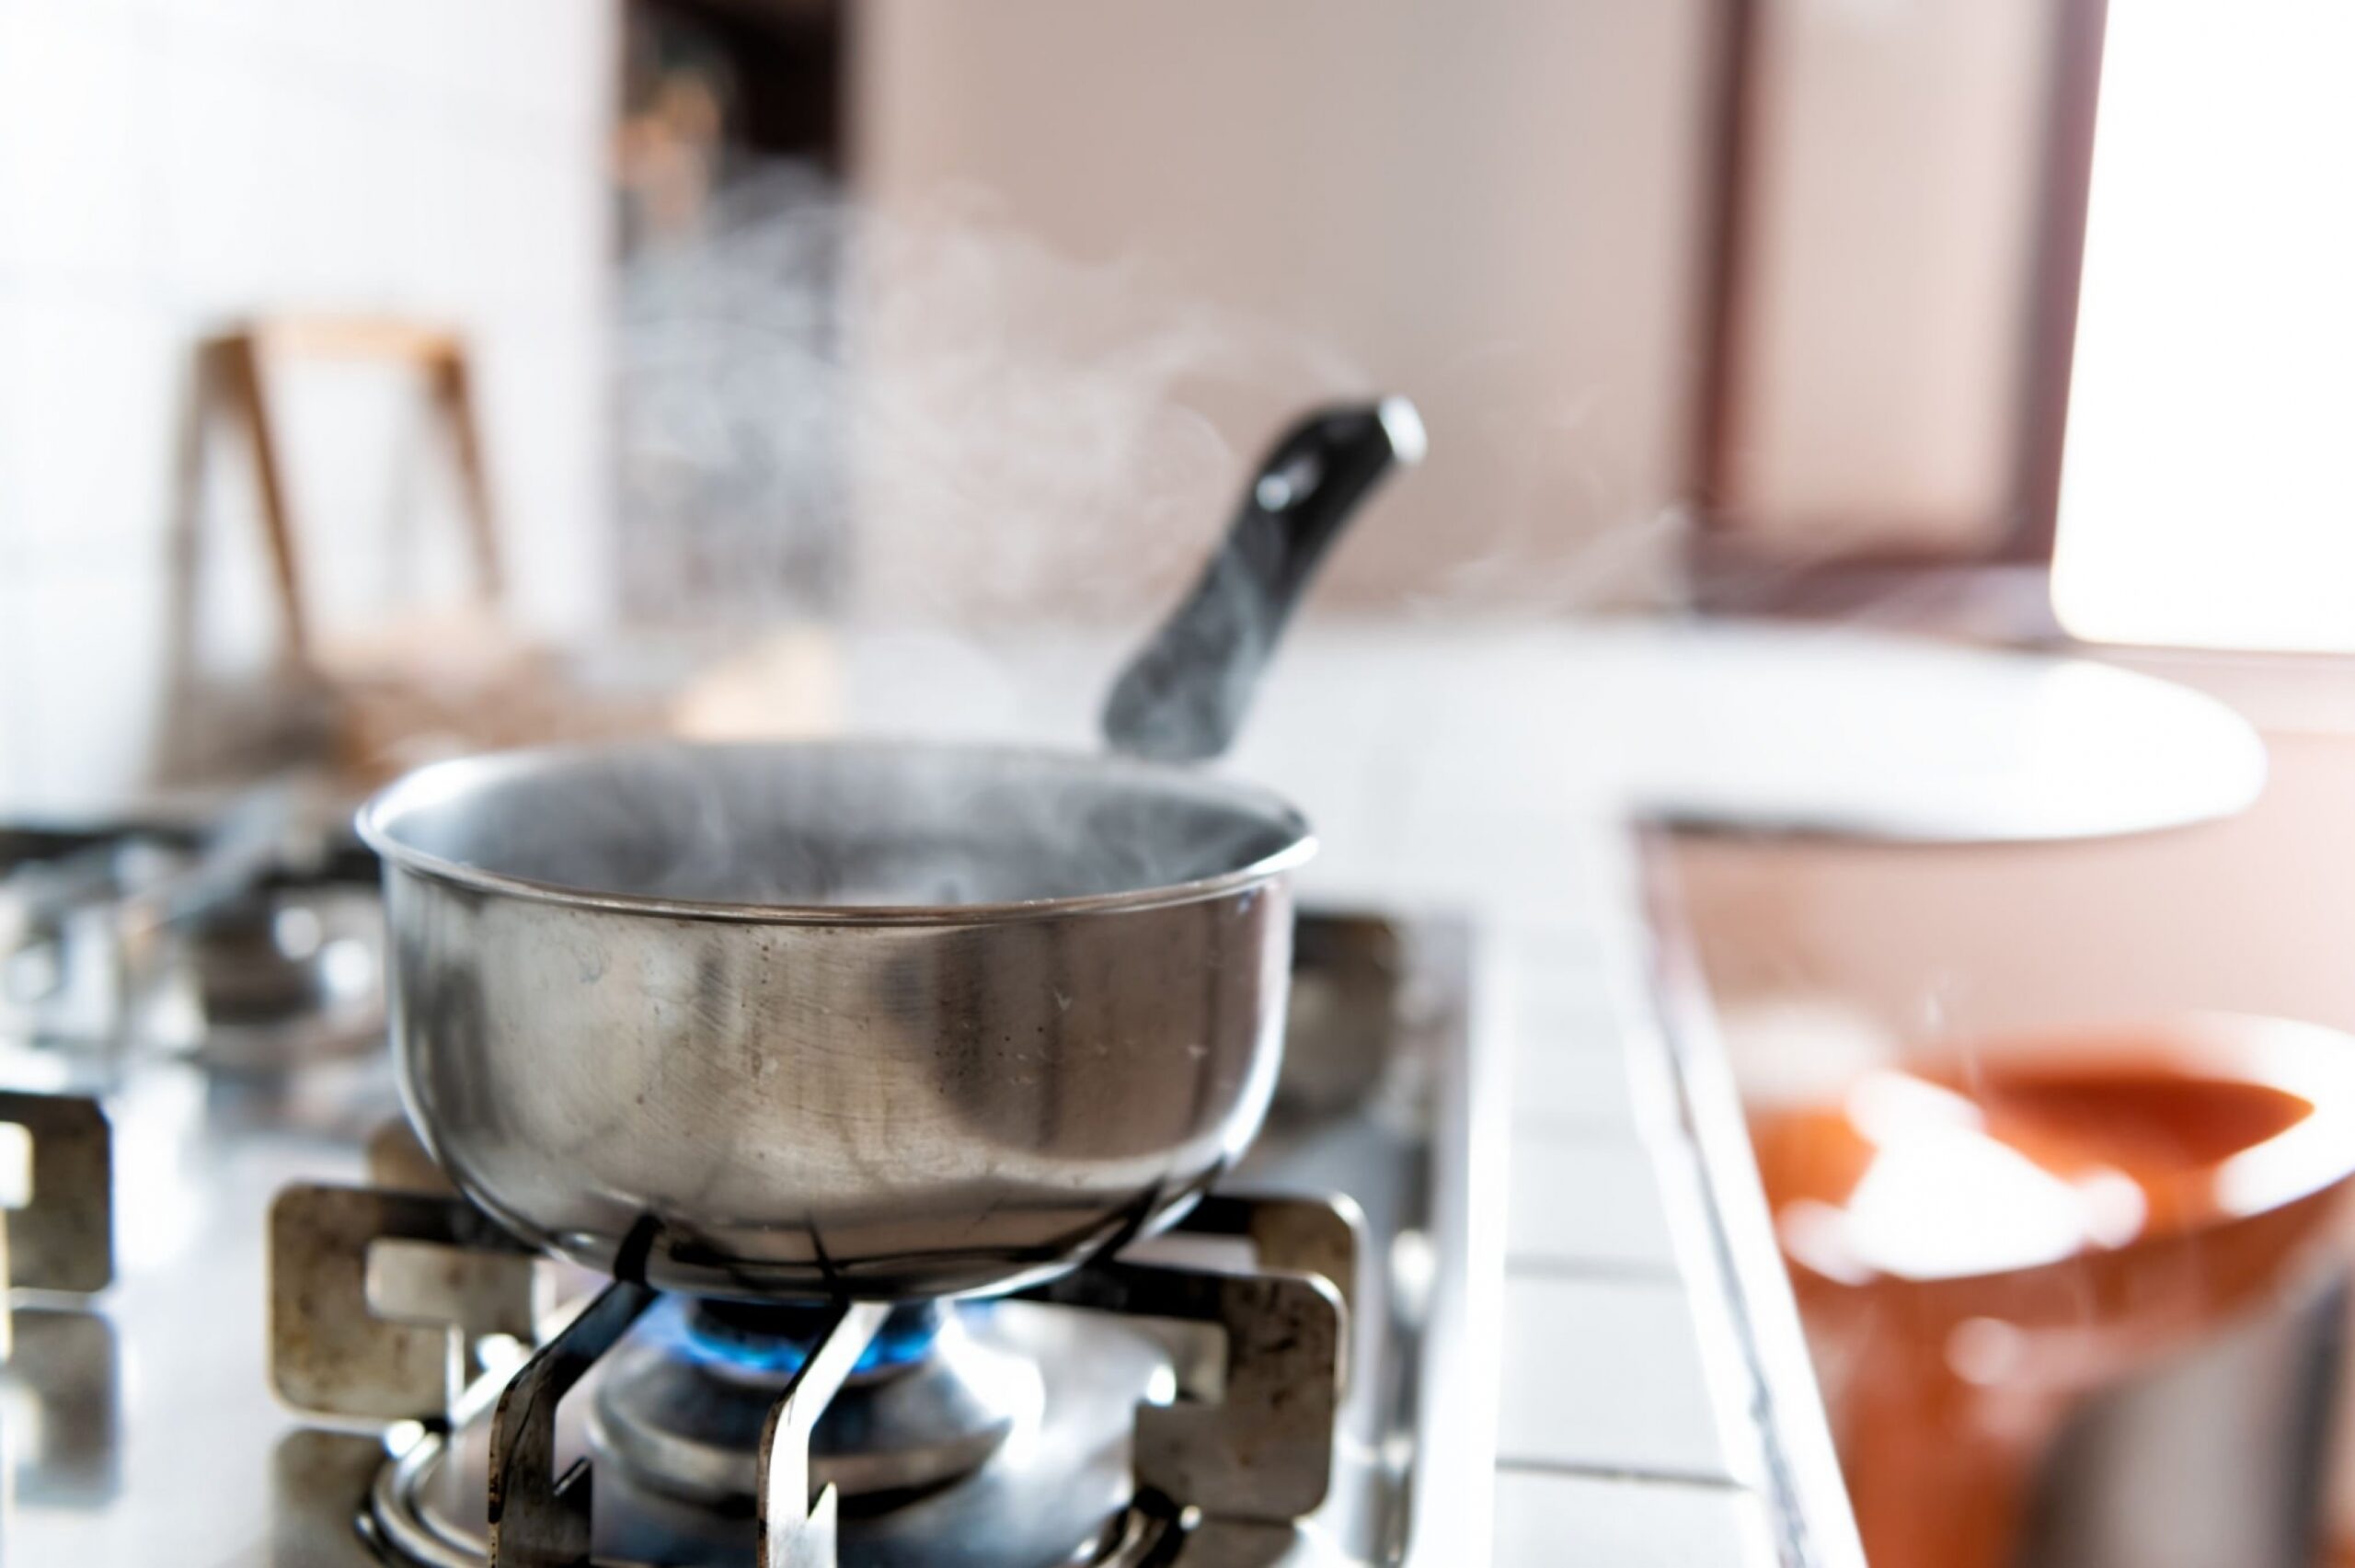
Need to clean and sanitize your kitchen sponge in a pinch? Here’s the easiest way to keep your sponge clean and sanitized for regular use:
- Fill a pot with water and set it on the stove to boil.
- Once the water has started to boil, place your sponge in the pot and allow it to boil with the water for about 5 minutes.
- After you’ve allowed the sponge to heat up and boil in the water, turn off your stove’s burner and give the water time to cool.
- When both the water and the sponge have cooled, take the sponge out of the water and wring it out. Allow the sponge to fully dry before using it again.
Tips & Tricks
No matter what method you decide to use to clean and disinfect your kitchen sponge, there are a few other things to keep in mind. Here’s what you should remember:
- Kitchen sponges should be cleaned at least once a week and sanitized almost everyday, but they should also be replaced monthly when used regularly.
- If your sponge has a metallic abrasive, do not place it in the microwave to clean or sanitize it. This can and will cause a fire within the microwave.
- When using your sponge, try to avoid cleaning anything except your dishes with it. Using it around the kitchen as more than a dishwashing utensil can actually spread more germs and bacteria around the room. Instead of using your kitchen sponge to clean up and catch messes around the house, we highly recommend having a few spare microfiber cloths among your arsenal of cleaning supplies.
FAQs
How often should a sponge be cleaned and disinfected?
Kitchen sponges should be cleaned and disinfected at least once every week in order to decrease and even stop the spread of germs and bacteria around the kitchen.
How do you prolong the life of a sponge?
You can easily prolong the life of your sponges by storing them properly and allowing them to fully air dry above and away from your sink and also make sure that you are keeping your sponge clean and sanitized between uses.
Can you reuse kitchen sponges?
You can clean, sanitize, and reuse your kitchen sponge for several weeks before replacing it. Once your kitchen sponge has reached its limit after 2 or 3 weeks of use, it is time to replace it.
Are there alternatives to a sponge?
Scrubbers made of materials like bamboo and silicon are very common and well-loved sponge alternatives. Many also swear by Swedish dishcloths and wooden dish brushes.
Remember that even with regular cleaning, you’ll still need to replace that grubby old sponge after a few weeks. When you keep up with the cleaning around your kitchen, you’ll be on your way to a healthier and happier home. Do you have any other tips and tricks to share when it comes to keeping your kitchen clean? Leave a comment below and tell everyone about it! We love hearing your stories and sharing them with others.
If you’re looking for some help around the house, we’ve got you covered. We’re proud to offer a variety of services for homes of every size. We even offer apartment cleaning services in Chicago so you know we’ll be able to help any home. Contact us today to find out exactly how we can help you keep your home looking its very best.
The post How to Properly Clean Your Kitchen Sponge appeared first on Cleanzen.
from Cleanzen https://cleanzen.com/blog/how-to-clean-kitchen-sponge/
via IFTTTfrom Cleanzen Cleaning Services https://cleanzencleaningservices0.blogspot.com/2023/04/how-to-properly-clean-your-kitchen.html
via IFTTTfrom Gabriela Bragg https://gabrielabragg.blogspot.com/2023/04/how-to-properly-clean-your-kitchen.html
via IFTTT -
Making Cleaning Eco-Friendly with Vinegar
Many cleaning products on the market right now are super effective against germs and bacteria but aren’t considered to be eco-friendly. Why sacrifice having a clean and germ-free home when you can’t use a product that is safe to use around your kids and pets? The answer is, you don’t have to, because there is already a super effective and safe product within your pantry: distilled white vinegar. If you’re wondering just what this product can do for you and your home, allow us to give you a few examples.
Why Clean with Vinegar?
White vinegar is an effective and powerful natural cleaner, degreaser, and even disinfectant. If you’re wondering how this super common household product could possibly be any kind of “miracle cleaner”, then sit tight because it’s time for some science. Vinegar is made from about 4-5% acetic acid, otherwise called ethanoic acid. Acetic acid is produced both naturally, by bacteria found in both food and water, as well as synthetically, like what is found in vinegar.
The acetic acid in vinegar is what gives it that pungent smell and makes it such an effective cleaning product. It can break down and dissolve most dirt, oil, grease, and grime. In fact, we recommend cleaning with vinegar to almost all of our clients. It works best for general household cleaning purposes on surfaces that can handle acidic products, so make sure you test small areas before cleaning if you aren’t sure.
Using Vinegar Around the House
Below, you’ll find a list of ways you can start to implement vinegar into your regular cleaning and disinfecting schedule. Plus, we’ll even explain what makes vinegar so effective and remind you why it’s such an incredible cleaning product to have on hand at all times. If you’re curious to see how you can start using vinegar around your home, keep reading!
1. Mop Linoleum & Tile Floors
When cleaning up around the house, you can never forget the floors. If you’re looking to clean and freshen up your floors in a more eco-friendly way, you can create a highly effective solution of a gallon of water and about ½ cup of white vinegar. Just keep in mind that this particular mix should only be used on ceramic tile and no-wax linoleum flooring, not wood or natural stone.
2. Leave Windows & Mirrors Streak-Free

Streaky windows and mirrors can be the bane of our existence, this is almost a universal experience. Fortunately, we have just the solution to this problem. You can mix together a 2-to-1 solution of white vinegar and water to make the ultimate glass cleaner. You can also add a couple of drops of dish soap for extra cleaning power and a streak-free finish every time.
3. Clean & Deodorize Refrigerators
When it comes time to clean out your refrigerator and toss all those forgotten leftovers that got pushed to the very back, remember to be thorough. Use some vinegar when cleaning shelves and drawers and wiping up spills. You can even sprinkle a bit of baking soda to really scrub and deodorize while you clean. Vinegar is far safer to use around any food whether open or contained than most chemical cleaning products.
4. Freshen Dishwashers
Dishwashers can become overridden with musty odors after a while, especially if the filter hasn’t been cleaned out for a while. It happens to the best of us, so of course we have a solution for you. Simply add a cup of vinegar to the bottom of your dishwasher and run a regular cleaning cycle. The vinegar can double as a cleaner and a deodorizer to leave your dishwasher fresh and ready for another round.
5. Create an Eco-Friendly Air Freshener
Looking for a more natural and safe alternative to chemical air fresheners? We’ve got you covered. Mix half a teaspoon of vinegar with distilled water, plus a few drops of your favorite essential oil, in a spray bottle. Our favorite essential oils are lemon, eucalyptus, or tea tree but every home is different so tell us what kind of blends you come up with in the comments!
6. Clean & Disinfect Showers & Tubs

Tubs and showers tend to catch and hold soap scum and hard water stains, plus they always need regular cleaning and disinfecting. To combat those pesky stains you can mix together water and vinegar, and maybe add a few drops of dish soap. Spray or wipe that mixture on the walls of your shower or tub and leave it to work for about 15 minutes then clean it away for a fresh start.
7. Descale Faucets & Showerheads
Sink faucets and showerheads can become clogged and lose their pressure over time thanks to mineral deposits and hard water build-up. You can fix this by adding some white vinegar into a plastic bag and then securing it with a rubber band. Be sure to add enough vinegar to cover the bottom of the faucet or showerhead completely. Leave the bag on for a few hours or overnight, then remove it and let the water run.
8. Disinfect & Deodorize Mattresses
If you’ve noticed a strange smell or a random stain on your mattress while changing the sheets, we have just the fix. Just mix vinegar, a little rubbing alcohol, and some tea tree essential oil in a spray bottle and spritz this on your mattress. This solution helps combat dust mites, mildew, and general odors. If you find your mattress needs some deeper deodorizing, sprinkle some baking soda on top of the spray. Let the spray settle and dry, and then vacuum the mattress surface.
9. Descale Coffee Makers & Kettles
If you’re anything like us, you can barely function without your daily caffeine fix. The only problem is the state of your coffee maker, when was the last time you cleaned that? The solution? Pour an even mix of water and vinegar directly into the kettle and run it through the coffee maker or simply boil the water in the kettle then rinse thoroughly with water. If you have an automatic coffee maker, you can run plain water through a few times to get the smell and taste of vinegar out..
10. Disinfect Countertops

Kitchen and bathroom countertops are high-traffic surfaces that require regular cleaning and disinfecting. When cleaning surfaces like kitchen counters, you need to make sure to use food-safe and eco-friendly cleaning products as using chemicals can risk contaminating future food preparations. Luckily, vinegar is the best solution to this particular problem as all you’ll need to do is dilute a spray bottle of vinegar with some water. You can use this specific mixture on most countertops, however, you should avoid using vinegar to clean marble and granite.
11. Clean & Degrease Cookware
Cooking mishaps happen to everyone and can leave even our most durable pots and pans with baked-on messes. The best course of action to save your cookware is with vinegar of course. Simply fill the offending cookware with a half-and-half solution of water and vinegar and then bring it to a boil on the stove. Allow this mix to boil for a few minutes before allowing it to cool and follow with a good scrub.
12. Clean & Disinfect Plastic Cutting Boards
If you’ve prepared any kind of raw meat within the last few days, hopefully, you did so on a plastic cutting board. Even if you haven’t been preparing meat, when was the last time you deep cleaned and disinfected your go-to cutting board? Take a moment to spray and wipe both sides thoroughly with an even mixture of vinegar and water and then wash the board before letting it air dry and putting it away.
13. Degreasing Ovens
Much like our beloved cookware, ovens and stovetops can accumulate grease and oil with regular use throughout the week. The best way to cut through this greasy grimey mess is, of course, with vinegar. Mix water and vinegar in a spray bottle and spray the solution around the surface of the cooktop. Give it 10 minutes to cut through all that stubborn grease and then wipe it away with some warm water and a sponge.
14. Boost & Deodorize Laundry
Our final tip to share is by far one of our favorites. Everyone loves the feeling of freshly washed and warm laundry, and it turns out vinegar is the key. Adding half a cup of vinegar to your next load can both preserve and brighten the colors of the laundry. You can also toss in a full cup of vinegar to a rinse cycle to be a more eco-friendly and effective fabric softener and static reducer. We’ve tried this and can promise that you’ll notice the difference and you’ll love the results!
15. Clear Cloudy Glasses

Glassware can develop a cloudy appearance with time, even after running them through the dishwasher. This is almost always due to hard water deposits, or frequent wine drinking (we don’t judge!), but it can be easily remedied with a little bit of white vinegar. All your cloudy glassware needs is a brief soak in a tub of vinegar followed by a quick wash and buff with a soft microfiber cloth.
What to Avoid When Cleaning with Vinegar
While vinegar can be an incredible cleaning product to have on hand, there are a few things you should keep in mind before going after your whole house:
- Vinegar can cause pitting on stainless steel, so we don’t recommend using it on kitchen knives or appliances without diluting it.
- You should also avoid using vinegar when cleaning marble, granite, and other natural stone countertops or floors because it can very easily damage the finish and or leave the surface looking dull or scratched.
- It’s also a good idea to avoid using vinegar to clean any electronic screens because it can damage the protective coating on devices and screens and make touch screens less effective.
- Be careful cleaning any wood countertops and or untreated or unfinished hardwood floors as undiluted vinegar can damage these beyond repair.
- As long as you keep these tips in mind, your home is well on its way to looking and smelling great.
FAQs
Will cleaning with vinegar leave a smell?
The bad news is that, yes, cleaning with vinegar can smell up your space, but the good news is that the smell of vinegar naturally dissipates after a few hours. In order to mask, or at least lessen the effects, of vinegar, we suggest both diluting it with water as well as adding a few drops of an essential oil like lemon or eucalyptus.
Can vinegar be used on all surfaces?
While safe to use on many surfaces to kill bacteria and clean, vinegar is not safe to use on natural stone, waxed wood, cast iron, or aluminum. This is because vinegar is about 5% acetic acid, which can harm some surfaces, so it is always recommended that you test it in an inconspicuous area before cleaning any surface.
How effective is vinegar against bacteria?
In most cases, vinegar does work as an effective disinfectant to some degree. However, it is not as effective against bacteria as bleach or other commercial cleaners. If you are looking to combat germs as effectively as possible, there may be other solutions you should try before reaching for vinegar.

We hope you were able to learn more about the natural and eco-friendly cleaning and disinfecting capabilities of vinegar. Even if you just picked up a few new tips and tricks for cleaning around the house. Was there anything you knew already and use in your home? What other cleaning tips and tricks using vinegar have you tried around your home and become obsessed with? Tell us all about it in the comments below, we love hearing from you!
If you’re looking for some extra time and attention to detail around your home, but don’t want to sacrifice the desire for eco-friendly products, we’ve got you covered! We’re proud to offer eco-friendly products and services as the best house cleaners in Philadelphia. If you’re curious, check out our website and see for yourself. Contact us today and find out how we can help you keep your home looking and feeling amazing!
The post Making Cleaning Eco-Friendly with Vinegar appeared first on Cleanzen.
from Cleanzen https://cleanzen.com/blog/cleaning-with-vinegar/
via IFTTTfrom Cleanzen Cleaning Services https://cleanzencleaningservices0.blogspot.com/2023/04/making-cleaning-eco-friendly-with.html
via IFTTTfrom Gabriela Bragg https://gabrielabragg.blogspot.com/2023/04/making-cleaning-eco-friendly-with.html
via IFTTT -
Making Cleaning Eco-Friendly with Vinegar
Many cleaning products on the market right now are super effective against germs and bacteria but aren’t considered to be eco-friendly. Why sacrifice having a clean and germ-free home when you can’t use a product that is safe to use around your kids and pets? The answer is, you don’t have to, because there is already a super effective and safe product within your pantry: distilled white vinegar. If you’re wondering just what this product can do for you and your home, allow us to give you a few examples.
Why Clean with Vinegar?
White vinegar is an effective and powerful natural cleaner, degreaser, and even disinfectant. If you’re wondering how this super common household product could possibly be any kind of “miracle cleaner”, then sit tight because it’s time for some science. Vinegar is made from about 4-5% acetic acid, otherwise called ethanoic acid. Acetic acid is produced both naturally, by bacteria found in both food and water, as well as synthetically, like what is found in vinegar.
The acetic acid in vinegar is what gives it that pungent smell and makes it such an effective cleaning product. It can break down and dissolve most dirt, oil, grease, and grime. In fact, we recommend cleaning with vinegar to almost all of our clients. It works best for general household cleaning purposes on surfaces that can handle acidic products, so make sure you test small areas before cleaning if you aren’t sure.
Using Vinegar Around the House
Below, you’ll find a list of ways you can start to implement vinegar into your regular cleaning and disinfecting schedule. Plus, we’ll even explain what makes vinegar so effective and remind you why it’s such an incredible cleaning product to have on hand at all times. If you’re curious to see how you can start using vinegar around your home, keep reading!
1. Mop Linoleum & Tile Floors
When cleaning up around the house, you can never forget the floors. If you’re looking to clean and freshen up your floors in a more eco-friendly way, you can create a highly effective solution of a gallon of water and about ½ cup of white vinegar. Just keep in mind that this particular mix should only be used on ceramic tile and no-wax linoleum flooring, not wood or natural stone.
2. Leave Windows & Mirrors Streak-Free
Streaky windows and mirrors can be the bane of our existence, this is almost a universal experience. Fortunately, we have just the solution to this problem. You can mix together a 2-to-1 solution of white vinegar and water to make the ultimate glass cleaner. You can also add a couple of drops of dish soap for extra cleaning power and a streak-free finish every time.
3. Clean & Deodorize Refrigerators
When it comes time to clean out your refrigerator and toss all those forgotten leftovers that got pushed to the very back, remember to be thorough. Use some vinegar when cleaning shelves and drawers and wiping up spills. You can even sprinkle a bit of baking soda to really scrub and deodorize while you clean. Vinegar is far safer to use around any food whether open or contained than most chemical cleaning products.
4. Freshen Dishwashers
Dishwashers can become overridden with musty odors after a while, especially if the filter hasn’t been cleaned out for a while. It happens to the best of us, so of course we have a solution for you. Simply add a cup of vinegar to the bottom of your dishwasher and run a regular cleaning cycle. The vinegar can double as a cleaner and a deodorizer to leave your dishwasher fresh and ready for another round.
5. Create an Eco-Friendly Air Freshener
Looking for a more natural and safe alternative to chemical air fresheners? We’ve got you covered. Mix half a teaspoon of vinegar with distilled water, plus a few drops of your favorite essential oil, in a spray bottle. Our favorite essential oils are lemon, eucalyptus, or tea tree but every home is different so tell us what kind of blends you come up with in the comments!
6. Clean & Disinfect Showers & Tubs
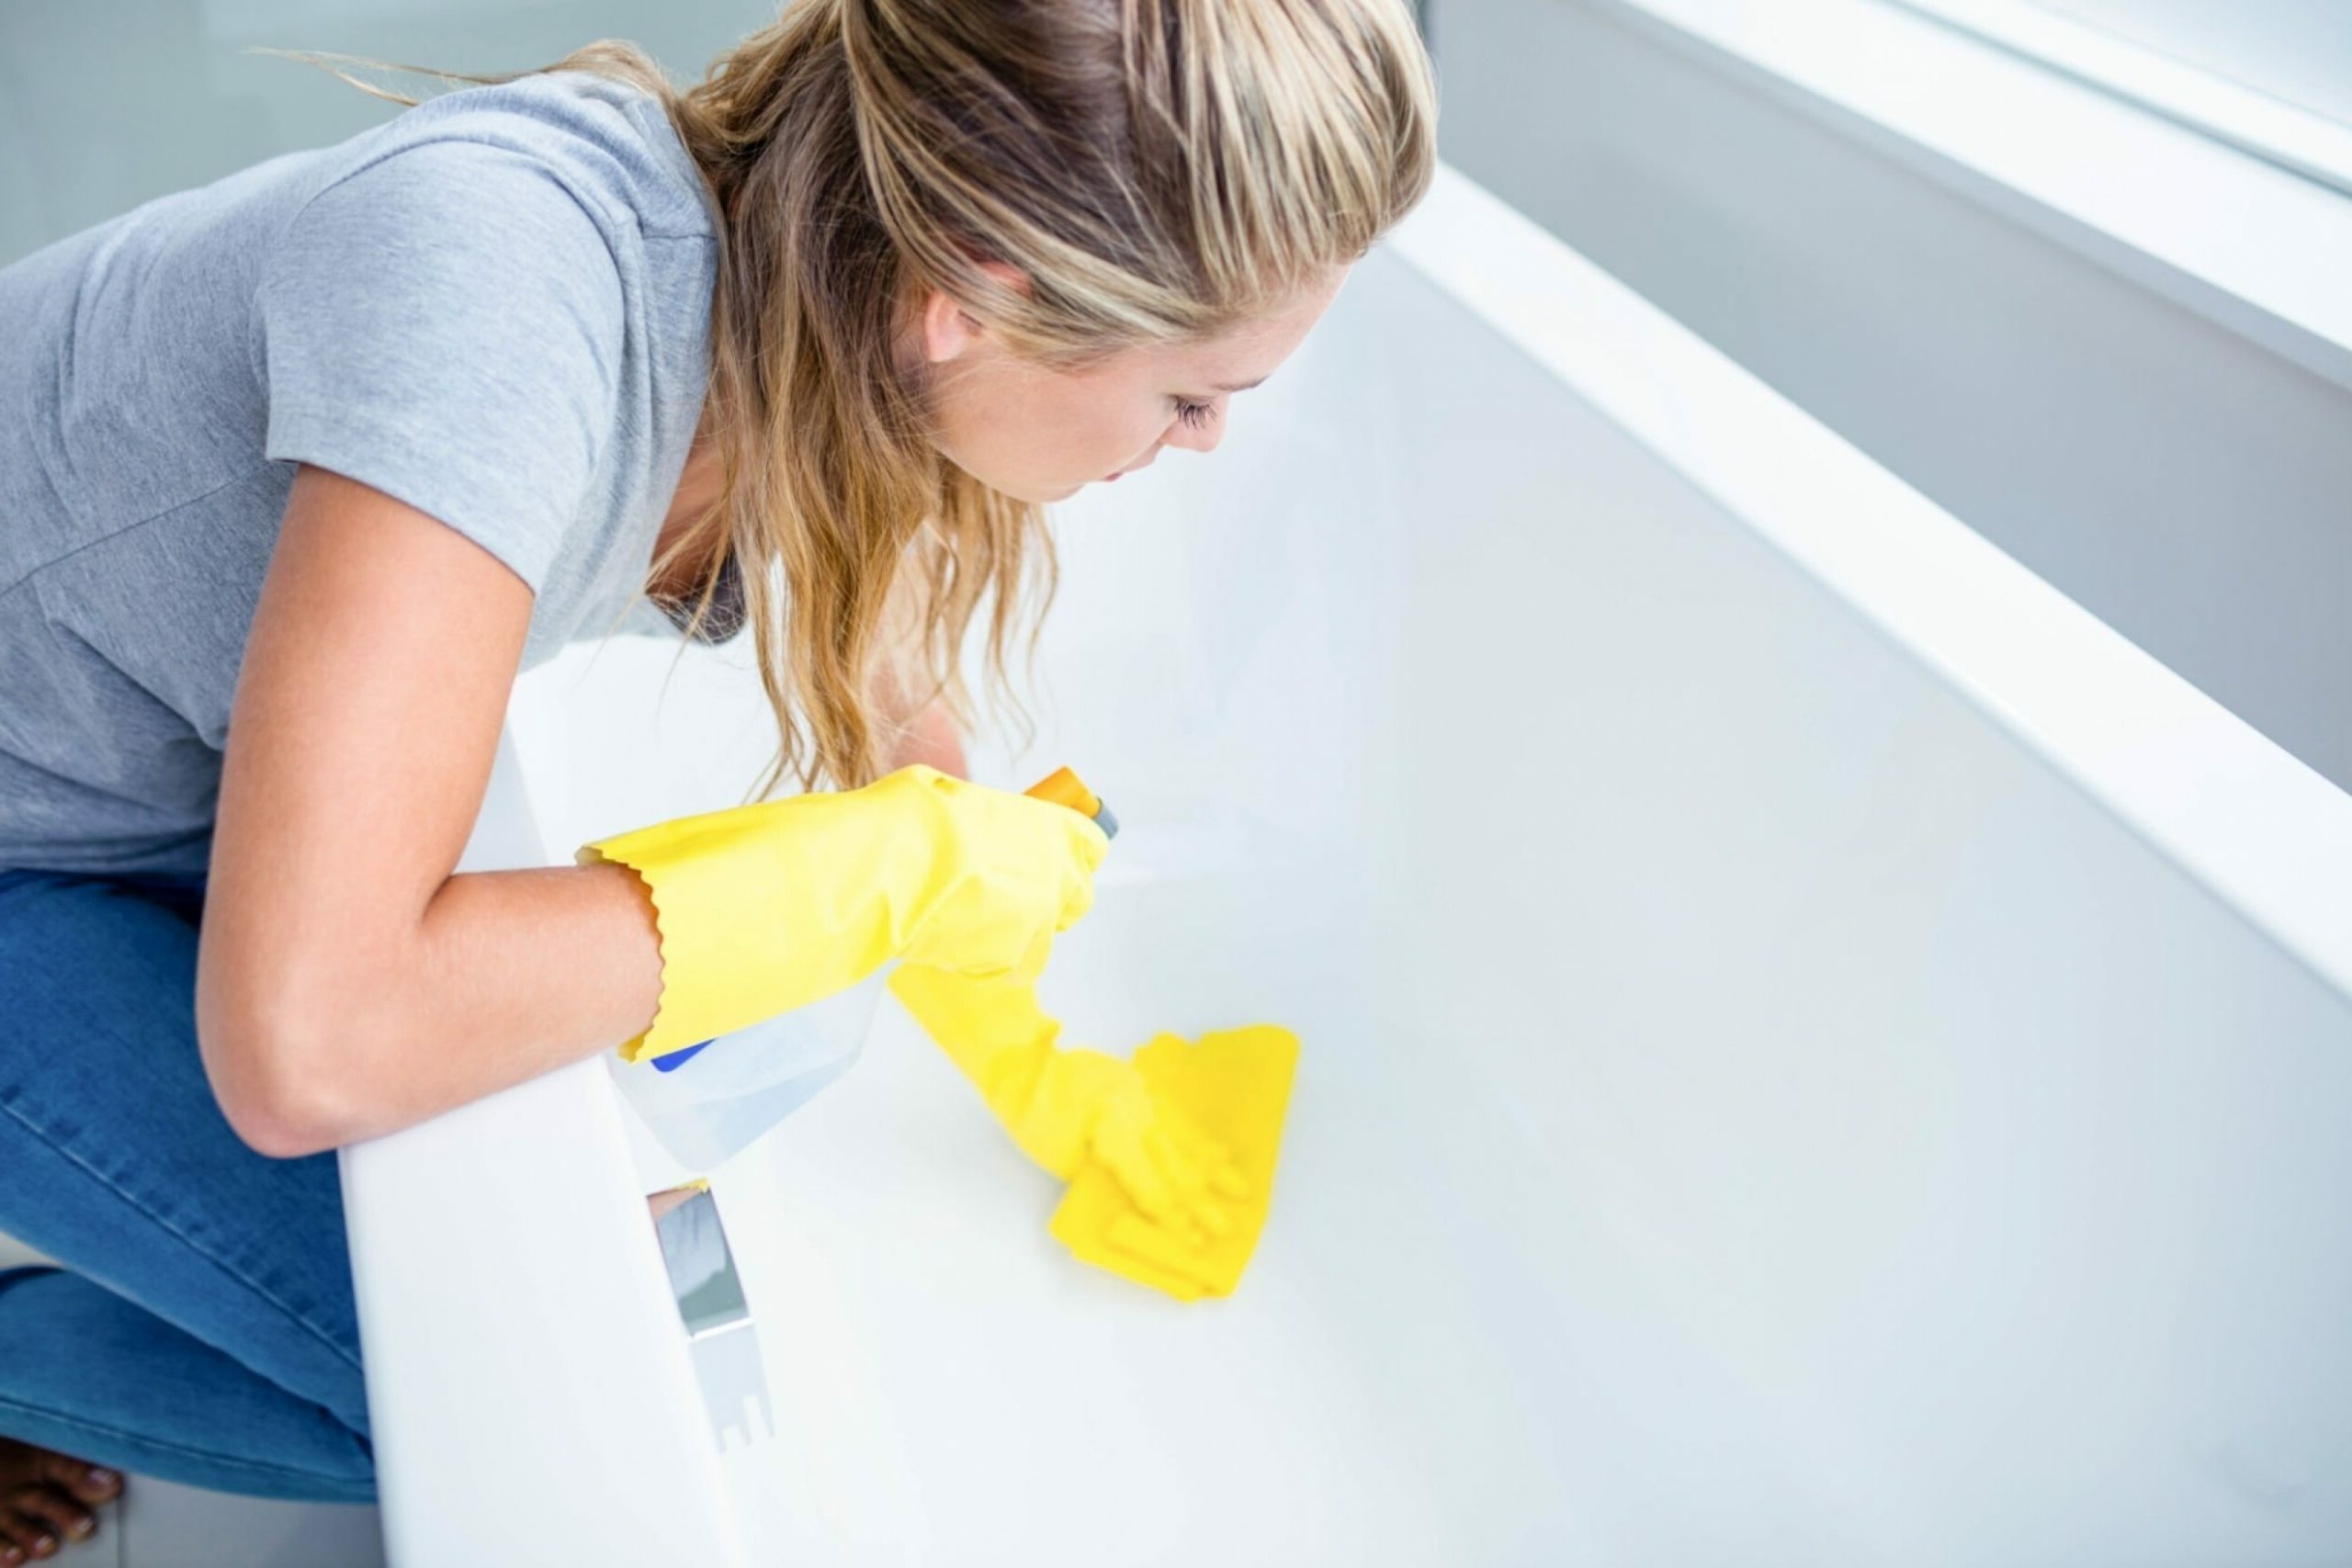
Tubs and showers tend to catch and hold soap scum and hard water stains, plus they always need regular cleaning and disinfecting. To combat those pesky stains you can mix together water and vinegar, and maybe add a few drops of dish soap. Spray or wipe that mixture on the walls of your shower or tub and leave it to work for about 15 minutes then clean it away for a fresh start.
7. Descale Faucets & Showerheads
Sink faucets and showerheads can become clogged and lose their pressure over time thanks to mineral deposits and hard water build-up. You can fix this by adding some white vinegar into a plastic bag and then securing it with a rubber band. Be sure to add enough vinegar to cover the bottom of the faucet or showerhead completely. Leave the bag on for a few hours or overnight, then remove it and let the water run.
8. Disinfect & Deodorize Mattresses
If you’ve noticed a strange smell or a random stain on your mattress while changing the sheets, we have just the fix. Just mix vinegar, a little rubbing alcohol, and some tea tree essential oil in a spray bottle and spritz this on your mattress. This solution helps combat dust mites, mildew, and general odors. If you find your mattress needs some deeper deodorizing, sprinkle some baking soda on top of the spray. Let the spray settle and dry, and then vacuum the mattress surface.
9. Descale Coffee Makers & Kettles
If you’re anything like us, you can barely function without your daily caffeine fix. The only problem is the state of your coffee maker, when was the last time you cleaned that? The solution? Pour an even mix of water and vinegar directly into the kettle and run it through the coffee maker or simply boil the water in the kettle then rinse thoroughly with water. If you have an automatic coffee maker, you can run plain water through a few times to get the smell and taste of vinegar out..
10. Disinfect Countertops
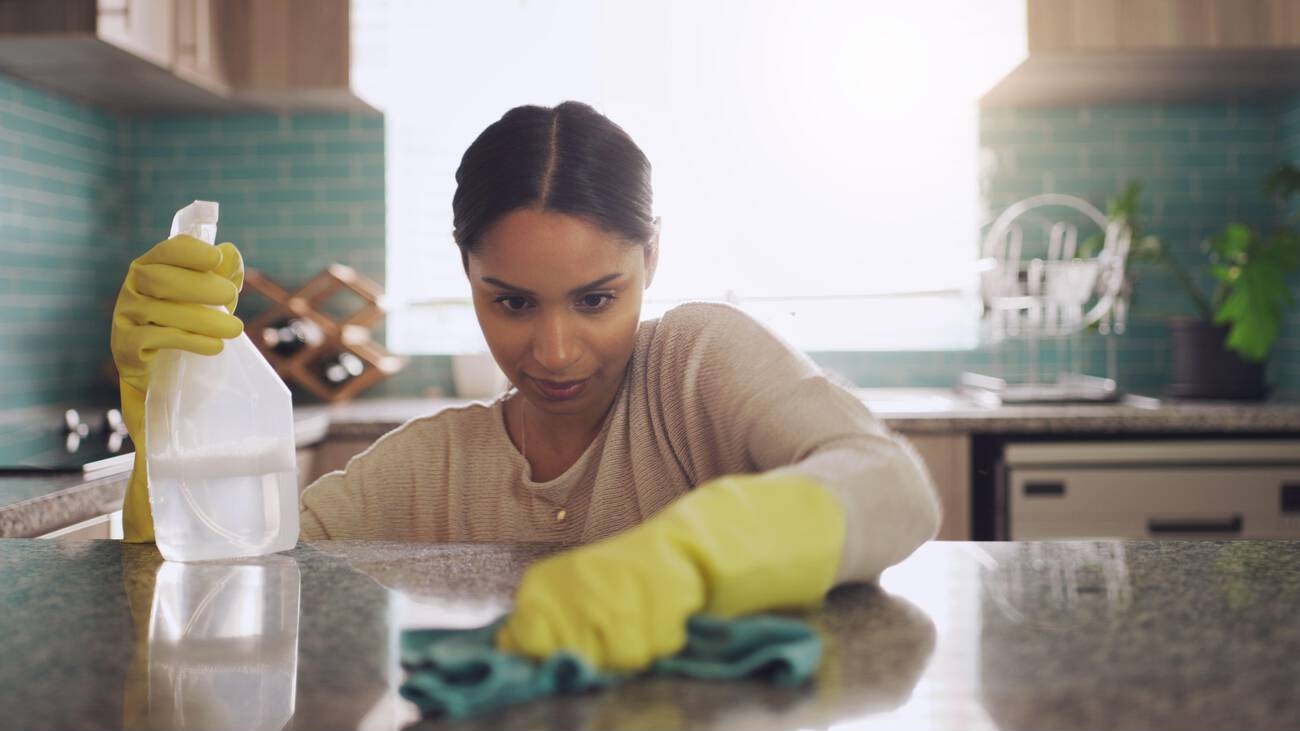
Kitchen and bathroom countertops are high-traffic surfaces that require regular cleaning and disinfecting. When cleaning surfaces like kitchen counters, you need to make sure to use food-safe and eco-friendly cleaning products as using chemicals can risk contaminating future food preparations. Luckily, vinegar is the best solution to this particular problem as all you’ll need to do is dilute a spray bottle of vinegar with some water. You can use this specific mixture on most countertops, however, you should avoid using vinegar to clean marble and granite.
11. Clean & Degrease Cookware
Cooking mishaps happen to everyone and can leave even our most durable pots and pans with baked-on messes. The best course of action to save your cookware is with vinegar of course. Simply fill the offending cookware with a half-and-half solution of water and vinegar and then bring it to a boil on the stove. Allow this mix to boil for a few minutes before allowing it to cool and follow with a good scrub.
12. Clean & Disinfect Plastic Cutting Boards
If you’ve prepared any kind of raw meat within the last few days, hopefully, you did so on a plastic cutting board. Even if you haven’t been preparing meat, when was the last time you deep cleaned and disinfected your go-to cutting board? Take a moment to spray and wipe both sides thoroughly with an even mixture of vinegar and water and then wash the board before letting it air dry and putting it away.
13. Degreasing Ovens
Much like our beloved cookware, ovens and stovetops can accumulate grease and oil with regular use throughout the week. The best way to cut through this greasy grimey mess is, of course, with vinegar. Mix water and vinegar in a spray bottle and spray the solution around the surface of the cooktop. Give it 10 minutes to cut through all that stubborn grease and then wipe it away with some warm water and a sponge.
14. Boost & Deodorize Laundry
Our final tip to share is by far one of our favorites. Everyone loves the feeling of freshly washed and warm laundry, and it turns out vinegar is the key. Adding half a cup of vinegar to your next load can both preserve and brighten the colors of the laundry. You can also toss in a full cup of vinegar to a rinse cycle to be a more eco-friendly and effective fabric softener and static reducer. We’ve tried this and can promise that you’ll notice the difference and you’ll love the results!
15. Clear Cloudy Glasses

Glassware can develop a cloudy appearance with time, even after running them through the dishwasher. This is almost always due to hard water deposits, or frequent wine drinking (we don’t judge!), but it can be easily remedied with a little bit of white vinegar. All your cloudy glassware needs is a brief soak in a tub of vinegar followed by a quick wash and buff with a soft microfiber cloth.
What to Avoid When Cleaning with Vinegar
While vinegar can be an incredible cleaning product to have on hand, there are a few things you should keep in mind before going after your whole house:
- Vinegar can cause pitting on stainless steel, so we don’t recommend using it on kitchen knives or appliances without diluting it.
- You should also avoid using vinegar when cleaning marble, granite, and other natural stone countertops or floors because it can very easily damage the finish and or leave the surface looking dull or scratched.
- It’s also a good idea to avoid using vinegar to clean any electronic screens because it can damage the protective coating on devices and screens and make touch screens less effective.
- Be careful cleaning any wood countertops and or untreated or unfinished hardwood floors as undiluted vinegar can damage these beyond repair.
- As long as you keep these tips in mind, your home is well on its way to looking and smelling great.
FAQs
Will cleaning with vinegar leave a smell?
The bad news is that, yes, cleaning with vinegar can smell up your space, but the good news is that the smell of vinegar naturally dissipates after a few hours. In order to mask, or at least lessen the effects, of vinegar, we suggest both diluting it with water as well as adding a few drops of an essential oil like lemon or eucalyptus.
Can vinegar be used on all surfaces?
While safe to use on many surfaces to kill bacteria and clean, vinegar is not safe to use on natural stone, waxed wood, cast iron, or aluminum. This is because vinegar is about 5% acetic acid, which can harm some surfaces, so it is always recommended that you test it in an inconspicuous area before cleaning any surface.
How effective is vinegar against bacteria?
In most cases, vinegar does work as an effective disinfectant to some degree. However, it is not as effective against bacteria as bleach or other commercial cleaners. If you are looking to combat germs as effectively as possible, there may be other solutions you should try before reaching for vinegar.
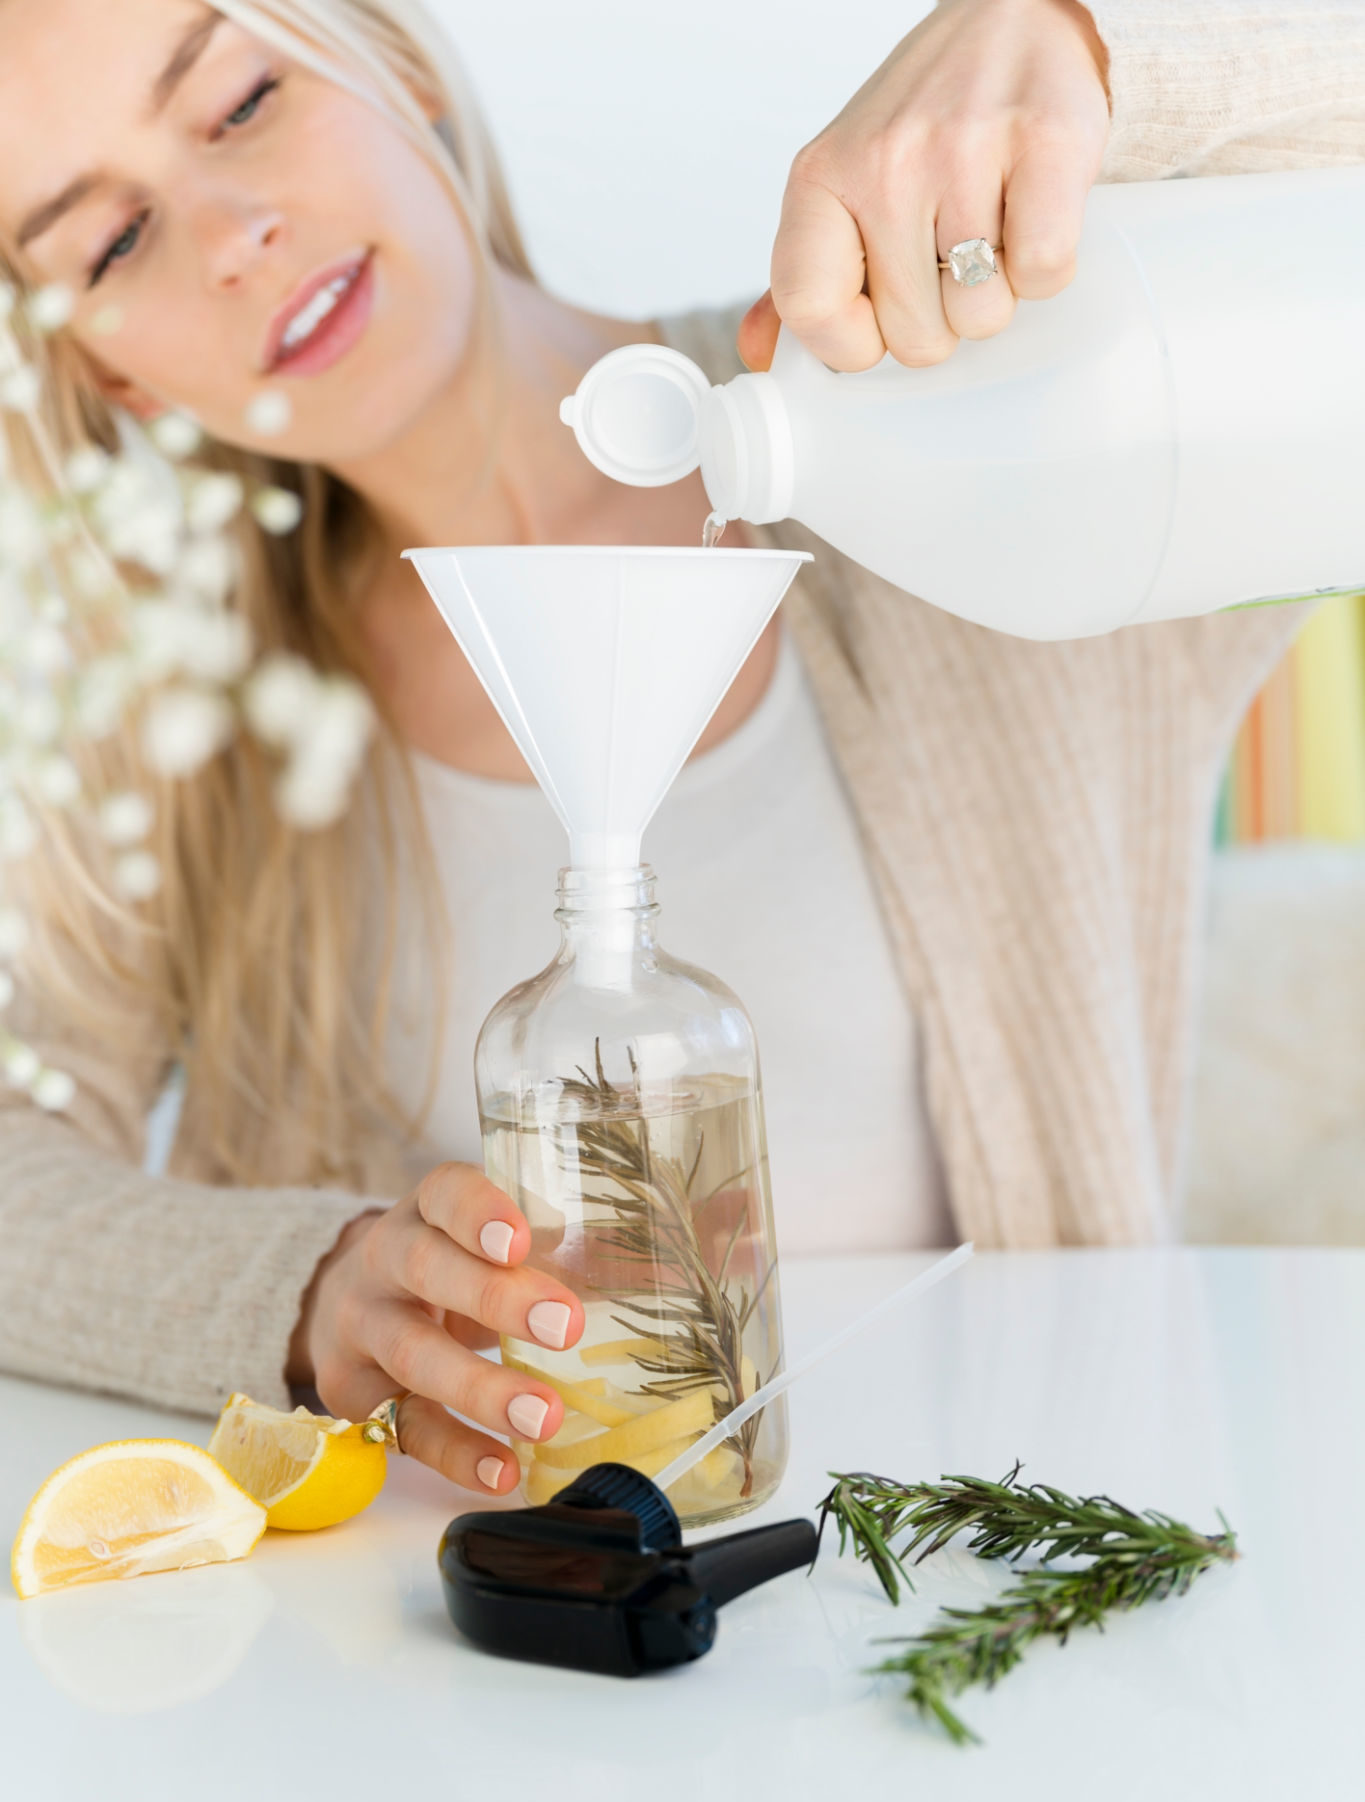
We hope you were able to learn more about the natural and eco-friendly cleaning and disinfecting capabilities of vinegar. Even if you just picked up a few new tips and tricks for cleaning around the house. Was there anything you knew already and use in your home? What other cleaning tips and tricks using vinegar have you tried around your home and become obsessed with? Tell us all about it in the comments below, we love hearing from you!
If you’re looking for some extra time and attention to detail around your home, but don’t want to sacrifice the desire for eco-friendly products, we’ve got you covered! We’re proud to offer eco-friendly products and services as the best house cleaners in Philadelphia. If you’re curious, check out our website and see for yourself. Contact us today and find out how we can help you keep your home looking and feeling amazing!
The post Making Cleaning Eco-Friendly with Vinegar appeared first on Cleanzen.
from Cleanzen https://cleanzen.com/blog/cleaning-with-vinegar/
via IFTTTfrom Cleanzen Cleaning Services https://cleanzencleaningservices0.blogspot.com/2023/03/making-cleaning-eco-friendly-with.html
via IFTTTfrom Gabriela Bragg https://gabrielabragg.blogspot.com/2023/03/making-cleaning-eco-friendly-with.html
via IFTTT -
Cleaning & Maintaining Your Favorite Leather Jacket
Leather jackets are bold and edgy statement pieces in any wardrobe and they can seriously bring almost any outfit to the next level. Wearing a leather jacket can make you look and feel amazing so that it can see a lot of regular use.
Unfortunately, with regular wear, genuine leather can become dry and cracked. Not to mention the other dirt and debris and stains that can develop around the surface. But how do your clean and care for your favorite statement piece? Keep reading to find out our best cleaning and care suggestions.
Cleaning Leather Jackets Properly
Cleaning and caring for your leather jacket can be a tricky process. In order to make sure your beloved jacket stays in great condition and looks incredible every time you wear it, you’ll need the proper techniques. Here are our best recommendations for cleaning your leather jacket, both inside and out.
Leather
When the time comes to clean your leather jacket, there are a few options you can decide to use. The first is a store-bought leather cleaning product, which can be effective and easy to use, but almost always comes with a learning curve. One benefit of a store-bought product is that many kits come with everything you’ll need, including cleaners and conditioners as well as a cleaning brush or sponge. Finding a highly rated product or kit can be a great way to save time and money.
The second option is simple household cleaning products that every home is likely to have: dish soap and vinegar. In order to properly clean and care for your leather jacket, you’ll want to make sure you’re using the right amount of water and soap or vinegar. To help take the guesswork out of this process, here is our recommendation for cleaning:
- Pour warm water into a bowl and add 2 or 3 drops of a mild dish soap. Alternatively, you can mix together a 50/50 solution of warm water and white vinegar. This is an effective cleaning solution, but can dry out the leather and will require you to follow with conditioning.
- Dip a soft cloth or sponge into the mixture. Be careful not to soak or saturate the cloth or sponge and wring out the excess before applying it to your jacket.
- Use small, circular motions around the surface of the leather to remove surface dirt and grime. Pay attention to not over-saturate or rub the leather excessively when cleaning.
- With a new clean and dry cloth, blot the surface of the jacket and wipe away any remaining soapy water. Allow the jacket to fully air dry before conditioning.
- We highly suggest placing your jacket on a soft, padded hanger while it dries to avoid misshapen shoulders. You should also avoid placing your jacket in direct sunlight while it dries as this can cause excessive drying and cracks in the leather.
Lining
Once the outside of your jacket has been cleaned and dried, it’s time to take a look inside. The interior of your jacket likely consists of a lining, and that lining needs a cleaning and refreshing. Here is how to clean your jacket’s lining using regular household cleaning products:
- Turn your jacket inside out for proper cleaning. Fill a bowl with warm water and add a few drops of mild dish soap. You can also use the same vinegar solution you used on the exterior for added stain and odor-fighting.
- Use a soft cloth or sponge dipped in the cleaning solution, but not soaked or saturated, to spot clean and treat stains on the surface of the lining. Pay extra care around the underarms and collar.
- Ensure that there is no excess soap residue on the lining by using a sponge or cloth dipped only in water to wipe the soap away.
- Use a clean and dry cloth to blot the surface of the lining dry. Allow the lining to air dry completely before properly turning the jacket out. Again, we highly suggest placing your jacket on a soft, padded hanger while it dries to avoid misshapen shoulders.
Cleaning Common Stains on a Leather Jacket
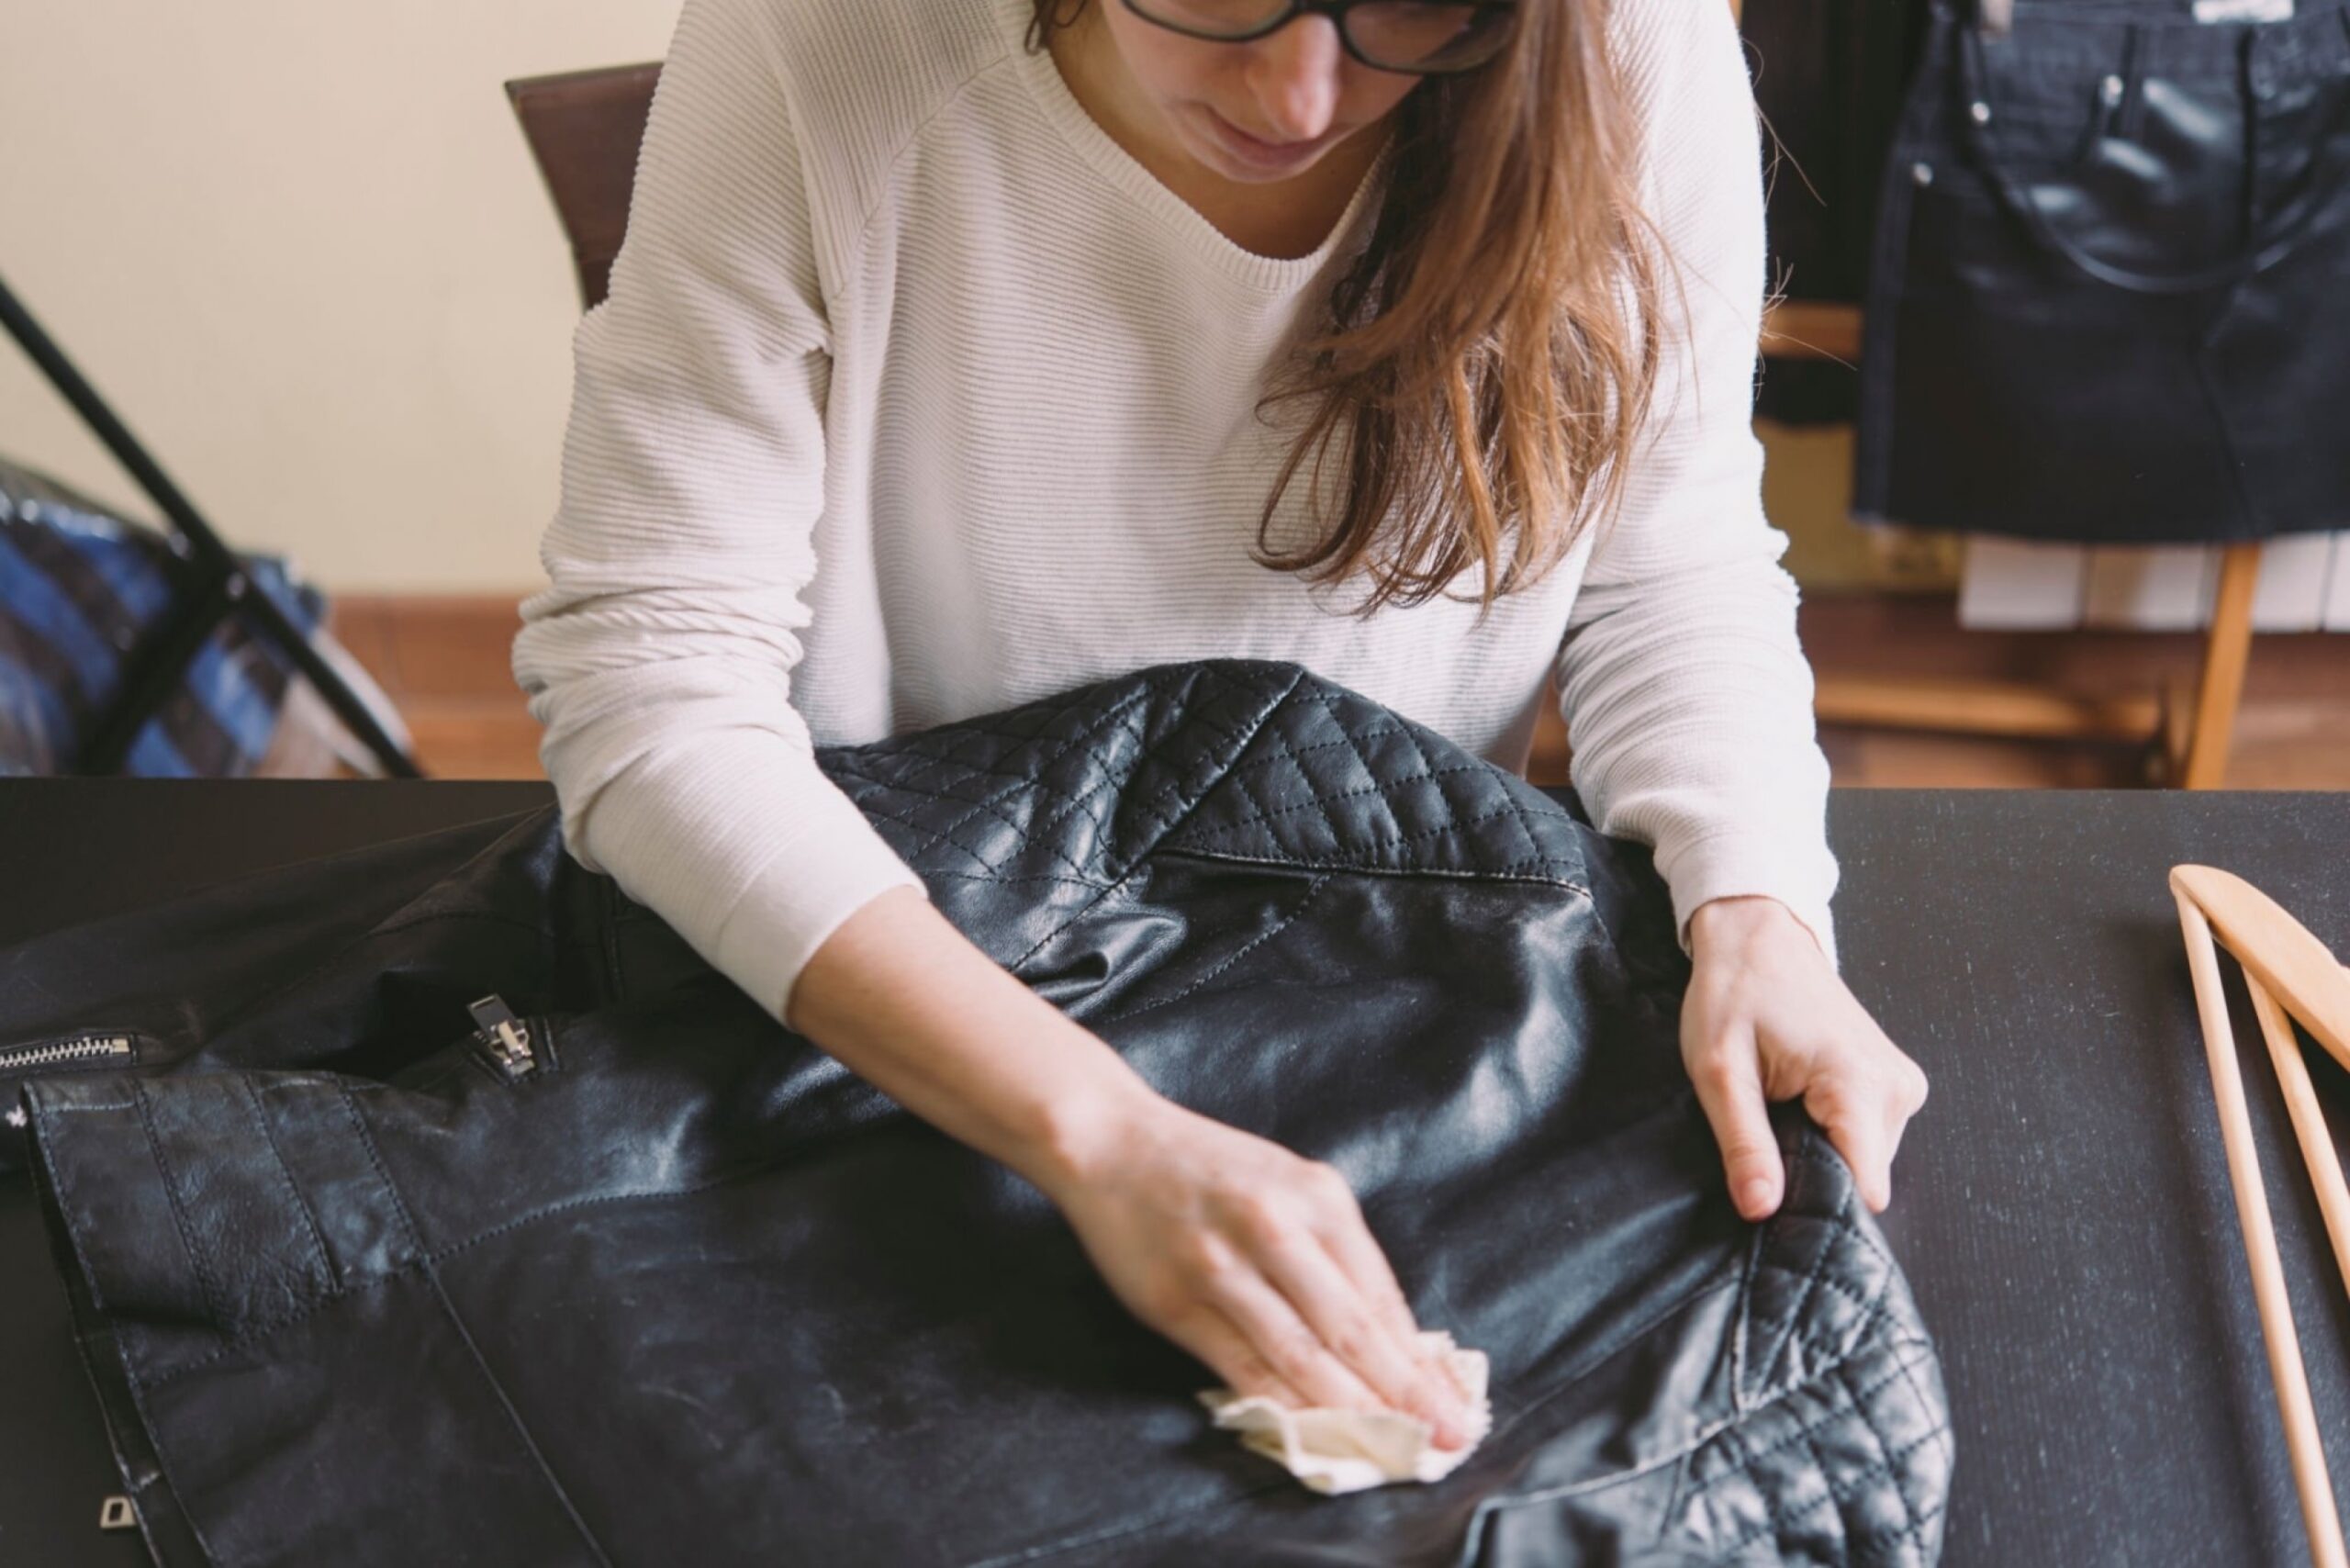
When you wear your leather jacket regularly, there is almost no way to avoid certain stains. Here is our easy guide for cleaning a few of the most common stains from your leather jacket:
Oil & Grease
The best way to treat and clean a oil or grease stain on leather is with baking soda or another absorbent powder like cornstarch. Here is how to treat this type of stain:
- If the stain is fresh, use a cloth to blot and absorb as much of the oil as possible.
- Sprinkle the powder of your choice, we highly suggest baking soda, directly onto the remaining stain.
- Use a soft cloth to rub the powder into the stain and allow the powder to sit on the stain for a few hours, or overnight.
- After the powder has worked to lift the stain, wipe it away with a clean, soft cloth and then spot-clean the stain with warm soapy water.
Ink
One of the more stubborn stains is ink, but fortunately even the most stubborn ink stains are no match for nail polish remover. Here’s what to do:
- If the stain is fresh, use a cotton ball or swab to blot away any excess ink on the surface of the jacket.
- Dip a cotton swab into a bit of acetone-based nail polish remover. Be sure not to saturate the swab as too much nail polish remover can cause the ink to bleed deeper into the leather.
- Use the swab to gently blot the ink stain until it is lifted as much as possible. Again, make sure not to use too much nail polish remover as to not saturate the leather.
- To clean and remove the excess nail polish remover, use a soft, damp cloth to blot to surface of the leather before blotting it dry with a dry cloth.
Mold & Mildew
Unfortunately, with time and regular wear, even our favorite leather jackets run the risk of developing mold and mildew staining and stink. To treat your jacket for mold and mildew, here’s what to do:
- Lay your jacket on a flat surface and smooth it out to thoroughly check for mold around the surface.
- In a bowl, mix together a 50/50 solution of rubbing alcohol and water.
- Use a soft cloth dipped in this solution, not saturated, to wipe the affected areas of the surface of the jacket.
- Once the mold and mildew have been treated and removed, use a fresh damp cloth to wipe the treated areas clean.
- Leave the jacket on the flat surface, out of direct sunlight, to fully air dry before hanging it.
Conditioning and Protecting Leather Jackets

DIY Conditioner
There are a few methods of conditioning leather using both store-bought and household products. If you don’t have access to a leather protectant product, there are various DIY conditioners you can create. Here are some of the more popular and effective of those methods:
- Mix together a solution of 1 part white vinegar and 2 parts linseed oil and apply this to the surface of your jacket using a soft clean cloth. Wait 15 minutes and then buff the surface of your jacket with a fresh cloth.
- Use a small amount of coconut oil or flaxseed oil on a cloth to buff the surface of the jacket. Both coconut and flaxseed oil are the best household oils to use on leather as they are hypoallergenic and won’t cause damage in the long run.
- Mix together 1 part beeswax and cocoa butter with ½ part almond oil, and heat the mixture in a bowl or on the stove.
- A petroleum gel like Vaseline is also a great and effective leather conditioner found in most homes.
Waterproofing
Most leather cleaning kits come with a waterproofing product that you can use to further protect your leather jacket. However, if you don’t have access to a cleaning kit with a waterproofing product, you’ll want to shop around and invest in an alternative. There are 2 main products you should look into to waterproof your leather jacket.
The first is a wax waterproofing product like beeswax. In order to treat and protect your leather jacket with beeswax, your need a bar of the wax and a heat gun or high-heat hairdryer. All you’ll need to do is rub the wax around your jacket to thoroughly coat the surface, and then use the heat gun or hairdryer to melt the wax onto the leather.
The second product is simple and easy to use on most leather surfaces including your jacket. A good waterproofing spray can be highly effective and a great way to save your leather jacket and furniture in the future. Be sure to read and follow the instructions on the product very carefully and to always test it on a small area before using it all around the surface of your favorite leather jacket.
FAQs
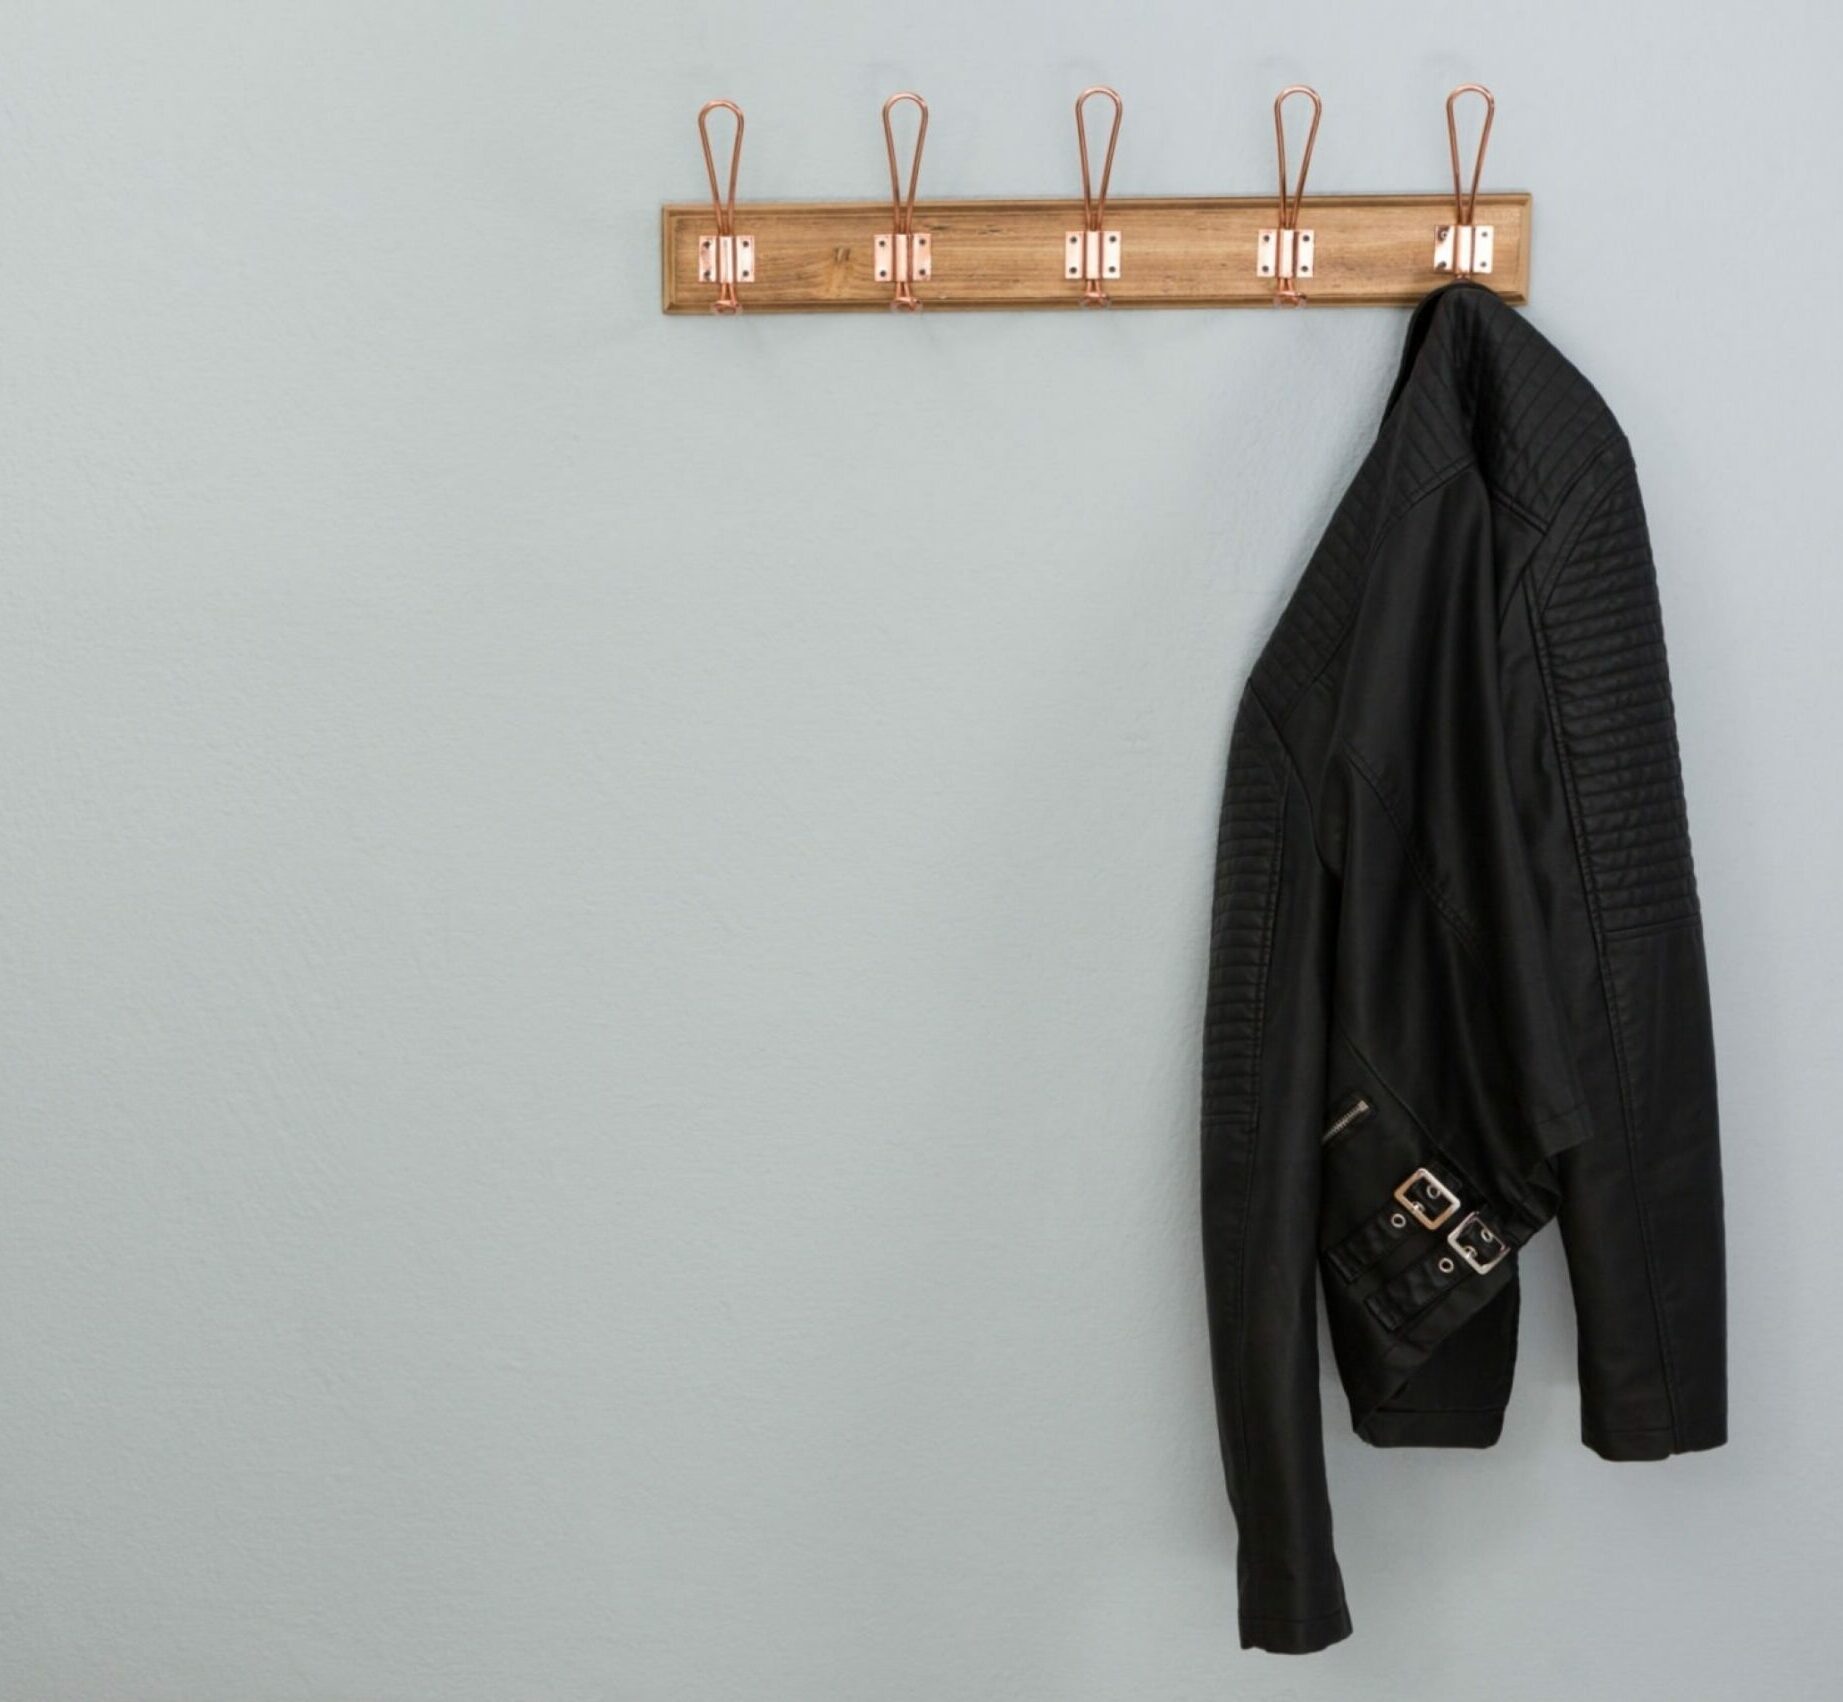
Can I wash my leather jacket in the washing machine?
You cannot wash a leather jacket in the washing machine. Extensive and prolonged exposure to water will damage leather beyond repair and you will ultimately have to fully replace your jacket.
Is leather ruined if it gets wet?
Getting leather wet can damage the surface and cause it to dry out and form cracks. Water can also create stains and warping on the surface of the leather, so it is highly suggested to protect your leather with a wax or waterproofing spray.
How do you restore dry leather?
To restore dried leather, you should first make sure that it is thoroughly cleaned and then apply a conditioner or petroleum jelly like Vaseline to soften and loosen the leather. Dry and cracked leather can be avoided and treated with regular cleaning and conditioning practices.
How have you been cleaning and maintaining your leather jacket? Share your tips and tricks in the comments below, we’d love to hear from you! For more cleaning tips and tricks, you can check out our Boston Housekeeping blog or see what cleaning services we offer to find out how we can keep your home looking just as incredible as your wardrobe.
The post Cleaning & Maintaining Your Favorite Leather Jacket appeared first on Cleanzen.
from Cleanzen https://cleanzen.com/blog/how-to-clean-a-leather-jacket/
via IFTTTfrom Cleanzen Cleaning Services https://cleanzencleaningservices0.blogspot.com/2023/03/cleaning-maintaining-your-favorite.html
via IFTTTfrom Gabriela Bragg https://gabrielabragg.blogspot.com/2023/03/cleaning-maintaining-your-favorite.html
via IFTTT
Skip to content

